
From Grime to Shine: Your Path to a Flawless Vehicle
Keeping your car in pristine condition goes far beyond a simple rinse and vacuum. It's a detailed process that preserves your vehicle's value, enhances its appearance, and actively protects it from the damaging effects of the elements. Many car owners stop at a basic wash, unintentionally missing the critical steps that professional detailers use to achieve that coveted, long-lasting showroom shine. This comprehensive car cleaning checklist is designed to bridge that gap, providing a clear roadmap from a dirty daily driver to a flawlessly detailed vehicle.
We'll guide you through seven essential stages, moving from foundational exterior techniques to advanced interior and paint protection methods. Whether you are a weekend warrior aiming for a perfect finish, a new car owner dedicated to long-term preservation, or a professional looking to refine your process, this step-by-step guide provides the actionable insights you need. This isn't just about making your car look good for a day; it's about implementing a system for sustained excellence.
Prepare to transform your approach and achieve professional-grade results right in your own driveway. As we delve into the specific items on the checklist, we will highlight how modern tools can streamline your efforts, turning what was once a chore into a satisfying and rewarding project. By following this structured car cleaning checklist, you'll not only clean your vehicle but also protect your investment for years to come. Let's get started.
1. Pre-Rinse and Wheel Cleaning
The foundation of any proper car wash, and a non-negotiable step in a professional car cleaning checklist, is the pre-rinse and dedicated wheel cleaning phase. This initial stage is not just about getting the car wet; it's a strategic process designed to safely remove the majority of loose dirt, grit, and abrasive contaminants before you ever touch the paint with a wash mitt. Skipping this step is the primary cause of swirl marks and fine scratches, as you would essentially be grinding that loose debris into your clear coat during the contact wash.

Why Wheels and Tires Come First
Professional detailers always tackle wheels and tires before any other part of the vehicle. Wheels are typically the dirtiest part of a car, accumulating heavy brake dust, road tar, and grime. Cleaning them first prevents this concentrated filth from splashing onto your freshly washed body panels. Brake dust is particularly corrosive as it contains tiny, hot metal filings from the brake pads and rotors. If left to sit, it can permanently etch and pit your wheel's finish.
By isolating this task, you can use aggressive, specialized chemicals and dedicated brushes without the risk of cross-contamination. This ensures the heavy-duty cleaners used on your wheels never accidentally come into contact with your car's sensitive paintwork.
How to Execute a Proper Pre-Rinse and Wheel Clean
Follow this systematic approach for the best results:
- Cool Down: Never work on hot wheels. Spraying cleaner onto a hot surface can cause it to evaporate too quickly, leaving behind stubborn stains and potentially damaging the finish. Always ensure your wheels are cool to the touch.
- Initial Rinse: Start by thoroughly rinsing the entire vehicle from top to bottom. Using a pressure washer with a 40-degree (white) nozzle is ideal for this. The goal is to let the water do the heavy lifting, knocking off as much loose dirt as possible. For an even more effective pre-wash, using one of the top car washer spray guns can significantly improve your results.
- Apply Wheel Cleaner: Liberally spray a dedicated, pH-balanced wheel cleaner onto one wheel at a time. Products like Sonax Wheel Cleaner or Chemical Guys Diablo Gel are formulated to break down brake dust without harming the finish.
- Dwell and Agitate: Allow the cleaner to dwell for the manufacturer-recommended time, usually 1-3 minutes. You will often see the product change color (typically to purple or red) as it chemically reacts with iron particles in the brake dust. Use a set of dedicated wheel brushes (a soft-bristled face brush, a barrel brush for behind the spokes, and a lug nut brush) to agitate the cleaner in all the intricate areas.
- Rinse and Repeat: Thoroughly rinse the wheel, tire, and wheel well before moving to the next. Working on one wheel at a time prevents the cleaner from drying on the surface. Once all four wheels are clean, you are ready for the main contact wash.
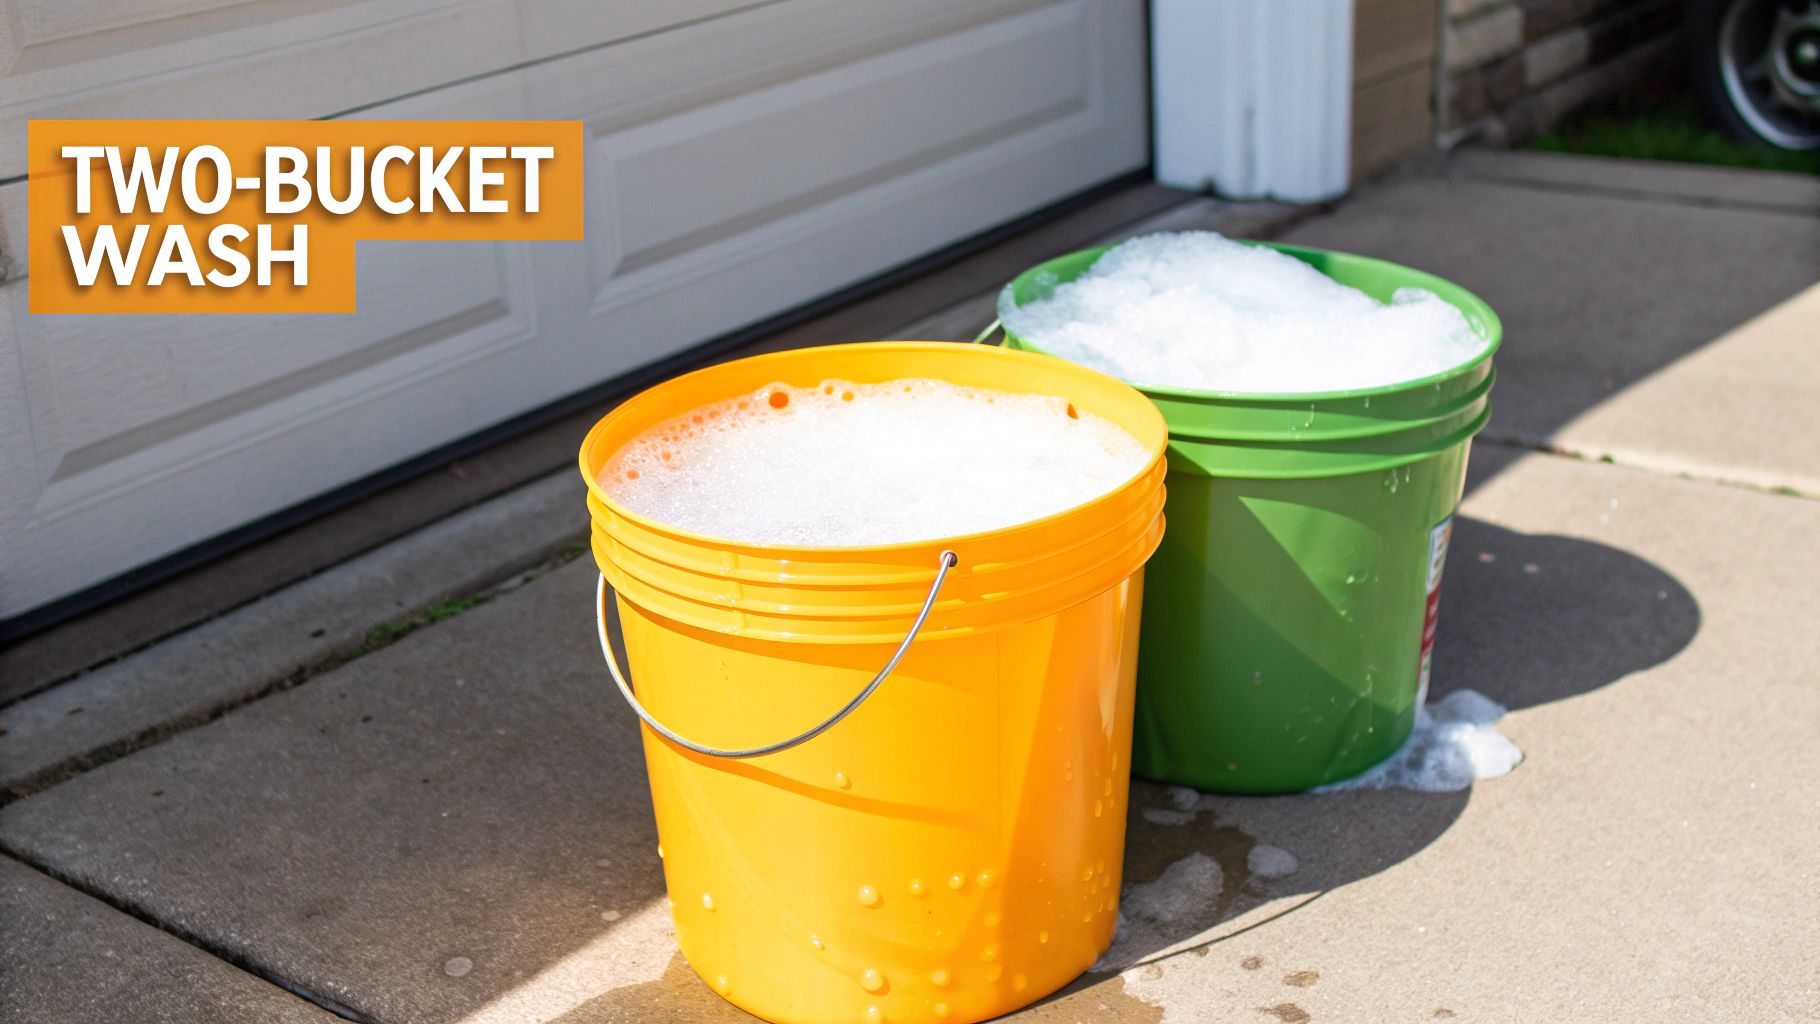
2. Two-Bucket Wash Method
Once the pre-rinse is complete, the next critical step in any professional car cleaning checklist is the contact wash, executed using the Two-Bucket Method. This technique is the gold standard for safely cleaning a vehicle's paint and is universally adopted by professional detailers and discerning enthusiasts. It’s a simple yet profoundly effective system designed to isolate dirt and prevent it from being dragged across your car's delicate clear coat, which is the number one cause of swirl marks and micro-scratches.
Why Two Buckets Are Better Than One
The logic behind the two-bucket system is straightforward: one bucket holds your car shampoo solution, and the other holds plain, clean water for rinsing your wash mitt. After cleaning a single panel, your mitt picks up dirt and grit. Instead of dunking it directly back into your clean soap, you first rinse it thoroughly in the plain water bucket. This action dislodges the contaminants, which then settle at the bottom of the rinse bucket. Only then do you reload the clean mitt with fresh suds from the wash bucket.
This process, popularized by detailing experts like Larry Kosilla of AMMO NYC and the Chemical Guys education team, ensures that only clean, lubricated soap ever touches your paint. It breaks the cycle of contamination that is inevitable with a single-bucket wash, where you are essentially just swishing dirt around in your soap and reapplying it to the car.
How to Execute the Two-Bucket Wash Method
Follow this procedure for a scratch-free wash every time:
- Prepare Your Buckets: You will need two distinct buckets, ideally 3-5 gallons each. It's helpful to have them in different colors (e.g., one for "Wash" and one for "Rinse") to avoid mix-ups. Place a Grit Guard at the bottom of each bucket. This simple plastic insert acts as a washboard for your mitt and traps dirt particles underneath it, preventing them from being stirred back up.
- Fill and Soap Up: Fill both buckets about two-thirds full with water. Add the recommended amount of a quality, pH-neutral car shampoo to your "Wash" bucket. Use a strong jet of water to agitate the solution and create thick suds. The "Rinse" bucket contains only plain water.
- Wash Top-Down: Always start washing from the top of the vehicle and work your way down. Gravity will pull dirt downwards, so this approach prevents you from contaminating cleaner upper panels with runoff from dirtier lower sections. Wash one small section at a time (e.g., half the roof, one door).
- Rinse and Reload: After washing a single panel, dunk your dirty wash mitt into the "Rinse" bucket. Vigorously rub it against the Grit Guard to release trapped dirt. Wring it out, and only then dip it into the "Wash" bucket to pick up fresh, clean suds. Repeat this process for every panel until the entire vehicle is washed.
- Final Rinse: Once the contact wash is complete, thoroughly rinse the entire vehicle with clean water, again working from top to bottom, ensuring all soap residue is removed.
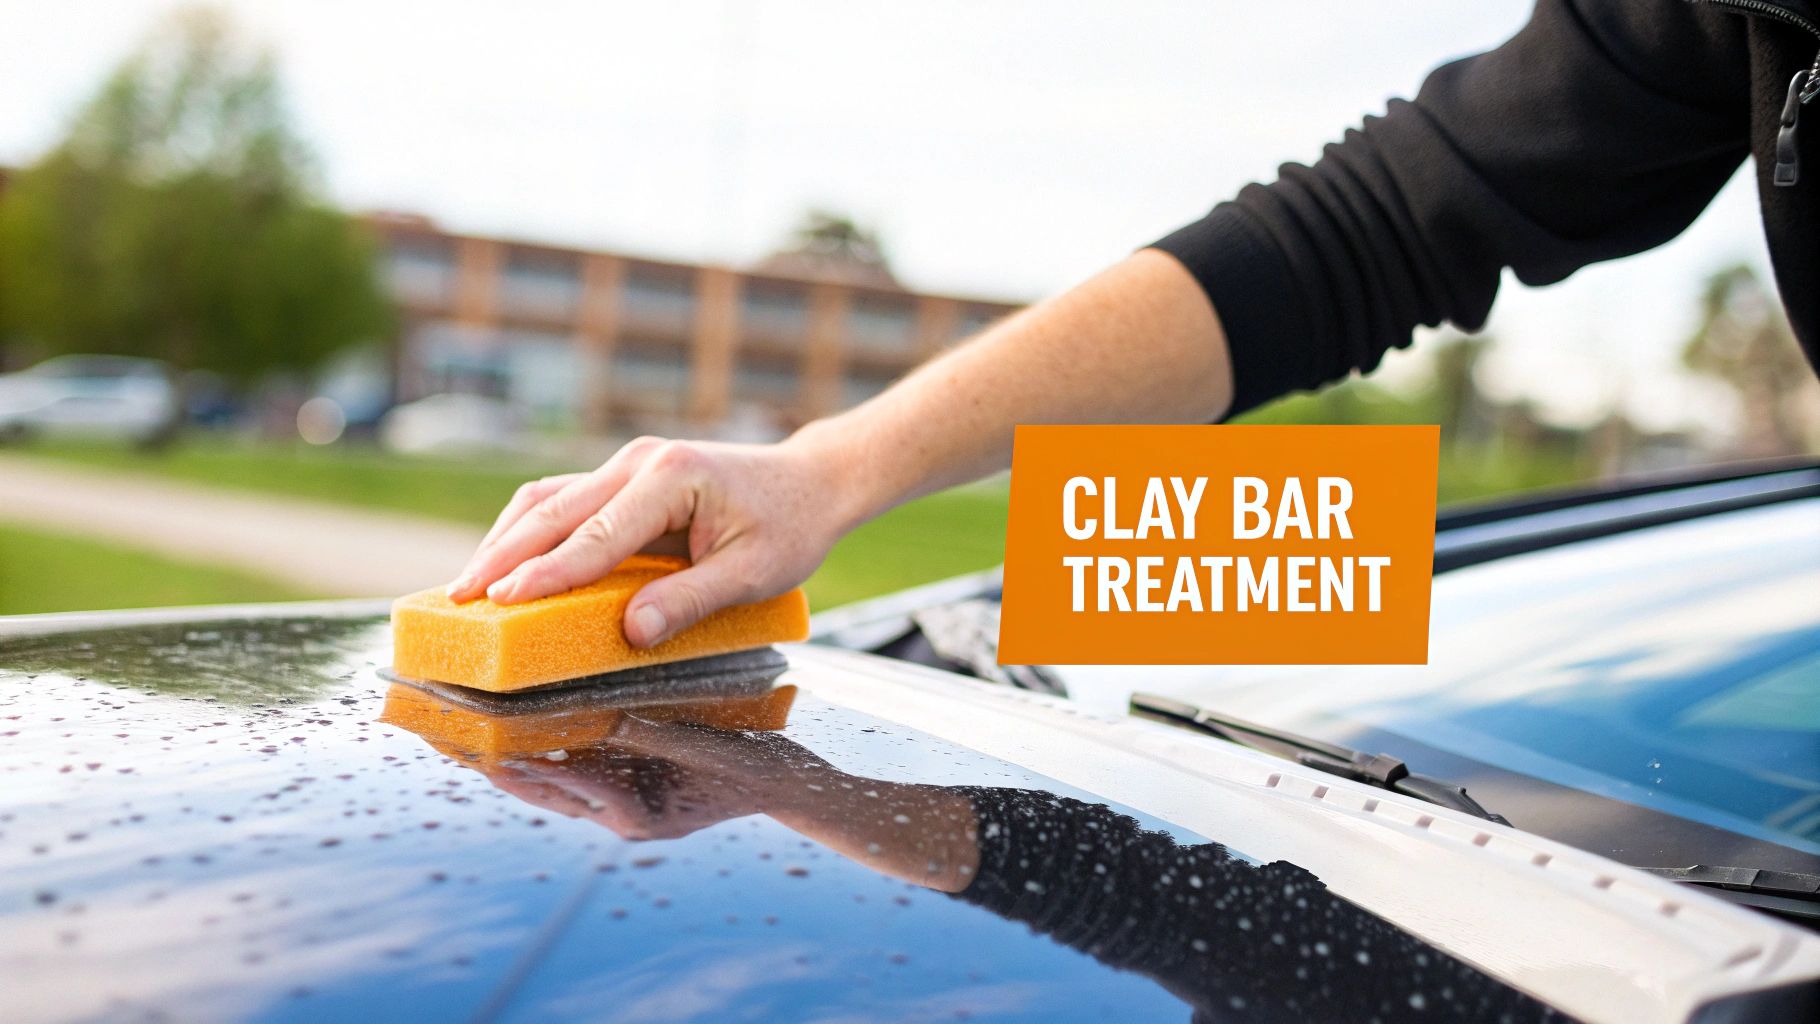
3. Clay Bar Treatment
After the contact wash and drying stages, the next critical step in a comprehensive car cleaning checklist is paint decontamination using a clay bar. While a thorough wash removes surface-level dirt, it cannot tackle the bonded contaminants that have embedded themselves into your car's clear coat. Running your hand over a "clean" car often reveals a gritty, rough texture. This is caused by industrial fallout, rail dust, tree sap, and road tar that a regular wash mitt simply glides over.
Why a Clay Bar is Essential for a Smooth Finish
A clay bar is an engineered resin compound designed to gently lift and pull these embedded particles out of the paint's microscopic pores. This process is not abrasive; instead, the clay's tacky nature grabs the contaminants as you glide it across a lubricated surface. Skipping this step means you are applying wax or sealant on top of a contaminated surface, which hinders the product's bonding, reduces its longevity, and fails to achieve a truly deep, reflective shine.
Pioneered by the Japanese detailing industry and popularized by brands like Meguiar's and Mothers, claying is the secret to achieving that glass-smooth finish. It is a mandatory preparatory step before any polishing or waxing for professional-grade results. It ensures that subsequent products have a perfectly clean and smooth foundation to adhere to, maximizing their effectiveness and durability.
How to Execute a Proper Clay Bar Treatment
Follow this methodical approach to safely decontaminate your vehicle's paint:
- Prep the Surface: Ensure the car is completely washed and dried. You do not want to be rubbing loose dirt around with the clay, as this can cause scratches. Work in a shaded, cool area.
- Lubricate Generously: Proper lubrication is the most important rule. Spray a dedicated clay lubricant or a quick detailer spray generously onto a small, 2x2 foot section. You cannot use too much lubricant; the clay should glide effortlessly without any grabbing or sticking.
- Clay the Section: Take a small piece of your clay bar (about a quarter of the bar) and flatten it into a pancake shape. Gently glide it back and forth over the lubricated area with light pressure. You will feel and hear the clay picking up contaminants. Continue until the surface feels completely smooth and the clay glides silently.
- Knead and Continue: Inspect the clay often. When it becomes visibly dirty, fold the clay in on itself and knead it until a clean surface is exposed. This prevents you from redepositing the grime back onto the paint. Wipe the section dry with a clean microfiber towel and move to the next, overlapping slightly with the previous section.
- Protect Immediately: Claying removes everything from the paint, including any old wax or sealant, leaving it bare. It is crucial to follow up with a coat of wax, sealant, or a ceramic coating within a few hours to protect the now-pristine surface.
4. Interior Deep Cleaning and Protection
Just as the exterior requires a methodical approach, a comprehensive car cleaning checklist must prioritize the interior environment where you spend all your time. A true interior deep clean goes far beyond a quick vacuum and wipe-down. It's a meticulous process of cleaning, restoring, and protecting every surface-from the dashboard and seats to the carpets and door panels-to maintain both the vehicle's value and a healthy, pleasant cabin. This crucial step removes accumulated dust, allergens, body oils, and UV damage that can degrade materials over time.
Why a Systematic Interior Clean is Essential
The interior of your car is a high-contact area constantly exposed to wear and tear. Plastics and vinyl are susceptible to fading and cracking from sun exposure, while leather can dry out and split without proper conditioning. Fabrics and carpets trap dirt, food particles, and moisture, which can lead to unpleasant odors and mold growth. A systematic approach ensures that each material receives the correct treatment, preventing damage and preserving the "new car" look and feel.
By using dedicated products for each surface, you avoid the common mistake of using an all-purpose cleaner that might be too harsh for leather or leave a greasy, dust-attracting residue on plastics. Products like 303 Aerospace Protectant, originally developed for the aerospace industry, offer powerful UV blockers, while systems like Lexol's Leather Care are trusted by luxury car dealerships to maintain supple, rich leather. This targeted strategy is the key to long-term preservation.
How to Execute a Proper Interior Deep Clean
Follow this process to rejuvenate and protect your vehicle’s cabin:
- Complete Empty-Out: The first step is to completely clear the interior. Remove all personal belongings, trash, and, most importantly, the floor mats. This gives you unobstructed access to every nook and cranny.
- Thorough Vacuuming: Start from the top and work your way down. Use a soft brush attachment for the headliner and dashboard and a crevice tool for tight spaces like seat tracks and center console gaps. Don't forget to vacuum the seats, carpets, and the floor mats you set aside.
- Surface Cleaning: Using a quality all-in-one product like Chemical Guys Interior Detailer and several clean microfiber towels, wipe down all hard surfaces. This includes the dashboard, door panels, center console, and steering wheel. For stubborn grime on textured plastics, use a soft-bristled detailing brush to gently agitate the cleaner before wiping.
- Address Fabric and Leather: For fabric seats and carpets, use a dedicated fabric cleaner and a stiff brush to lift stains. For leather, use a two-step process: first, a pH-neutral leather cleaner to remove dirt and oils, followed by a quality conditioner applied in a thin, even coat to nourish the material.
- Protect and Finish: Apply a non-greasy protectant with UV blockers, like 303 Aerospace Protectant, to all vinyl, rubber, and plastic surfaces. Clean the interior glass last with an ammonia-free cleaner to avoid streaks from other product overspray. You can discover more techniques in our guide covering 7 pro car interior cleaning tips.
5. Glass Cleaning and Treatment
Often overlooked but critically important, the fifth step in a comprehensive car cleaning checklist is dedicated to all glass surfaces. This isn't just a quick wipe-down with a household cleaner; it's a methodical process of cleaning and treating your windshield, side windows, rear glass, and mirrors to achieve perfect, streak-free clarity. Crystal-clear glass is a cornerstone of both aesthetic appeal and driver safety, directly impacting visibility in all conditions, especially at night or during rain. Neglecting this step leaves behind films and smudges that cause dangerous glare and distortion.
Why Dedicated Glass Care is Essential
Interior glass accumulates a surprising amount of grime, including oils from skin, dust, and a hazy film from interior plastics off-gassing. Exterior glass faces a constant assault from road film, bug splatter, and mineral deposits from water. Using the wrong cleaner, like an ammonia-based household product, can damage window tint, dashboard materials, and rubber seals. Specialized, automotive-grade glass cleaners are formulated to be tint-safe and cut through stubborn road film without leaving residue.
Going beyond cleaning to apply a hydrophobic treatment is a game-changer for safety. Products like Rain-X create an invisible, super-slick coating that causes water to bead up and roll off the windshield, drastically improving visibility during storms and reducing the need for constant wiper use.
How to Achieve Flawless Glass
Follow this proven method for professional-level results on your vehicle's glass:
- Work in the Shade: Always clean glass when the surface is cool and out of direct sunlight. Heat causes cleaners to evaporate too quickly, which is a primary cause of streaks and residue.
- Use the Two-Towel Method: Dedicate at least two high-quality, waffle-weave microfiber towels exclusively for glass cleaning to prevent cross-contamination from other car care products. Spray the cleaner directly onto the first towel, not the glass, to avoid overspray onto paint and interior trim.
- Wipe Directionally: Clean the exterior glass using vertical strokes and the interior glass using horizontal strokes. This simple trick allows you to immediately identify which side of the glass a streak is on if you spot one.
- Apply a Glass Sealant (Optional): Once the exterior glass is perfectly clean and dry, apply a rain-repellent treatment. Following the product's instructions, apply the sealant with an applicator pad, allow it to haze over, and then buff it off with a clean, dry microfiber towel for months of enhanced visibility.
- Don't Forget the Edges: Lower the windows slightly to clean the top edge of the glass that normally sits inside the door seal. This often-missed area collects significant dirt and grime.
6. Paint Polishing and Correction
The ultimate step in paint restoration and a key component of a truly professional car cleaning checklist is paint polishing and correction. This is an advanced process that goes far beyond simple waxing. It involves using specialized machines and abrasive compounds to carefully level the vehicle's clear coat, permanently removing surface defects like swirl marks, fine scratches, water spots, and oxidation. This restores the paint's clarity, depth, and gloss to a like-new or even better-than-new condition.
Why Paint Correction is Essential for a Flawless Finish
Over time, improper washing techniques and environmental exposure create a web of microscopic scratches on your car's clear coat. While individually small, these scratches diffuse light rather than reflecting it directly, which makes the paint look dull and faded. Paint correction physically removes these imperfections, creating a perfectly flat surface that reflects light uniformly, resulting in a deep, wet-looking shine.
This process, popularized by experts like Kevin Brown (Buff Daddy) and enabled by precision machines from companies like Rupes, is the secret behind every show-car finish. It's the only true way to fix existing paint damage, as waxes and sealants only temporarily fill in and hide these flaws.
The following infographic illustrates the sequential, multi-stage process required for achieving a flawless finish through paint correction.

This step-by-step flow from aggressive defect removal to fine gloss enhancement is critical for achieving professional-grade results without leaving behind micro-marring.
How to Approach Paint Polishing
Executing paint correction requires patience and precision. While professional results are achievable for a dedicated DIYer, it's a methodical process.
- Start with a Test Spot: Always begin on a small, inconspicuous area (like the lower part of a door) to test your combination of polish, pad, and technique. This ensures you are achieving the desired result without being too aggressive.
- Work in Small Sections: Divide your panels into 2x2 foot sections. Work the polish in one section at a time using a cross-hatch pattern (up-and-down, then side-to-side passes) to ensure even coverage and correction.
- Follow a Multi-Step Process: For moderate to heavy defects, start with a more aggressive "cutting" compound (like Meguiar's Ultimate Compound) on a microfiber or foam cutting pad. This removes the deepest scratches. Follow this with a finer finishing polish (like Menzerna Super Finish 3500) on a soft foam pad to refine the surface and maximize gloss.
- Monitor Your Work: Use a bright inspection light to check your progress after each section. Ensure all defects are removed before moving on. For advanced users, a paint thickness gauge is recommended to monitor how much clear coat is being removed, preventing you from polishing through it.
- Wipe Down and Protect: After polishing, use an isopropyl alcohol (IPA) solution to wipe down the surface. This removes any polishing oils and reveals the true state of the paint. Finally, apply a high-quality wax, sealant, or ceramic coating to protect your newly perfected finish.
7. Final Protection Application (Wax/Sealant/Ceramic Coating)
The culminating step in any professional car cleaning checklist is the application of a protective barrier. This final layer is not merely for show; it is an essential shield that preserves the paintwork you just meticulously cleaned and polished. Applying a quality wax, sealant, or ceramic coating locks in the gloss and depth of your paint while providing critical protection against UV rays, acid rain, bird droppings, and other environmental contaminants. This sacrificial layer takes the abuse, so your clear coat doesn't have to.
Why This Final Step is Non-Negotiable
A vehicle's paint is constantly under assault. Without a protective layer, UV radiation from the sun will oxidize and fade the paint, leaving it dull and chalky. Contaminants can etch into the clear coat, creating permanent damage that requires aggressive machine polishing to fix. A proper protective product creates a hydrophobic surface, causing water to bead and sheet off, taking dirt with it and making future washes significantly easier.
The choice between wax, sealant, and ceramic coating depends on your goals for durability, appearance, and budget. Traditional carnauba waxes offer incredible depth and warmth but last only a few months. Synthetic sealants provide a sharp, reflective gloss and can last 4-6 months. Advanced ceramic coatings, like those from Gtechniq or Ceramic Pro, create a semi-permanent, hard shell that can last for years, offering the highest level of chemical resistance and protection.
How to Execute a Flawless Protection Application
Follow this systematic approach for professional, long-lasting results:
- Create the Right Environment: Always apply protection in a shaded, cool, and low-humidity environment. Direct sunlight or a hot panel will cause the product to flash and cure too quickly, leading to difficult removal, streaking, and an uneven finish.
- Work in Small, Manageable Sections: Whether using a liquid sealant or a ceramic coating, work on one small panel at a time, such as half a hood or a single door. This ensures you can apply the product evenly and remove the residue before it fully hardens.
- Apply Thin and Even Coats: The "more is better" approach does not work here. A thin, uniform layer provides better bonding and a clearer finish than a single thick coat. Use a dedicated foam or microfiber applicator pad for even distribution. For deeper insights into professional methods, you can explore some pro secrets for lasting brilliance to protect car paint on swiftjetusa.com.
- Observe Haze and Curing Times: Follow the manufacturer's instructions precisely. Most waxes and sealants will require you to wait for the product to "haze" over before buffing it off with a clean microfiber towel. Ceramic coatings have a specific flashing window for removal.
- Allow for Full Curing: This is especially crucial for ceramic coatings. Most require 12-24 hours to cure before being exposed to water and several weeks to fully harden. Respecting this curing time is the key to achieving maximum durability and performance from your chosen protection.
7-Step Car Cleaning Checklist Comparison
| Item | Implementation Complexity 🔄 | Resource Requirements ⚡ | Expected Outcomes 📊 | Ideal Use Cases 💡 | Key Advantages ⭐ |
|---|---|---|---|---|---|
| Pre-Rinse and Wheel Cleaning | Moderate: requires pressure washer and wheel-specific products | Moderate: water usage can be high; specialized tools needed | Prevents scratches, removes loose dirt and brake dust | Initial cleaning step to protect paint and wheels | Protects paint, prevents swirl marks, removes brake dust |
| Two-Bucket Wash Method | Moderate: needs setup of two buckets with grit guards | Moderate: more equipment and water needed | Reduces swirl marks and cross-contamination | Detailed wash to protect paint from swirl marks | Effective swirl reduction, professional results at home |
| Clay Bar Treatment | High: careful technique required; time-intensive | Moderate: clay bars, lubricants, possibly discarded frequently | Removes embedded contaminants, restores smoothness | Paint preparation before polishing or waxing | Removes contaminants washing can't, restores paint clarity |
| Interior Deep Cleaning and Protection | High: multiple products and detailed process | High: requires many specialized cleaners and conditioners | Preserves interior materials, prevents aging | Full cabin maintenance and protection | Preserves value, healthy cabin, prevents material aging |
| Glass Cleaning and Treatment | Low to Moderate: technique sensitive but products are simple | Low to Moderate: specific glass cleaners and cloths | Enhances visibility and safety, water repellency | All-glass surfaces including rain repellent | Maximizes visibility, streak-free finish, rain defense |
| Paint Polishing and Correction | High: requires skill, costly equipment, time-intensive | High: polishing machines, abrasives, paint gauges | Restores paint gloss, removes scratches and defects | Advanced paint restoration and defect removal | Showroom finish, removes damage, enhances value |
| Final Protection Application (Wax/Sealant/Ceramic Coating) | Moderate to High: precise application and curing conditions needed | Moderate to High: quality waxes, sealants or ceramic coatings | Long-term paint protection, enhanced gloss | Final step for paint protection and longevity | Durable protection, gloss enhancement, easier future cleaning |
Driving Forward with a Pristine Vehicle
You have now journeyed through the definitive car cleaning checklist, a comprehensive roadmap designed to elevate your vehicle's appearance from merely clean to truly pristine. We have systematically deconstructed the process, moving far beyond a simple wash and wax. By embracing this detailed, seven-step methodology, you have unlocked the secrets to achieving a professional-grade finish right in your own driveway.
This guide was built not just to be read, but to be used. It transforms the abstract idea of a "deep clean" into a concrete, repeatable system. From the critical first step of a thorough pre-rinse and dedicated wheel cleaning to the final, gleaming layer of paint protection, each stage is a vital link in a chain of automotive preservation. You are no longer just washing your car; you are performing a systematic act of maintenance that safeguards its value, enhances its longevity, and deepens your connection to your investment.
From Checklist to Habit: The Power of Consistency
The true value of this comprehensive car cleaning checklist is realized through consistent application. While a full, seven-step detail as outlined here is likely a seasonal or quarterly undertaking, the principles behind it should inform your regular maintenance. The two-bucket method, for instance, isn't just for big detailing days; it's a fundamental practice that should be part of every single wash to prevent scratches.
Think of it this way:
- Quarterly Deep Clean: This is your major reset button. You perform all seven steps, including clay bar treatment, polishing, and a fresh application of a durable protectant like a ceramic coating. This is where you correct imperfections and lay a strong foundation of protection.
- Monthly Maintenance Wash: This is a lighter, yet crucial, touch-up. You'll focus on the pre-rinse, a careful two-bucket wash, and a detailed interior wipe-down. You might also top up your paint protection with a spray sealant or detailer to boost hydrophobicity and shine.
- Weekly Upkeep: This involves quick, targeted actions like cleaning glass, spot-treating bird droppings before they etch the paint, and a quick vacuum of the driver's side floor mat.
Adopting this tiered approach makes the entire process manageable and far less daunting. Each deep clean becomes easier because the vehicle's condition has been actively maintained, preventing the heavy buildup of contaminants that makes detailing a chore.
Your Actionable Path to a Flawless Finish
To translate this knowledge into tangible results, your next steps are clear. First, assess your current toolkit. Review the supplies mentioned in each section and identify any gaps in your arsenal. You don't need to buy everything at once, but investing in quality microfiber towels, a pH-neutral car shampoo, and a dedicated wheel cleaner will make a noticeable difference.
Next, schedule your first full detail. Block out a weekend afternoon and commit to following the car cleaning checklist in the exact order presented. The sequence is intentional, designed to maximize efficiency and prevent cross-contamination. As you work through each stage, from claying the paint to protecting the plastic trim, you will see and feel the transformation. This hands-on experience is the most powerful teacher, cementing the "why" behind each step.
By mastering this checklist, you are taking ultimate control over your vehicle's aesthetic. You are no longer at the mercy of harsh automatic car washes or paying premium prices for professional services that you can now confidently execute yourself. The pride that comes from stepping back to admire a vehicle you meticulously detailed is a reward in itself, a testament to your effort and dedication.
Ready to make your maintenance washes faster and more effective? The SwiftJet Car Wash Foam Gun turns any garden hose into a powerful foaming tool, perfectly complementing the pre-rinse and two-bucket wash steps in this checklist. Elevate your car care routine and achieve a professional-level clean every time by visiting SwiftJet to see how it can revolutionize your process.