
Learning how to wax your car at home is all about getting the process down. It's a satisfying routine: wash and dry the car completely, prep the surface with a clay bar to get it silky smooth, apply a thin, even coat of wax to one section at a time, and then buff it off with a fresh microfiber towel after it hazes. Once you get the hang of it, you'll be able to get a professional-looking shine right in your own driveway.
Assembling Your Car Waxing Toolkit
Before you even think about opening a can of wax, you need to gather the right gear. This isn't just about buying stuff; it's about setting yourself up for success. Having the right tools makes the entire process smoother and, more importantly, helps you avoid accidentally scratching your paint. A brilliant shine starts with smart preparation.
Choosing the Right Wax for Your Car
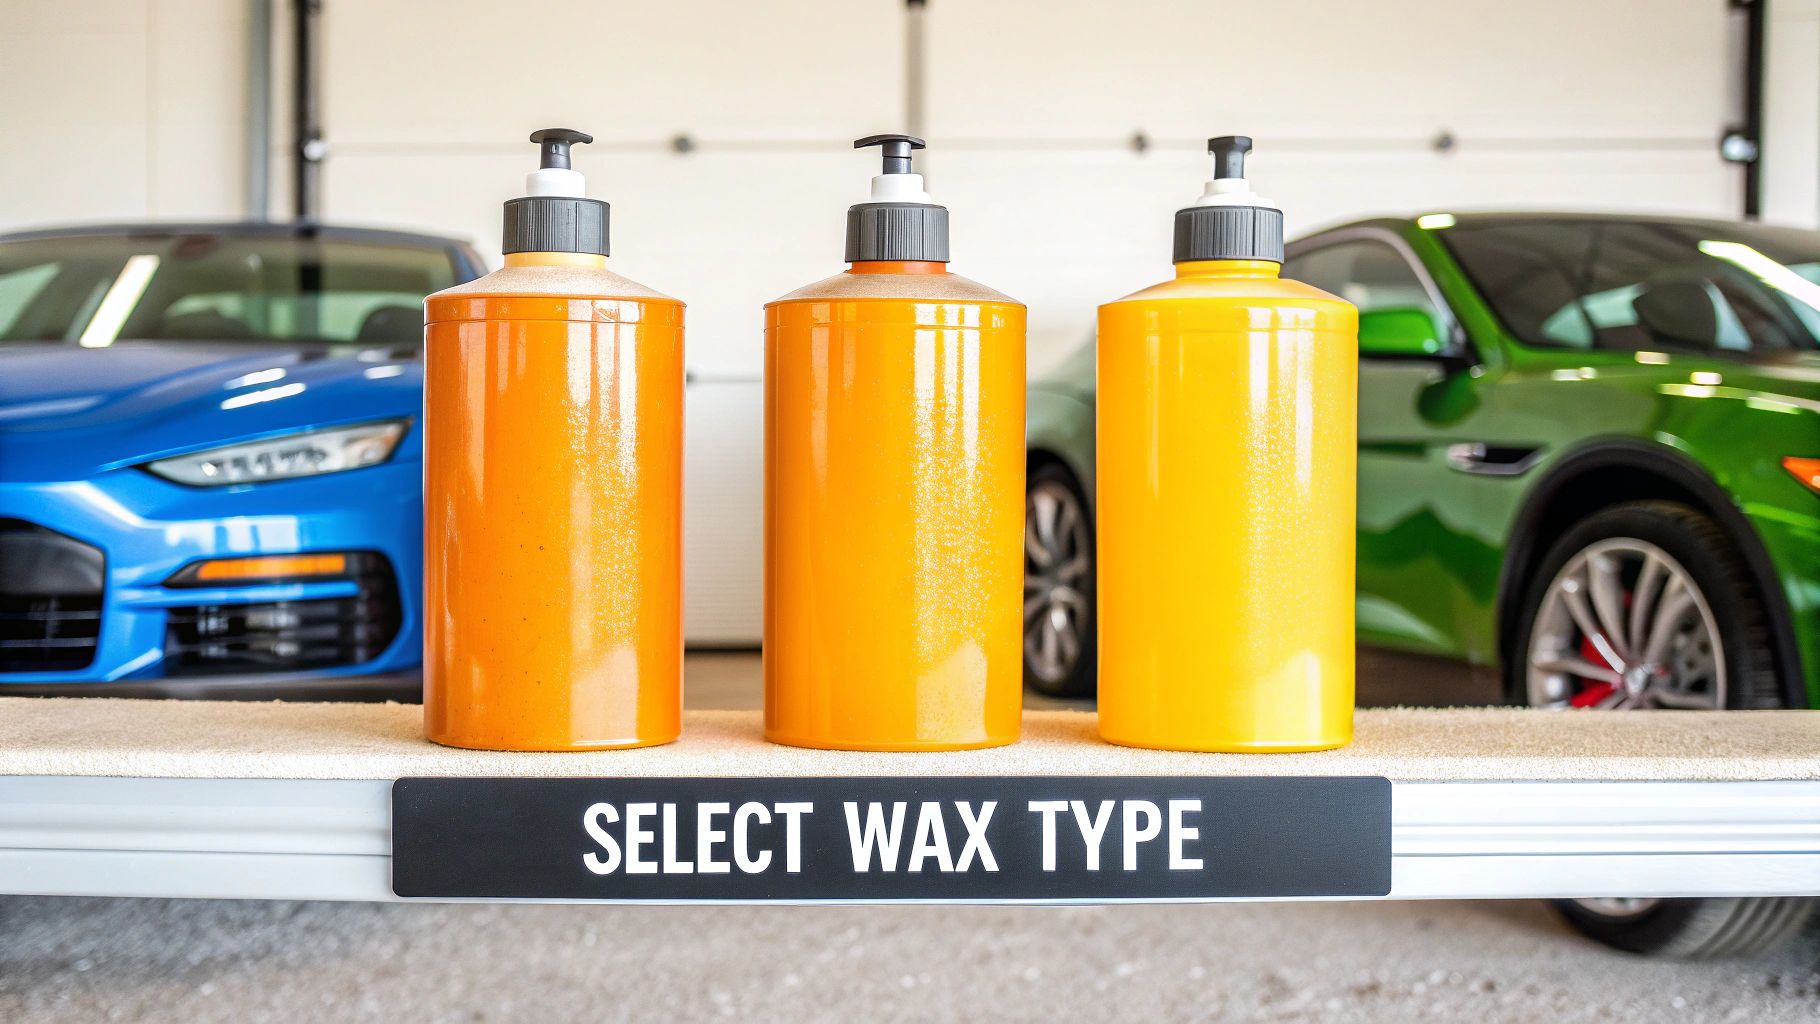
The wax itself is the star of the show, and picking the right one can feel a little overwhelming at first. Don't worry, it's pretty straightforward once you know what you're looking for. It really just comes down to what you value most: shine, protection, or a mix of both.
I've put together a quick table to help you compare the most common types of wax.
Choosing Your Wax Type
| Wax Type | Key Benefit | Best For | Durability |
|---|---|---|---|
| Carnauba Wax | Unmatched deep, warm gloss | Car show enthusiasts; achieving the ultimate shine | Shorter-term, around 6-8 weeks |
| Synthetic Wax (Sealant) | Long-lasting, durable protection | Daily drivers needing defense from UV rays and grime | Very durable, up to 6 months or more |
| Hybrid Ceramic Wax | A balanced blend of shine and durability | Anyone wanting great gloss and modern, long-lasting protection | Excellent; combines gloss with ceramic-like water beading |
Ultimately, there's no single "best" wax—just the best one for your car and your goals. If you're prepping for a weekend car show, the deep glow of carnauba is hard to beat. For a daily driver that sits outside, a synthetic sealant's tough-as-nails protection is the smarter choice.
Essential Tools Beyond the Wax
Your success hinges on more than just the wax you choose. The supporting tools are just as critical. First up, you absolutely need high-quality microfiber towels. Don't cheap out here. You'll want a few on hand—some for applying the wax and a separate, perfectly clean set for the final buffing. This prevents you from rubbing old residue or grit back into your fresh wax job.
The real secret weapon for perfect paint prep? A clay bar. This little block of magic glides across the paint and pulls out tiny, embedded contaminants that washing leaves behind, like industrial fallout or tree sap. It’s what takes your paint from feeling clean to feeling like glass.
Of course, none of this matters if you're working on a dirty car. Starting with a completely clean surface is non-negotiable, otherwise you're just sealing dirt and grime under that beautiful layer of wax. If you need a refresher, check out our guide on how to properly wash your car at home for a step-by-step walkthrough.
Take a look at this chart—it breaks down the key differences between doing it yourself and hiring a pro.

As you can see, while DIY waxing definitely takes more of your personal time, the savings are significant. This is a big reason why more and more car owners are getting into detailing themselves. In fact, the global car wax market is expected to grow to USD 1,484.85 million by 2035, largely because of enthusiasts like us who take pride in maintaining our own vehicles.
Prepping Your Car for a Flawless Finish
Ask any seasoned detailer, and they'll tell you the same thing: a stunning wax job is 90% prep work. If you slap even the most expensive wax onto a dirty surface, you're just wasting your time and money. It won't look good, and it certainly won't last.
Getting your car's paint properly prepped is the single most important part of this whole process. It's what allows the wax to bond directly with the clear coat, giving you that deep, wet shine and durable protection you're after. Think of it like painting a room—you wouldn't just paint over dirty, dusty walls, would you?
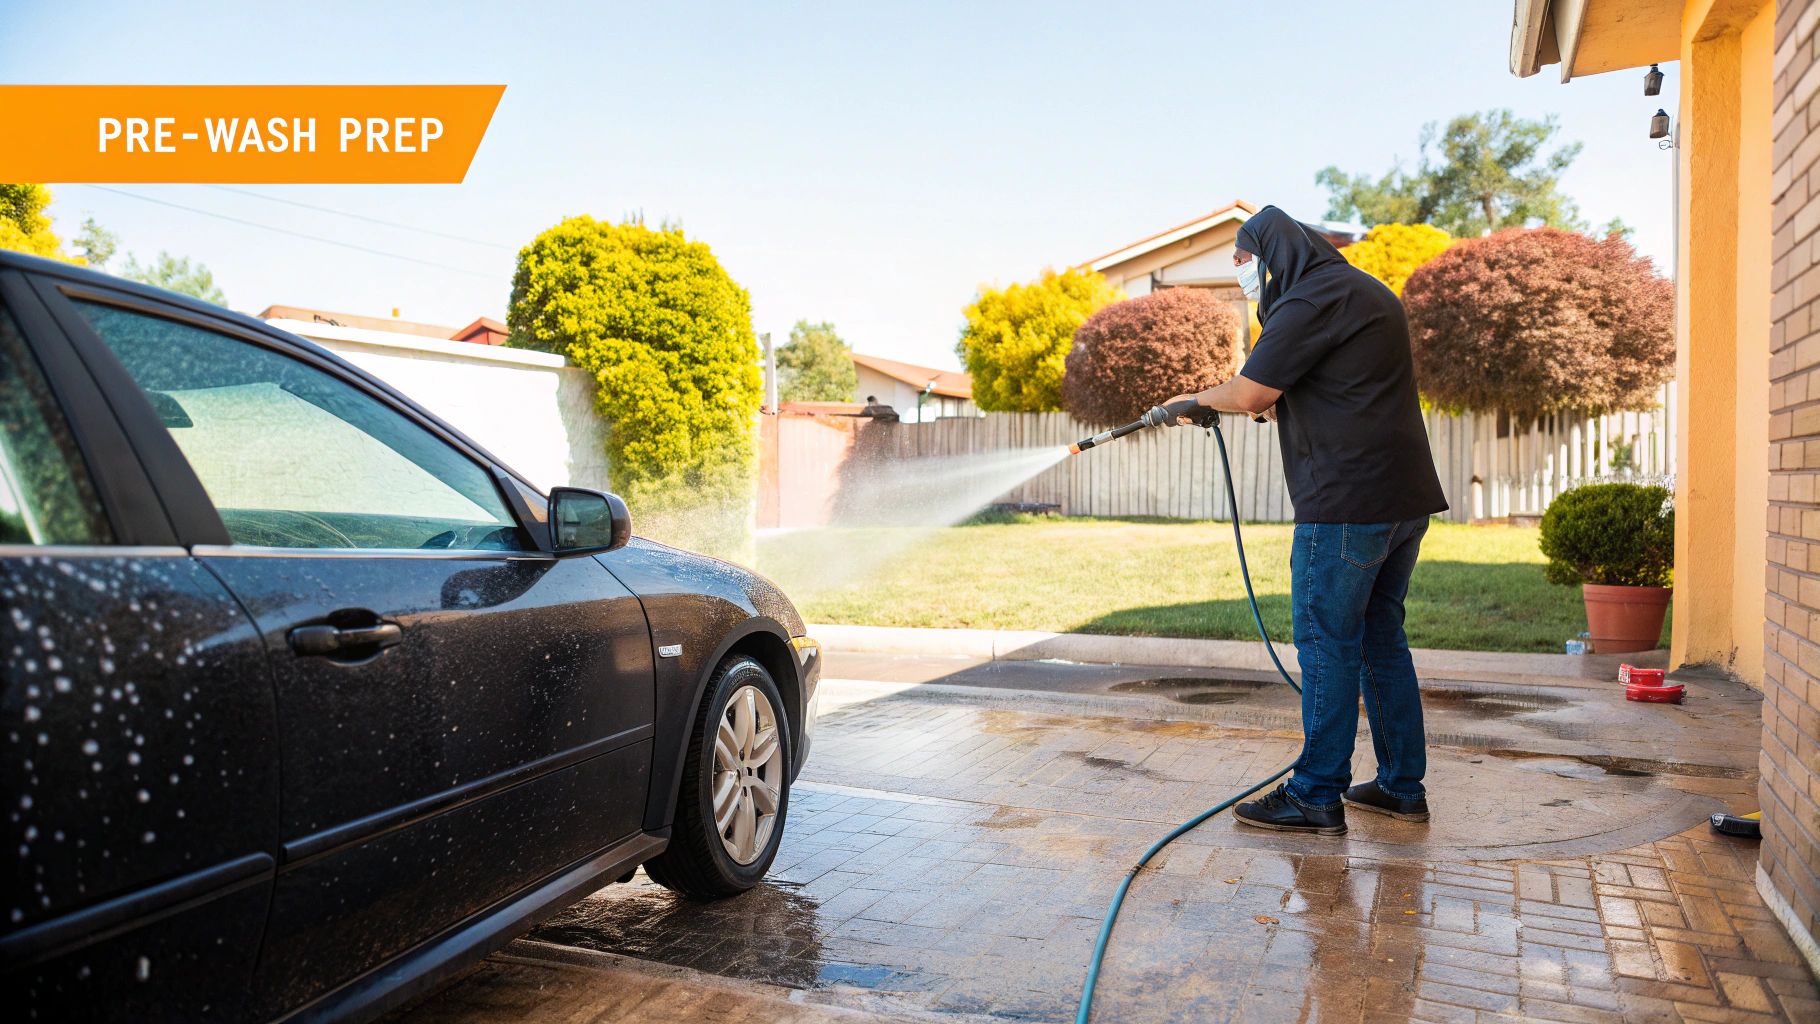
The Foundation: A Deep and Safe Wash
Everything starts with a good, thorough wash. And I don't mean a quick trip through the automatic car wash. To avoid creating fine scratches and swirl marks—which a fresh coat of wax will highlight beautifully—you need to wash your car the right way.
Your best friend for this is the two-bucket method. It's a simple concept that makes a world of difference.
- Bucket One: This one’s for your car shampoo and water solution.
- Bucket Two: This one is just for plain, clean water to rinse your wash mitt.
Here’s the process: dip your mitt in the soap bucket, wash a small section of the car, and then—before going back for more soap—rinse the dirty mitt in the clean water bucket. This simple action traps all the collected grit and grime in the rinse bucket instead of dragging it all over your paint. Once you're done washing, dry the entire vehicle with a big, plush microfiber drying towel to prevent ugly water spots from ruining your hard work.
Decontaminating the Paint with a Clay Bar
Even after a meticulous wash, your paint still isn't truly clean. It’s covered in tiny, bonded contaminants that you can't always see but can definitely feel. An easy trick is to put your hand inside a thin plastic sandwich bag and gently run your fingertips over the paint. If it feels gritty or rough, it's time to break out the clay bar.
A clay bar is an absolute game-changer. It’s a non-abrasive putty that works by grabbing and pulling out embedded gunk like industrial fallout, tree sap, and road tar from your clear coat. The result is a surface that's as smooth as glass. This step is non-negotiable if you're chasing a professional-level finish.
Using one is straightforward. Just spray a small area with a dedicated clay lubricant (never use it dry!) and gently glide the clay back and forth. You'll literally feel the friction disappear as the contaminants are lifted away. Remember to fold the clay every so often to expose a fresh, clean surface. You’ll be shocked at what it pulls off the paint.
Correcting Paint Before You Protect
Now that the surface is perfectly clean and smooth, find some good lighting and take a hard look at your paint. See a web of fine swirl marks? Notice any light scratches or dull, hazy spots? If you do, now is your chance to fix them.
Applying wax over these imperfections is like putting a picture frame on a torn photo—it just seals in the flaws, making them even harder to deal with later. A quality polishing compound, whether applied by hand or with a machine polisher, will remove these minor defects and bring back the paint's original clarity and depth. This is the step that separates a good wax job from a great one.
It's this growing understanding of proper technique that has more and more car owners taking pride in their vehicles. Thanks to a wealth of online tutorials and educational content from manufacturers, millions of people now see waxing as a vital part of maintaining their car's value and appearance. You can explore more about these consumer trends to see just how much the car care community has grown.
Mastering the Wax Application Process
Alright, your car is clean, smooth, and ready for the main event. This is the part where all that prep work pays off, and you lay down that protective shield that delivers a jaw-dropping shine. But here's a secret from years of experience: the magic isn't just in the wax you choose, but how you apply it.
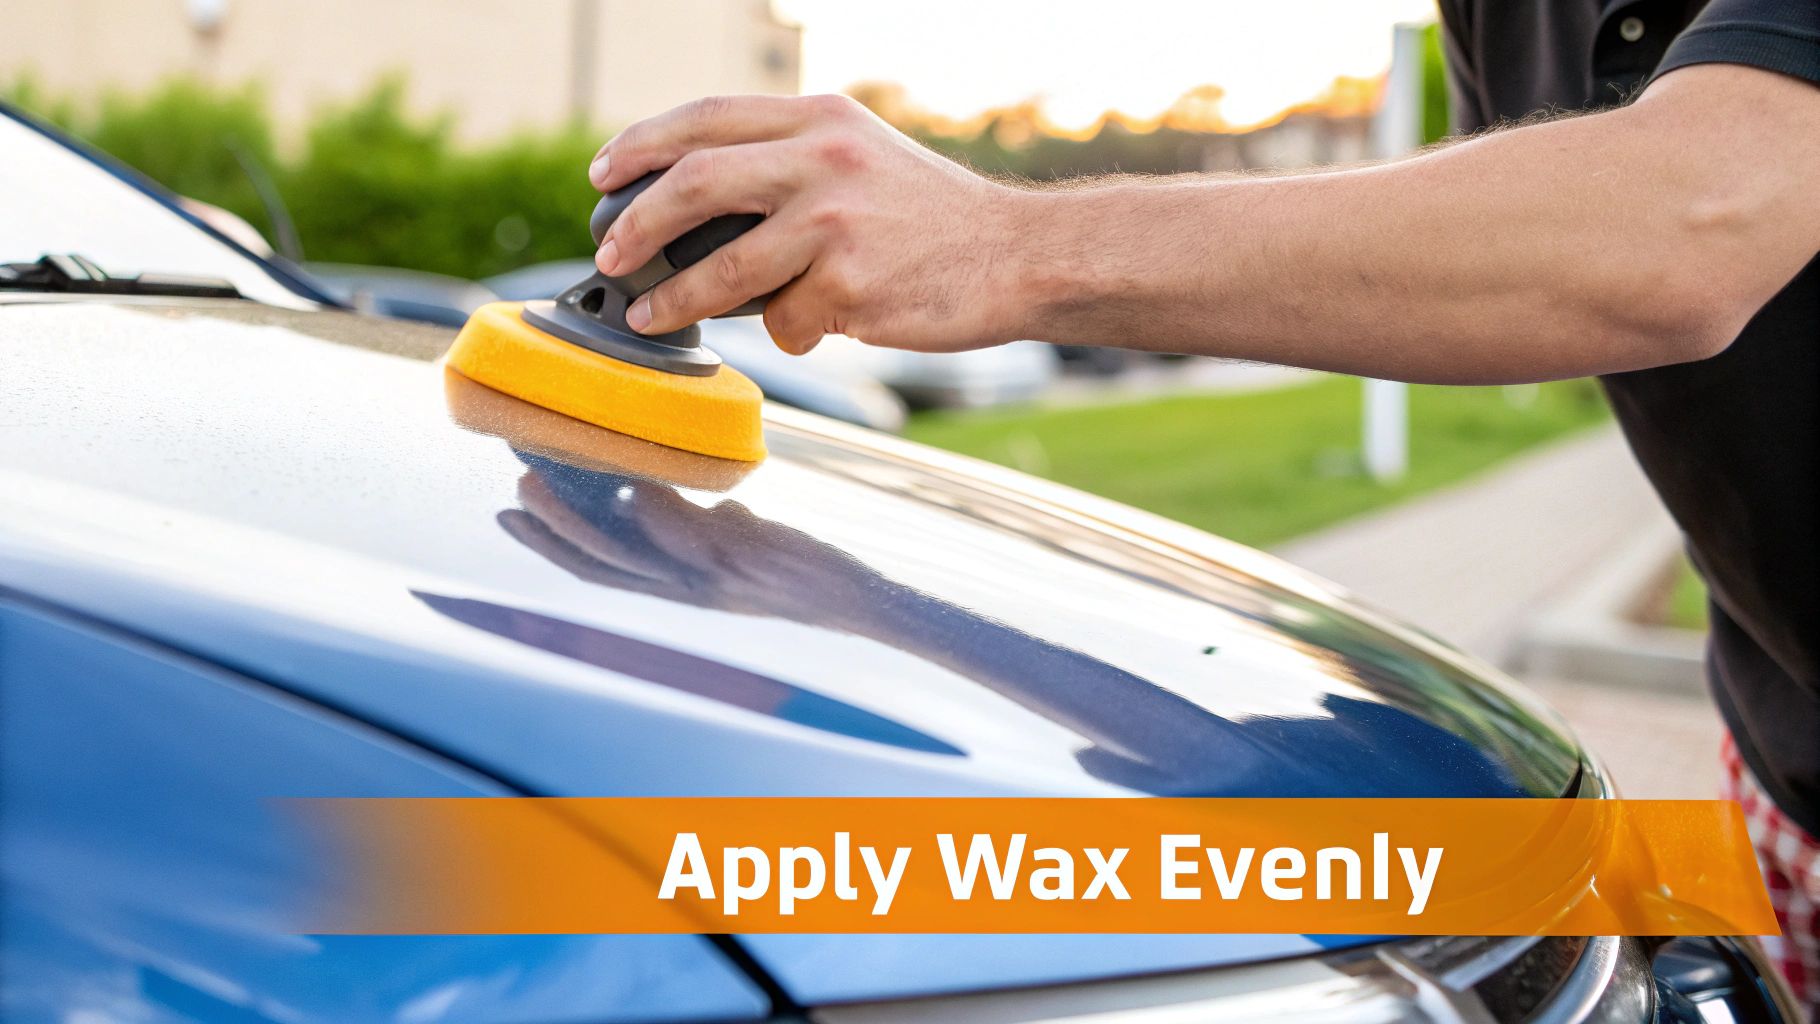
The single biggest mistake I see beginners make is globbing on way too much wax. They think a thick coat equals more protection, but it’s the opposite. It doesn't add shine—it just wastes product and makes buffing it off an absolute nightmare. So, remember the golden rule: less is more.
Panel by Panel Perfection
To keep things under control and guarantee you don't miss any spots, work on one small section at a time. Think of the car as a puzzle—focus on one piece, like a door, the hood, or even just half of the roof, before moving to the next. This approach is crucial because it stops the wax from over-drying in one area while you're busy on another.
If you're using a paste or liquid wax, just put a few pea-sized dabs on your foam applicator pad. That’s all you need to start. Then, begin spreading it over the panel with light, consistent pressure.
The Great Application Debate: Straight Lines vs. Circles
Ask ten detailers and you might get ten different answers, but here's the practical truth. The main risk with the classic "wax on, wax off" circular motion is that if a tiny bit of grit gets caught in your pad, you'll grind microscopic swirl marks into your paint.
For this reason, most pros I know have moved to applying wax in straight, overlapping lines.
- First, move back and forth in one direction (say, front-to-back on the hood).
- Then, go over the same area with lines that are perpendicular (side-to-side).
This simple cross-hatch pattern ensures you get full, even coverage without the risk of creating those dreaded swirls. It's a fantastic habit to build right from your first waxing job.
Pro Tip: I always tell people to think of it like buttering toast. You aren't trying to pile it on; you're just spreading a thin, even layer to cover the whole surface. Keep that image in mind, and you'll apply the perfect amount of wax every single time.
This dedication to meticulous car care is a big reason why North America is such a force in the auto appearance industry. In 2023, the region accounted for an estimated 42.67% share of the worldwide car wax market, largely thanks to the passionate car cultures in the U.S. and Canada. You can learn more about the global car wax market trends that reflect this consumer passion.
Knowing When to Buff: The Swipe Test
This is where a lot of people get anxious. How do you know the wax is actually ready to be buffed off? If you do it too soon, you get a greasy, smeared mess. If you wait too long, it feels like you're trying to buff off cement.
The solution is the simple, yet brilliant, swipe test.
After waiting the time recommended by the manufacturer (usually somewhere between 5-10 minutes), just swipe your finger across a small spot.
- If it smears: It's still wet. Give it a few more minutes to cure.
- If your finger glides cleanly away, revealing a clear, glossy surface: It has hazed over perfectly. It's time to buff.
This one little test takes all the guesswork out of the equation. Once your first panel passes the swipe test, you’re ready to grab a clean microfiber towel and reveal that incredible shine.
Buffing Your Way to a Perfect Shine
 Applying the wax is satisfying, but the final buff is where the real magic happens. This is the moment you transform that dull, hazy film into the deep, liquid shine you’ve been working so hard to achieve. Nailing this part is what separates an okay job from a truly professional, streak-free finish.
Your most critical tool here is a fresh stack of clean, plush microfiber towels. Seriously, don't even think about using the same pad you applied the wax with or some old t-shirt. You need a high-quality towel designed to lift the residue away without marring your now-perfect paint. I always keep at least two or three clean ones within arm's reach for this stage.
The Right Technique for a Streak-Free Finish
Once your wax has cured and passes the swipe test, it's go-time. Grab your first microfiber towel and fold it into quarters. This little trick instantly gives you eight fresh, clean buffing surfaces to work with as you move around the car.
Start wiping away the wax residue with light pressure. Let the towel do the work, not your bicep. As soon as you notice the side of the towel you're using is caked with wax, flip it to a clean section. This is a crucial habit to develop; it’s the single best way to prevent smearing that old wax back onto the paint and creating ugly streaks.
Think of it as a two-stage process. Your first pass is all about removing the bulk of the hazy wax. The final pass, using a completely fresh part of the towel, is what burnishes the paint to that brilliant, final gloss. This is different from more intensive paint correction, so if you're tackling deeper swirls and scratches, learning how to polish car paint is an entirely different skill set worth exploring.
Inspecting Your Work for High Spots
After you've buffed a panel, take a step back. Your job isn't quite done yet. You need to hunt for "high spots"—those sneaky, oily-looking patches where a little bit of wax residue got left behind. They're incredibly common and almost impossible to see in direct overhead sunlight.
The trick to spotting them is to change your perspective. Grab a flashlight or simply move your head around to view the panel from different angles. A high spot that's invisible head-on will often pop right out when you look at it from the side.
Found one? Don't sweat it. Just grab a clean microfiber and give the spot a gentle buff. The haze will disappear, and the finish will blend perfectly with the rest of the panel.
Handling Wax on Trim and in Crevices
No matter how careful you are, you'll probably get a little wax on the black plastic trim or in a tight body-panel gap. If it dries there, it leaves behind a chalky, white stain that can be a real pain to remove later.
Here's how to deal with it:
- Act fast. The moment you see wax on plastic or rubber, wipe it off immediately with a clean section of your towel before it can set.
- Use a detail brush. For dried residue stuck in panel gaps, around emblems, or in tight corners, a soft-bristled toothbrush or a dedicated detailing brush is your best friend. It will gently flick the residue out without scratching anything.
Paying attention to these little details is what takes a good wax job and makes it a great one. It’s that final, meticulous touch that screams "expertly detailed."
How to Maintain Your Car's Shine
https://www.youtube.com/embed/F3zLabmwJQk
You put in the work, and now your car looks fantastic—a deep, brilliant shine that reflects everything like a mirror. But the job isn't quite done. Now, the name of the game is making that hard-earned gloss last as long as possible. Good maintenance is the key to turning a temporary shine into durable, long-term protection.
First things first, your washing habits are critical. Those harsh, high-pH detergents common in many automated car washes are the enemy of your fresh wax job; they'll strip it right off. Instead, you'll want to stick with a quality, pH-neutral car shampoo. This kind of soap gets the grime off without eating away at the protective layer you just applied.
Extending Protection Between Waxes
No matter how carefully you wash it, your wax layer will naturally wear down over time. To keep that "just-waxed" look going strong, you can use a couple of fantastic maintenance products: a quick detailer or a spray wax booster. Using them after each wash is a game-changer.
The process couldn't be simpler. Just give a clean, dry panel a light misting and gently wipe it away with a fresh microfiber towel. It only adds a few minutes to your wash routine, but the payoff is huge.
- Brings Back the Gloss: It instantly refreshes that deep, wet shine.
- Restores Water Beading: It revives the hydrophobic effect, which is the best visual cue that your protection is holding up.
- Cleans Up Lingering Blemishes: It’s perfect for wiping away any pesky mineral spots left over from washing and drying.
Think of a quick detailer like a top-up for your wax. It’s not meant to replace a full wax session, but it’s the single best thing you can do to stretch the life and look of your current protective coat. You'll find you can go much longer between full wax jobs.
This dedication to upkeep is what defines the DIY car care community. The global car wax market is projected to be worth around $417.7 million in 2025, and it’s growing because enthusiasts see waxing as a fundamental part of vehicle care. The satisfaction and savings of knowing how to wax a car at home have made it a go-to skill for car owners everywhere.
To keep your entire vehicle in prime condition, try folding your waxing schedule into a larger care plan. Using a good car maintenance checklist can help you keep everything organized. Protecting your hard work is all about being proactive, not just reacting when the shine starts to fade.
Got Questions? We’ve Got Answers
Even after you've done this a few times, you're bound to run into some head-scratchers. That’s just part of the learning curve when you start waxing your own car. Let's walk through some of the most common issues people face, so you can tackle them with confidence.
Probably the number one question I hear is, "How often do I really need to wax my car?" The honest answer? It depends. Factors like the type of wax you're using, your local climate, and whether the car lives in a garage or on the street all play a huge role.
As a solid baseline, think about waxing it every three to four months. If you're using a high-end synthetic sealant, you might stretch that to six months. On the other hand, if you're using a classic carnauba wax for that deep, wet-look shine, you'll likely be reapplying it every six to eight weeks to keep it looking its best. The real test is watching how water behaves on your paint. When you see water sheeting off or forming flat puddles instead of tight, round beads, it's time for a fresh coat.
What Happens If I Get Wax on the Plastic Trim?
Don't panic—it happens to the best of us. You’re in the zone, and suddenly there’s a smear of wax on the black plastic bumper trim. If it dries, it leaves that ugly, chalky white stain that’s a real eyesore.
The trick is to catch it fast. If the wax is still wet, a quick wipe with a clean microfiber towel is all it takes. If it's already dried and set, you have a few options. I've found that a simple pencil eraser works surprisingly well on textured plastics; it just crumbles the dried wax right off. For more stubborn spots, a dedicated trim detailer or even a little isopropyl alcohol on a Q-tip will lift it right out.
Pro Tip: An ounce of prevention is worth a pound of cure here. Before you even open the wax, take ten minutes to mask off all your plastic and rubber trim with painter's tape. It feels like an extra step, but it saves a massive cleanup headache later.
Why Does My Wax Finish Look Streaky or Hazy?
A streaky finish is easily the biggest source of frustration for anyone new to waxing. It’s almost always caused by one of three culprits:
- Using way too much product: More is not better with car wax. You're aiming for a thin, almost transparent layer. Piling it on doesn't add more protection; it just makes it a nightmare to buff off and leads directly to streaks.
- Wiping it off at the wrong time: If you try to buff the wax off before it's fully cured, you'll just smear it around into a greasy mess. But if you wait too long, it becomes concrete-hard and difficult to remove. The "swipe test" is your best friend here—it tells you the perfect moment to start buffing.
- Using a dirty towel: Your microfiber towel can only hold so much wax residue. Once it’s saturated, it stops lifting the excess wax and starts spreading it around, creating new streaks. Always flip to a clean side or, better yet, switch to a completely fresh towel.
It's also important to distinguish streaks from swirl marks. Streaks are leftover wax residue, while swirl marks are microscopic scratches in the clear coat itself. If you see a spiderweb of fine scratches in direct sunlight, wax will hide them temporarily but won't fix the underlying problem. You can learn how to remove swirl marks with some light polishing before you apply your next coat of wax.
Ready to achieve that perfect, effortless foam wash that sets the stage for a flawless wax job? The SwiftJet Car Wash Foam Gun connects to any standard garden hose to make prep work faster and more effective. Explore the SwiftJet Foam Gun today and get a free microfiber mitt with your order!