
Getting rid of brake dust properly takes more than just a quick wipe-down. From my experience, the secret lies in using the right tools—specifically a pH-neutral wheel cleaner and some soft-bristled brushes—and following a smart, methodical process. For the best outcome, always make sure your wheels are cool to the touch, spray the cleaner on evenly, and give the grime a gentle but firm scrub before you rinse everything off.
Why Brake Dust is Your Wheels' Worst Enemy
That gritty, dark film covering your shiny wheels isn't just road dirt. It's a much more aggressive, corrosive cocktail that gets cooked up every single time you hit the brakes.
So, what's actually in this stuff? It’s a nasty mix of:
- Hot metal particles sheared right off the brake rotor.
- Carbon fibers from the brake pad itself.
- High-temperature adhesives that hold the pad materials together.
When this potent blend gets sprayed onto your wheels, it doesn't just sit there—it sticks like glue. The real damage happens when the heat from driving essentially bakes these tiny particles right onto your wheel's finish. Add a little moisture and oxygen, and those metal fragments start to rust, which can cause permanent damage.
The True Cost of Ignoring Brake Dust
What starts as a simple eyesore can quickly turn into a much bigger, more expensive headache. If you let it sit, the corrosive gunk will start to etch and pit the protective clear coat on your wheels. Once that barrier is broken, the metal underneath is left wide open to the elements, leading to corrosion that you can't just wipe away.
This is about more than just looks; it's about protecting your car's value. Wheels with pitted, flaking, or corroded finishes are a huge turn-off for potential buyers and can seriously hurt your vehicle’s resale price. A task that could've been a simple cleaning job now means you're looking at costly wheel refinishing or even a full replacement.
This isn't some rare problem, either—it’s something every car owner deals with. The global brake cleaner market was valued at approximately USD 2.5 billion and is projected to keep growing as more people realize what’s at stake. It's a clear signal that keeping brake components clean is about performance and safety, not just aesthetics.
Key Takeaway: Think of brake dust as more than just dirt. It's an active, corrosive substance that can permanently ruin your wheel's finish. A little cleaning now can save you from a big repair bill later.
Understanding the Source
The amount and type of dust you see often comes down to your brake pads. For example, high-performance metallic pads are notorious for creating a lot more dust than their ceramic counterparts. The more you know about how brake pads wear down, the more sense it makes to stay on top of cleaning.
Digging into brake pad wear indicators can give you a better grasp of why this is so critical. Ultimately, regular maintenance is your best defense against this relentless grime.
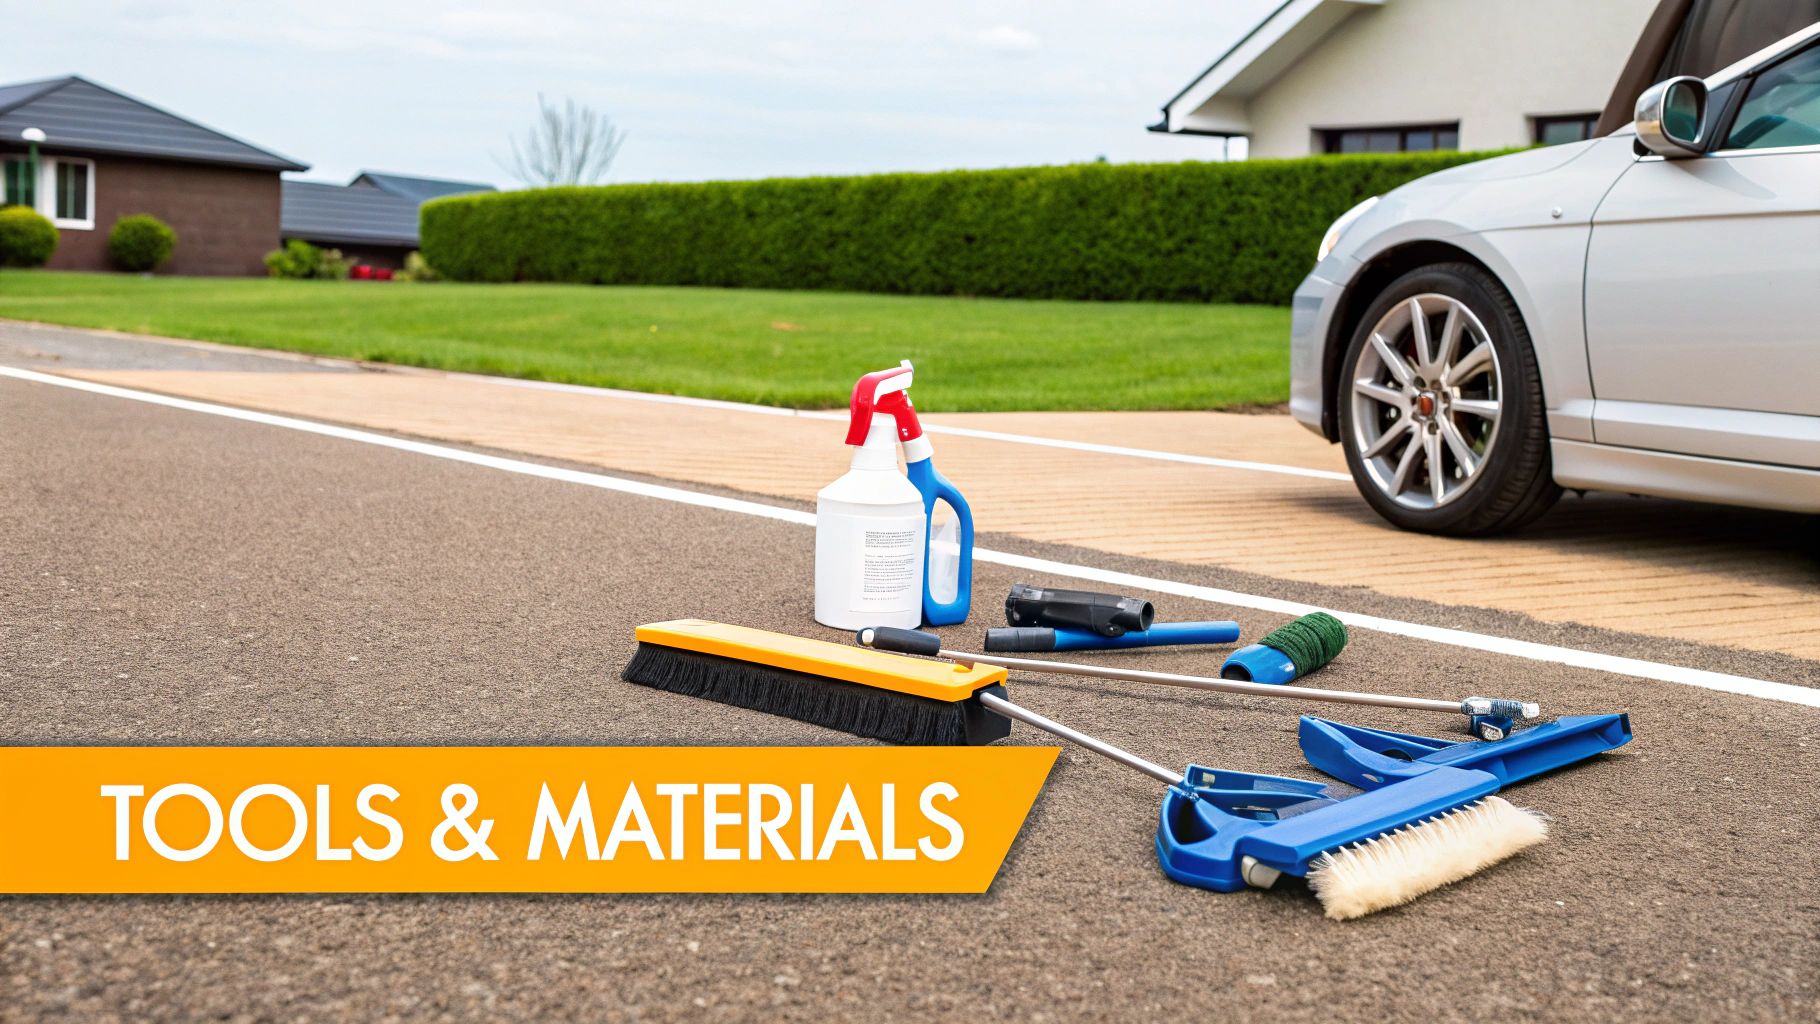
Your Wheel Cleaning Arsenal: A Guide to the Right Tools
If you want to get your wheels truly clean without spending a frustrating Saturday afternoon fighting stubborn grime, you need the right gear. It's the difference between a so-so job and a flawless, professional finish. Having a dedicated kit doesn't just make the work easier—it ensures you're cleaning safely and not accidentally damaging your prized wheels.
Let's start with the most important rule I can give you: use a dedicated wheel bucket. Seriously. Never, ever use the same bucket for your wheels that you use for your car's paint. Why? Brake dust is full of tiny, sharp metal shavings. Those particles will dig into your wash mitt and act like sandpaper on your car's clear coat, leaving a trail of scratches. A separate, clearly marked bucket is the cheapest insurance policy you'll ever buy for your paint job.
Brushes: Your Secret to a Deep Clean
There’s no "one-size-fits-all" brush for wheels. Each part—from the intricate spokes to the deep inner barrel—requires a specific tool. Think of it like a painter's kit; you need different brushes for different details.
Here’s the core set I recommend for every detailer:
- Soft-Bristled Face Brush: This is your go-to for the visible face of the wheel. You need bristles that are gentle enough to not scratch delicate finishes (like clear coat, paint, or powder coat) but still have enough backbone to lift the grime.
- Inner Barrel Brush: These are the long, skinny workhorses designed to reach deep inside the wheel where brake dust piles up. The best ones have a flexible shaft and a protective rubber tip to prevent you from accidentally scratching the inner rim.
- Lug Nut Brush: Brake dust loves to hide in tight spots. A small, specialized detailing brush is perfect for getting into the lug nut holes and around the lug nuts themselves. It’s a small tool that makes a huge difference.
Once you master the basics, you can explore more advanced techniques for an even better shine. For a deeper dive, check out our guide on the best way to clean car rims and really make them pop.
My Personal Tip: When you're shopping for brushes, do a quick test. Rub the bristles against the back of your hand. If they feel scratchy or harsh, they're too aggressive for your wheel faces. It’s always better to start with a softer tool.
Essential Gear for Safety and Rinsing
Let's be clear: wheel cleaners, especially the heavy-duty ones that dissolve brake dust, are powerful chemicals. They're formulated to react with iron particles, and you do not want that stuff on your skin or in your eyes.
This is non-negotiable: always wear nitrile gloves and safety glasses. A splash of potent wheel cleaner can easily irritate your skin, and getting it in your eyes is a serious hazard. Don't skip this step.
Finally, you need a solid way to rinse all the dirt and chemicals away. A regular garden hose can work in a pinch, but for a truly thorough rinse, a pressure washer is ideal. It provides a powerful, targeted spray that blasts away loosened debris from every nook and cranny. This prevents any chemical residue from drying on the surface, which can cause spotting or even long-term damage.
Choosing Your Tools
Deciding which tools to buy can be overwhelming. To help, I’ve broken down the essentials from the professional-grade upgrades. This way, you can build your kit based on your needs and budget.
| Tool | Essential for Beginners | Professional Upgrade | Purpose |
|---|---|---|---|
| Buckets | 2x Buckets (one dedicated to wheels) | Bucket with a Grit Guard insert | Separates dirt to prevent scratching your paint or wheel finish. |
| Wheel Face Brush | Soft, flagged-tip synthetic brush | Microfiber or Boar's Hair Brush | Gently cleans the delicate, visible surface of the wheel. |
| Inner Barrel Brush | Long-handle, flexible brush | Wheel Woolies or similar microfiber brushes | Reaches deep inside the wheel barrel to remove heavy brake dust. |
| Detailing Brushes | Small, soft-bristle brush | Set of various-sized detailing brushes | Cleans tight areas like lug nuts, calipers, and intricate spokes. |
| Rinsing Tool | Garden hose with a high-pressure nozzle | Pressure Washer | Provides powerful, efficient rinsing to remove all chemicals/grime. |
| Safety Gear | Nitrile Gloves, Safety Glasses | N/A (Safety is always essential) | Protects your skin and eyes from harsh cleaning chemicals. |
| Drying Towel | Old microfiber towel | Dedicated, high-pile microfiber drying towel | Dries wheels without leaving streaks or water spots. |
Whether you stick to the essentials or go for the pro-level gear, having these items on hand will make your next wheel cleaning session faster, safer, and far more effective.
The Pro Method for Removing Stubborn Brake Dust
Alright, you've got your tools ready. Now it's time to get to work. Getting rid of that stubborn, baked-on brake dust isn’t about brute force and scrubbing harder—it's about working smarter. This is the exact method professional detailers rely on to get those flawless, showroom-worthy results every single time, without ever putting the wheel's finish at risk.
The number one rule, and it's non-negotiable, is to always work on cool, dry wheels. Seriously, don't even think about cleaning wheels that are still hot from a drive. When the surface is hot, water and chemicals flash-evaporate, leaving behind nasty water spots and potentially etching your clear coat permanently. Pull your car into the shade and give it plenty of time to cool down completely before you start.
The One-Wheel-at-a-Time Strategy
To keep things under control and avoid creating more work for yourself, you'll want to tackle only one wheel at a time, from start to finish. This is a classic rookie mistake—spraying all four wheels down at once. By the time you get back to the first one, the cleaner has dried, creating a streaky mess that's even harder to remove. Focusing on a single wheel ensures each one gets the full attention it needs.
Here's the professional workflow I use for every wheel:
First up, a good pre-rinse. Before any chemicals even touch the surface, grab your pressure washer or a hose with a strong jet nozzle and blast away all the loose stuff. You're aiming to knock off the top layer of dirt and any heavy chunks of brake dust. This simple step lets your cleaner get straight to work on the deeply embedded contaminants.
Now, grab your wheel cleaner. Liberally spray your chosen pH-neutral cleaner all over the wheel. Be thorough—cover the face, get between the spokes, hit the inner barrel, and don't forget inside the lug nut holes. Don't be stingy here; full coverage is key for the cleaner to do its job.
Let it dwell. Patience is a virtue. Let the cleaner sit on the wheel for the time recommended on the bottle, usually just a few minutes. This is the cool part. You'll often see the product start to "bleed," turning a deep red or purple as it chemically reacts with and dissolves the iron particles from the brake dust. This reaction is doing most of the heavy lifting for you.
This photo shows a detailer carefully agitating the wheel surface, a key step in removing embedded brake dust.
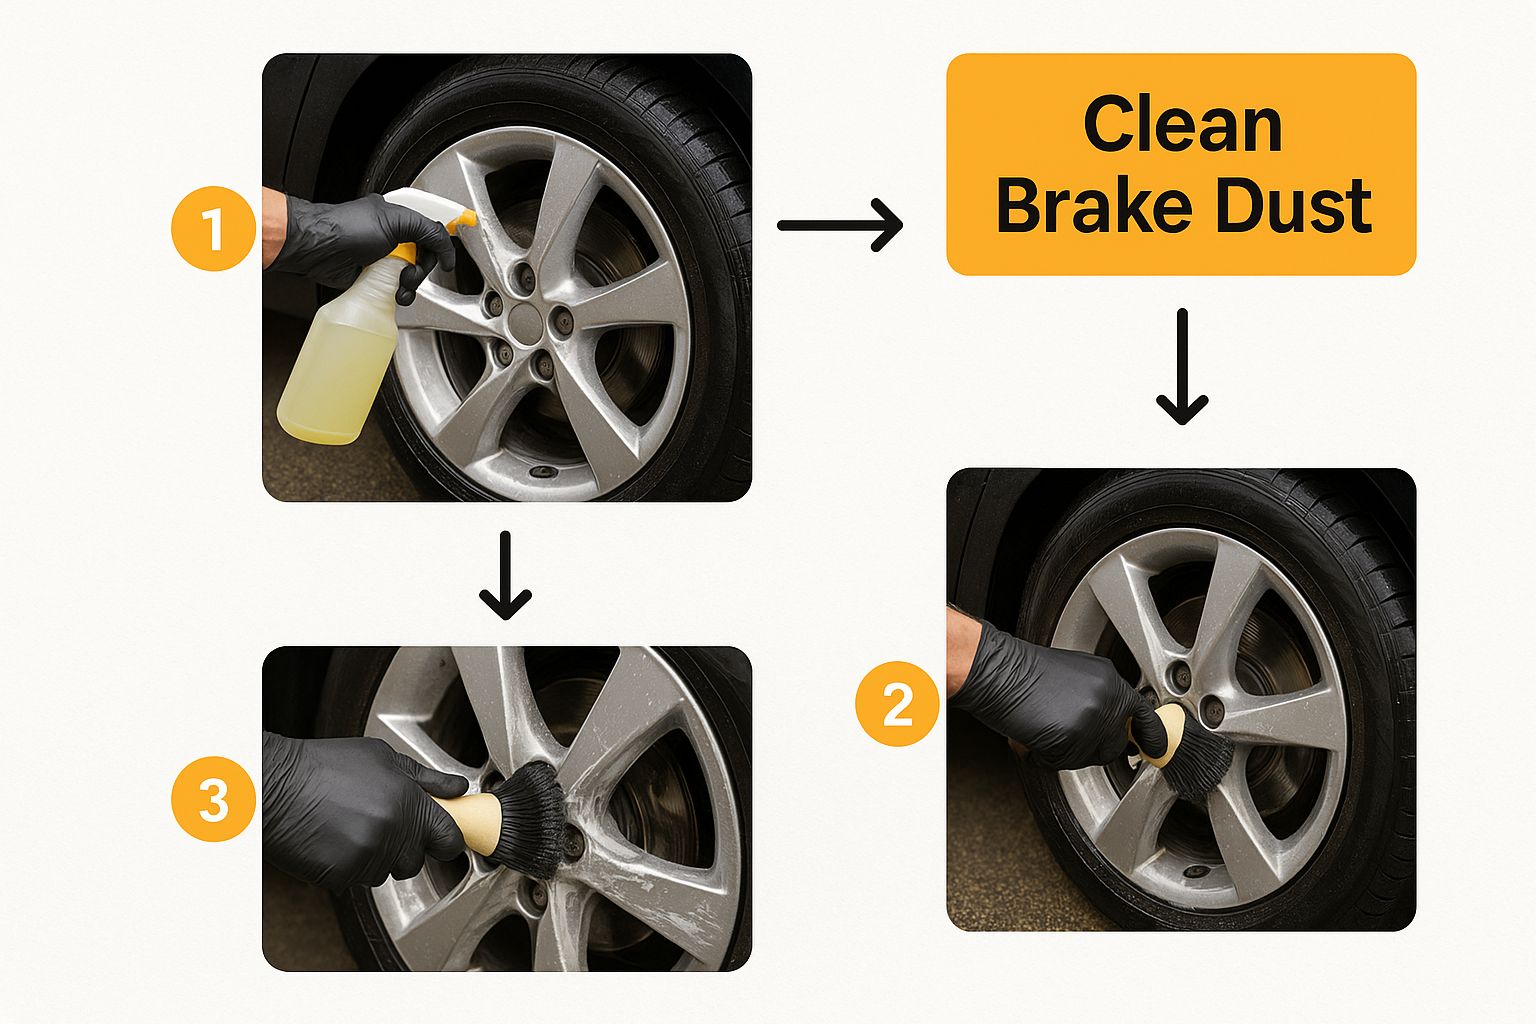 As you can see, using the right brushes is just as important as the chemical cleaner itself for getting that perfect finish.
Agitation: The Key to a Perfect Finish
While the cleaner is busy dissolving the brake dust, you need to give it a helping hand. Physically agitating the grime is what breaks its bond with the wheel's surface, allowing it to be rinsed away completely. This is where your specialized brushes come into play.
- Use your soft-bristled face brush for the delicate front of the wheel and spokes.
- Your long barrel brush is perfect for reaching deep inside to clean the inner rim.
- Finally, grab the small lug nut brush to get into all those tight, detailed areas.
If you run into other gunk like road tar, you'll need a different game plan. For that, check out our guide on the top 7 best tar removers for cars to learn more.
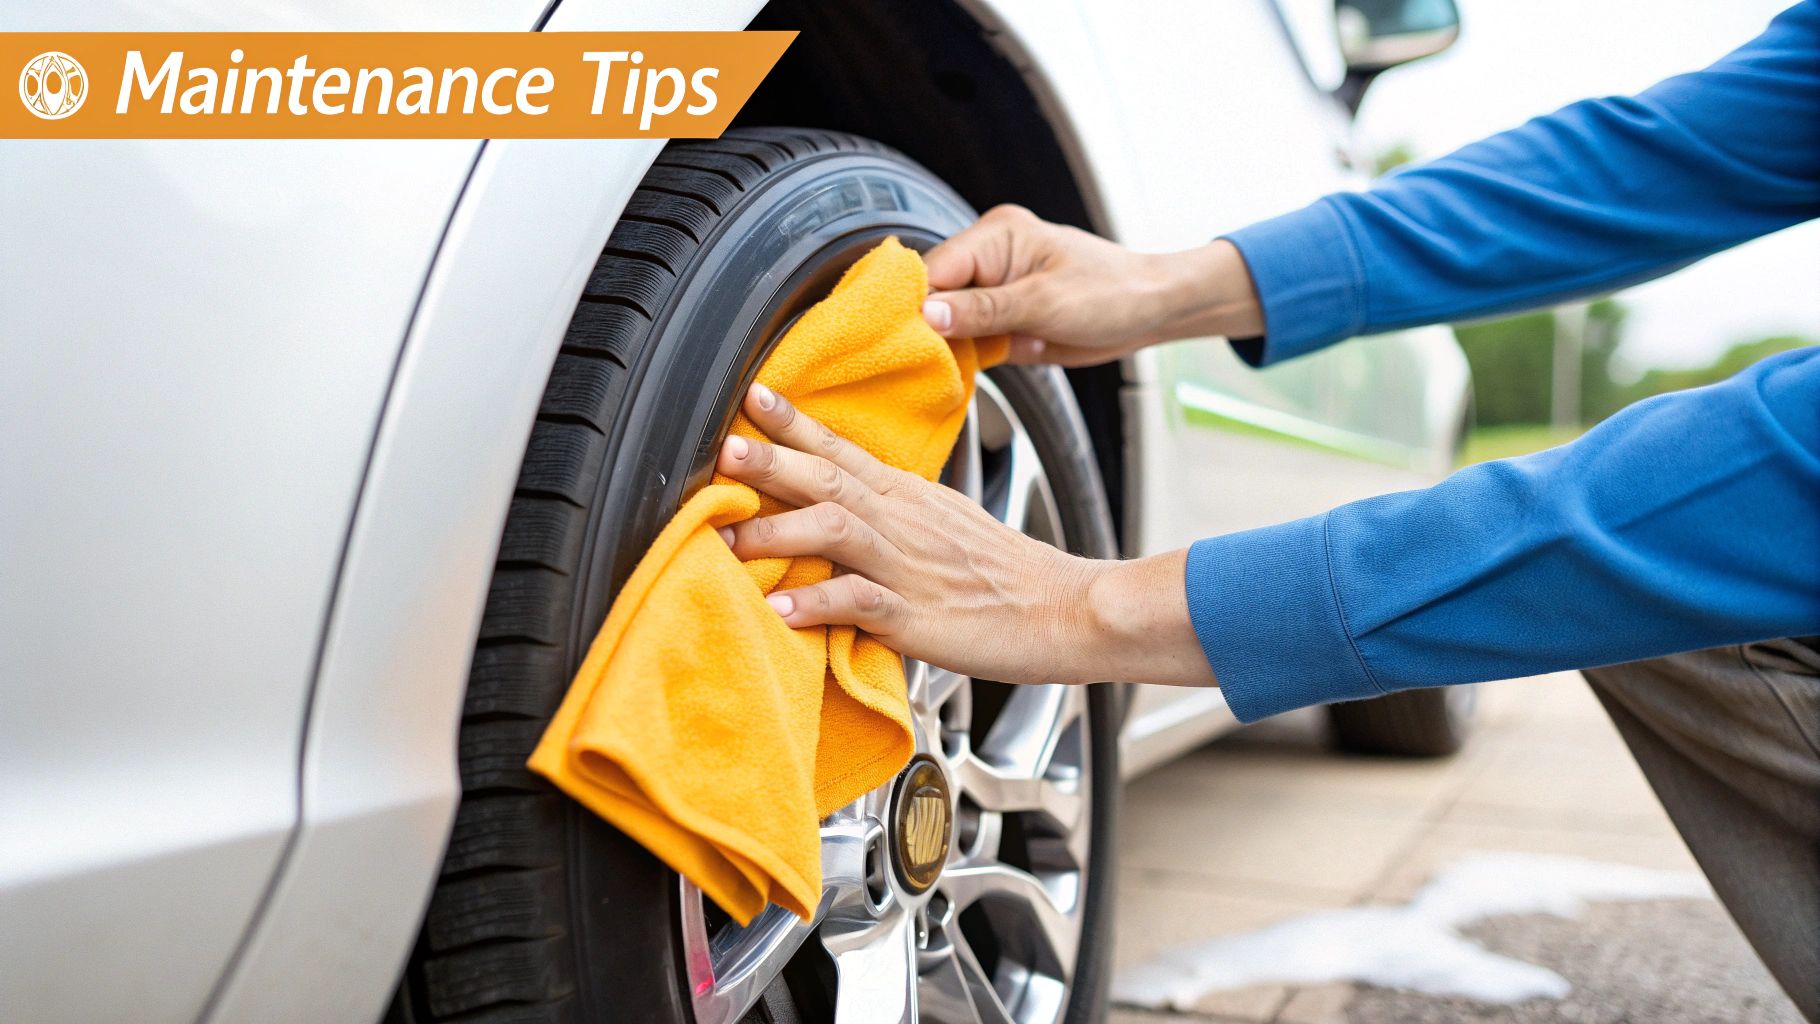
Once you’ve agitated every surface, it’s time for the final, powerful rinse. Start from the top and work your way down, making sure to flush out the barrels, lug nut holes, and behind the brake calipers. The last step is to dry the wheel completely with a clean microfiber towel to prevent water spots. Once it's bone dry, you can move on to the next wheel.
Pro Insight: This methodical approach isn't just about looks. Keeping your wheels clean is a crucial part of routine vehicle maintenance. With disc brakes now found in over 90% of passenger cars in developed countries, managing the dust they produce is essential for both performance and safety.
The automotive brake components market is a big deal—valued at $13.32 billion—and it's growing because people understand the need to maintain these high-performance systems. Caked-on brake dust can actually trap heat, leading to accelerated wear on your brake pads and rotors. Diligent cleaning helps preserve your car's braking efficiency and extends the life of those components.
Choosing the Right Cleaner for Your Wheels
https://www.youtube.com/embed/uAo4GyinV38
Let's be honest, grabbing the wrong chemical for your wheels is like trying to clean a window with sandpaper. It’s a recipe for disaster. What works wonders on a tough-as-nails chrome wheel could permanently stain or even strip the finish right off a delicate, polished aluminum one. The very first thing you need to do before tackling brake dust is figure out what your wheels are actually made of.
Most modern cars roll off the lot with clear-coated alloy wheels. Think of them as having a protective layer, much like your car's paint. But that's not the only type out there. You might be dealing with:
- Polished Aluminum: These wheels have a stunning, raw, mirror-like shine but come with a catch—no protective clear coat. This makes them incredibly sensitive to harsh chemicals.
- Chrome: While very durable and bright, even chrome can be pitted and damaged by overly aggressive acidic cleaners.
- Painted or Powder-Coated: Similar to clear-coated wheels, these have a colored finish. A gentle approach is key to avoid scratching, fading, or discoloration.
It's All About the Chemistry
The real magic—and the danger—of a wheel cleaner lies in its pH level. This isn't just some marketing gimmick; it's the single most critical factor determining how the product will react with both the caked-on brake dust and your wheel's delicate surface.
Generally, wheel cleaners fall into one of three buckets:
- Acidic Cleaners: These are the heavy hitters. They work by aggressively dissolving the metallic particles in brake dust. While incredibly effective, they can easily wreck sensitive finishes like polished aluminum or anodized wheels. Use these with extreme caution, if you even use them at all.
- Alkaline (High pH) Cleaners: Often marketed as "all-purpose cleaners," these are fantastic for cutting through grease and road grime. However, they can still be too strong for more delicate wheel surfaces.
- pH-Neutral Cleaners: This is your go-to, the safest option for virtually every type of wheel out there. These formulas are cleverly designed to target the iron in brake dust without relying on harsh acids or alkalis. That makes them perfect for clear-coated, painted, and even most aftermarket wheels.
My Golden Rule: When you're not 100% sure, always start with the least aggressive option. A good pH-neutral cleaner is your safest bet. Sure, it might take a bit more gentle persuasion with a soft brush, but it won’t send you shopping for a new set of expensive wheels.
The demand for these carefully formulated cleaners has exploded as more drivers get serious about proper maintenance. In fact, the brake cleaner market was recently valued at USD 2.37 billion and is expected to keep climbing. This isn't just a niche product anymore; it highlights a major shift toward using the right tool for the job. These cleaners are engineered to dissolve brake dust and prevent the abrasive damage it can cause to braking systems over time.
You can learn more about this trend by checking out the full research on brake cleaner market trends.
At the end of the day, matching the cleaner to your wheel type is non-negotiable for anyone who genuinely cares about their car's appearance and longevity. Spending a few extra moments to identify your wheel's finish and pick a safe, pH-balanced product will save you from a world of expensive, heartbreaking mistakes.
Keeping Your Wheels Gleaming with Long-Term Protection
You've just spent a good chunk of your afternoon getting your wheels spotless. The last thing you want is for that ugly, brownish-yellow film of brake dust to creep back in just a couple of days. A deep clean feels great, but the real win is making that shine stick around. This means shifting your mindset from constantly cleaning your wheels to proactively protecting them.
This is where the real magic happens, thanks to modern wheel sealants and ceramic coatings. These products are designed to form a super-slick, tough, and invisible shield over your wheel’s surface. The best way to picture it is like the non-stick coating on your favorite frying pan—hot, sticky brake dust and road grime just can't find a good place to latch on.
The Beauty of a Hydrophobic Surface
The number one advantage of using a sealant or a ceramic coating is the hydrophobic effect it creates. Instead of water clinging to the surface and leaving spots, it beads up instantly and rolls away, taking most of the loose dirt and dust along for the ride. This single quality can turn your future wheel-cleaning sessions from a back-breaking scrub-fest into a quick, satisfying rinse.
What does this look like in the real world? It means a quick blast from a quality foam gun, like the SwiftJet, can knock off up to 90% of the daily grime without you ever having to grab a brush. Now that’s working smarter.
How to Apply a Protective Shield
Applying a protective layer isn't difficult, but it does demand a bit of patience and attention to detail. For the product to bond properly and give you that long-lasting durability, the surface has to be perfectly prepared.
- Start with a Decontaminated Surface: Your wheel needs to be more than just clean; it needs to be pristine. After washing and drying, go over it with an iron remover and then a clay bar. This will pull out any deep, embedded contaminants that washing leaves behind.
- Wipe It Down: Next, give the entire wheel a wipe-down with an IPA (isopropyl alcohol) solution. This crucial step strips away any lingering oils, waxes, or residues, leaving a totally sterile surface for the coating to bond to.
- Apply with Care: Follow the manufacturer’s instructions to the letter when applying your sealant or ceramic coating. Typically, this involves using a small applicator pad, working in manageable sections, and buffing away the excess after it "flashes" (goes from wet to slightly hazy).
A Pro Tip on Curing: Don't rush the final step! The curing process is just as critical as the application itself. Most ceramic coatings require a 12-24 hour period to fully cure without any contact with water. Always plan your application for a day when you know you'll have clear, dry weather.
Once that protective layer is on and cured, maintenance becomes a breeze. Just wash your wheels regularly with a pH-neutral soap. Your wheels face just as much abuse as your car's paint, so they deserve the same level of care. To see what that involves, take a look at our guide on how to protect car paint from sun damage.
By putting in a little time upfront to add protection, you’ll be keeping your wheels looking incredible for months—or even years—to come.
Common Questions About Wheel and Brake Dust Care
Even after you've got the basic process down, you’ll probably still have questions about getting your wheels perfectly clean. That’s completely normal. Getting clear answers to these common questions is what separates a good detailer from a great one. Let’s dive into some of the things people ask me all the time.
One of the first things people want to know is how often they really need to be doing this. There’s no single answer—it really boils down to your driving habits and the kind of brake pads on your car.
If you’re a daily commuter dealing with a lot of stop-and-go traffic, you’ll want to give your wheels a proper cleaning every one to two weeks. This schedule keeps that corrosive dust from baking on and damaging the finish. And if you’re running high-performance metallic pads, you might find yourself needing to clean them even more frequently.
Are Wheel Cleaners Safe for Brakes?
It's a smart question. You’re spraying a powerful chemical right next to one of your car's most critical safety systems. So, what happens when that cleaner gets on your rotors and calipers?
For the most part, you're fine—as long as you stick with a quality, pH-neutral wheel cleaner. These cleaners are formulated to target the iron particles in brake dust without damaging the metal, rubber, or painted surfaces of your brake components. Honestly, a little overspray that helps clean your calipers isn't a bad thing.
Expert Tip: Never, ever spray acidic cleaners or all-purpose degreasers on your brakes. And please, don’t use something like WD-40. These products can leave a slippery residue that severely reduces your braking ability, creating a huge safety risk.
Why Do Some Cars Get So Much Dirtier Than Others?
Have you ever noticed that some cars, especially German performance sedans, always seem to have wheels coated in black dust? You're not just seeing things. It all comes down to the brake pads the manufacturer chose to install.
- Softer, High-Performance Pads: European and performance-focused cars often come with softer-compound brake pads. They provide phenomenal stopping power, but the trade-off is that they wear down quickly, shedding a ton of that dark, sticky dust.
- Harder, Ceramic Pads: Many North American and Japanese cars, on the other hand, tend to use harder ceramic pads. They’re much cleaner—producing a lighter-colored dust that doesn’t cling as much—but they might not have that same aggressive "bite" when you hit the pedal.
At the end of the day, some dust is just a sign your brakes are doing their job. But if you see one wheel that's dramatically dirtier than the rest, pay attention. It could be a red flag for a sticking brake caliper that needs a mechanic to look at it right away.
Ready to make your next car wash faster and more effective? The SwiftJet Car Wash Foam Gun connects to any standard garden hose to cover your vehicle in thick, dirt-lifting foam. It's the perfect tool for getting a deep clean without the hassle. Get yours today at https://swiftjetusa.com.