
Let's be honest, the idea of cleaning a car engine bay can feel a little intimidating. For most people, it brings up visions of a complicated, potentially risky task best left to the pros. But here's the thing: a clean engine is about so much more than just looking good. It’s a core part of smart vehicle ownership, one that has a real, direct impact on your car's performance and how long it lasts.
Why Bother Cleaning Your Engine Bay?
Before you even think about grabbing a bottle of degreaser, it's worth understanding the genuine benefits hiding under all that grime. A spotless engine bay is the calling card of a well-cared-for vehicle, but the advantages run much deeper than just appearances.
Think about it: thick layers of caked-on gunk, oil, and road salt essentially act like an insulating blanket. All that trapped heat makes your engine work harder than it needs to, which can shorten the lifespan of crucial rubber and plastic parts. When your engine is clean, it can dissipate heat exactly how the engineers designed it to, helping everything run cooler and more efficiently.
Spot Problems Early and Save Big
For me, the single biggest win is early leak detection. On a clean engine, a fresh fluid leak sticks out like a sore thumb. A small, new drip of coolant or a slick of oil becomes immediately obvious.
This kind of early warning is gold. It lets you get a simple, inexpensive fix done before that small leak turns into a catastrophic failure that leaves you stranded.
Regularly cleaning your engine bay is one of the smartest things you can do for proactive vehicle care. For more ideas, you can check out other preventive maintenance examples that show how staying ahead of problems can extend your vehicle's life.
Preserve and Protect Your Investment
Cleaning doesn't just reveal problems; it prevents them. It actively removes corrosive stuff like road salt that eats away at vital components. Your hoses, wiring harnesses, and plastic covers will stay more flexible and last longer, helping you avoid frustrating electrical gremlins and vacuum leaks down the line.
A quick 15-minute cleaning session every few months could genuinely save you from a multi-thousand-dollar repair bill. It reveals a problem when it's still small, cheap, and easy to manage.
This isn't just a niche habit for enthusiasts anymore. The global market for professional engine cleaning services hit an estimated USD 1.2 billion in 2024. That number is expected to nearly double by 2033, driven by more and more owners who understand the value of maintaining engine health and performance.
Assembling Your Detailing Toolkit
Let's be honest: cleaning an engine bay can either be a frustrating, messy chore or an incredibly satisfying project. The difference almost always comes down to having the right tools for the job. You're not just wiping down a countertop; you're tackling grease, road grime, and sensitive electronics. Building a dedicated kit is the first step toward getting professional results.
Before you even pop the hood, let's gather your supplies. Think of this as your engine bay cleaning arsenal—a checklist of essentials and some smart upgrades that make a world of difference.
Your Engine Bay Cleaning Arsenal
| Category | Essential Gear | Recommended Upgrades |
|---|---|---|
| Cleaning Agents | Quality engine degreaser (citrus or solvent-based) | All-purpose cleaner (APC) for lighter grime, iron remover |
| Applicators | A variety of detailing brushes (soft and stiff bristles) | Long-handle brushes (wheel woolies), detailing swabs for tiny crevices |
| Water Source | Standard garden hose with a spray nozzle | The SwiftJet foam gun for superior cleaner application |
| Drying | 3-4 clean microfiber towels | A dedicated air blower or compressed air for touchless drying |
| Protection | Chemical-resistant gloves, safety glasses/goggles | A plastic and rubber protectant/dressing |
With these items ready, you’re setting yourself up for a much smoother, safer, and more effective cleaning session.
Choosing Your Cleaner and Brushes
Your most important decision is the engine degreaser. This is the workhorse chemical that will cut through years of baked-on gunk. You'll generally find two types: solvent-based and water-based (often called citrus-based). Solvent degreasers are the heavy hitters, fantastic for extremely greasy, neglected engines. But, be warned, they can be aggressive on older, brittle rubber and plastic components. If you're working on a classic car or just prefer a gentler option, a quality citrus-based cleaner is the way to go.
Next up, your brushes. A single, all-purpose brush just won't cut it here. You need a small team of them to tackle different areas effectively.
- Stiff Nylon Brushes: Save these for the tough stuff. They're perfect for scrubbing caked-on grime from solid metal parts and the engine block itself.
- Soft-Bristled Detailing Brushes: These are your go-to for anything delicate. Use them around electrical connectors, plastic engine covers, and any intricate part where you want to avoid scratches.
- Wheel Woolies or Spoke Brushes: Their long, flexible design is a lifesaver for reaching deep into the engine bay. They’re fantastic for cleaning around suspension mounts and other tight spots you simply can't get to by hand.
The Smart Way to Apply Your Cleaner
Here’s a pro tip that can save you from a costly mistake: never blast your engine with a high-pressure washer. It's a surefire way to force water into electrical connections and cause major headaches down the road.
This is where a foam gun completely changes the game. A tool like the SwiftJet foam gun, which hooks right up to a regular garden hose, is perfect for this job. It blankets the entire engine bay in a thick, clinging foam, giving your degreaser the time it needs to break down grime without just running off onto the ground. This even coverage is the secret to avoiding a patchy, uneven clean.
If you’re curious about how different washing tools can elevate your entire detailing process, check out our guide on the top car washer spray gun picks for a perfect clean.
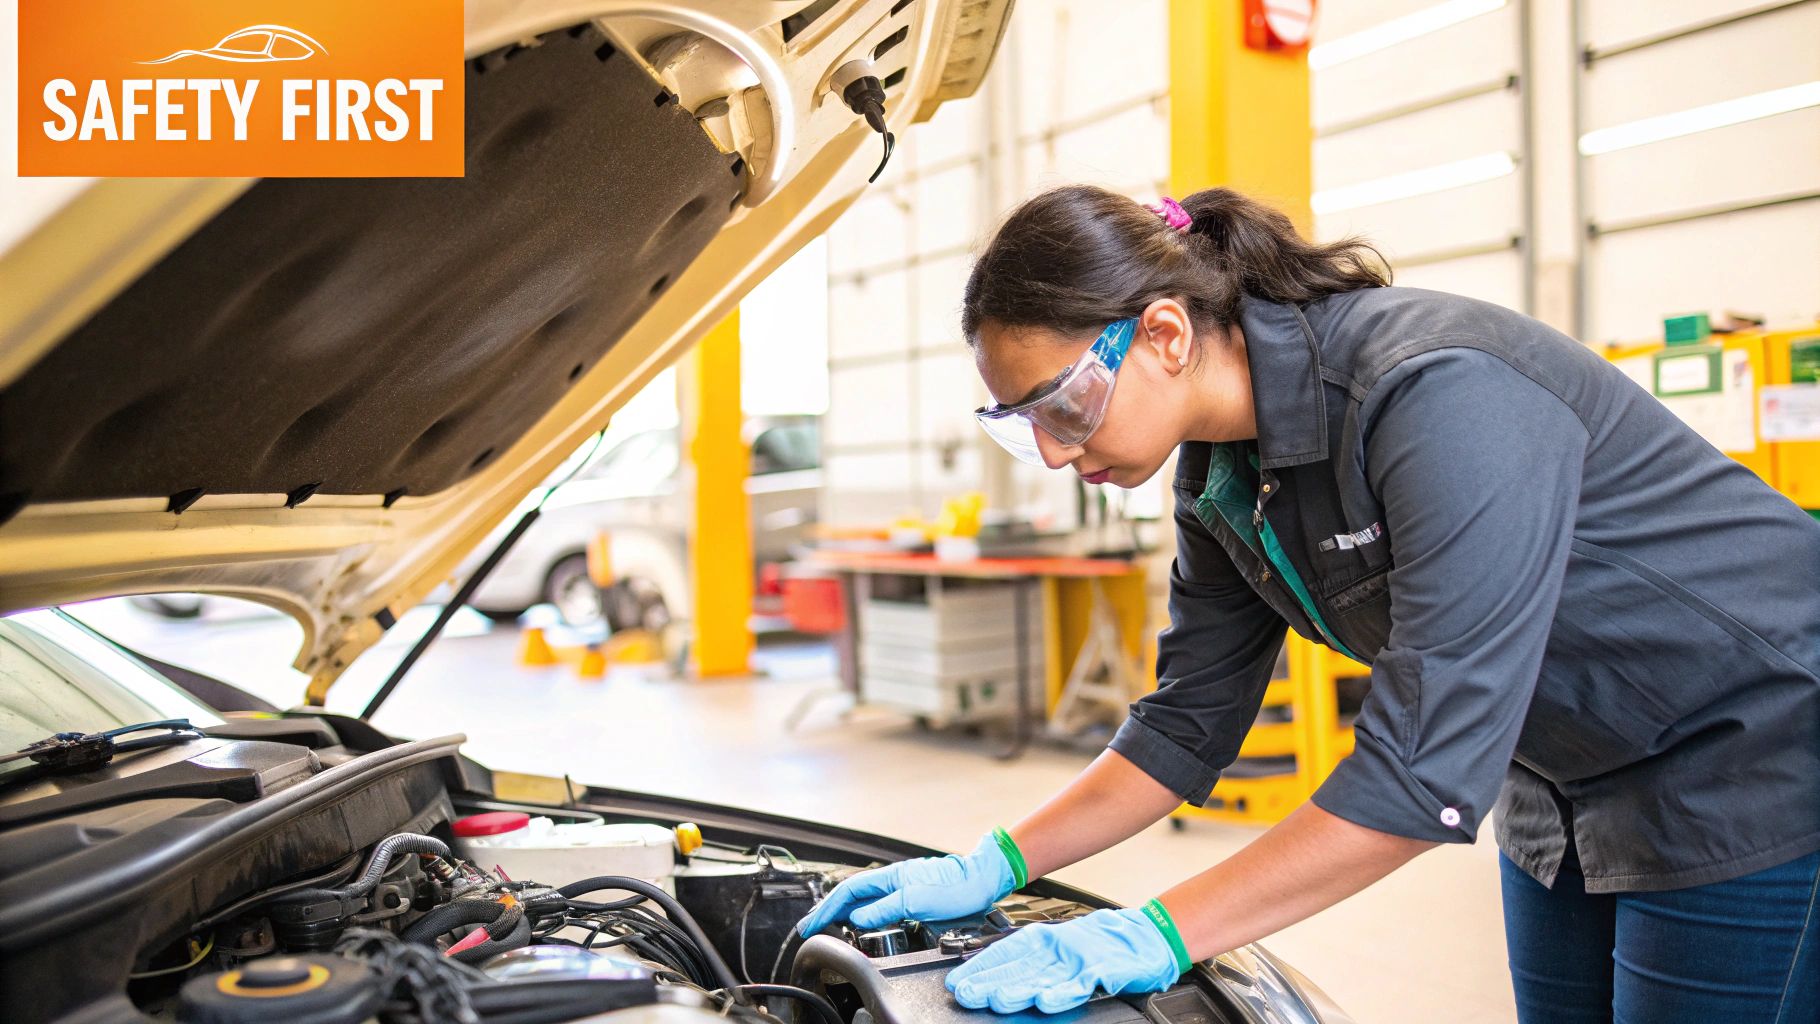
Don't Forget Safety and Finishing Touches
Finally, a quick but crucial word on safety. You're working with chemicals, so chemical-resistant gloves are an absolute must to protect your skin. A pair of safety glasses is just as vital to guard your eyes against any splashes or flying debris you kick up while scrubbing.
Once everything is clean and dry, a final wipe-down with a quality plastic and rubber protectant will restore that deep, black finish to your hoses and covers, leaving the bay looking factory-fresh. Now, with your toolkit assembled, you're ready to get to work.
Safely Preparing Your Engine for a Wash
Before you even think about spraying a single drop of water, we need to talk about prep. I've seen it happen: someone gets a little too eager, blasts the engine bay with a pressure washer, and ends up with a car that won't start and a massive repair bill. This prep work is hands down the most important part of the entire process.
Think of it as risk management. We're going to make sure that when you wash away all that built-up grime, the only thing you're left with is a sparkling engine bay, not an electrical nightmare.
Setting the Right Temperature
First things first, let's get the temperature just right. Never, ever spray a hot engine with cold water. It's a recipe for disaster. The rapid temperature change can cause thermal shock, which can lead to cracked metal parts—especially on things like an aluminum intake manifold or cast-iron exhaust.
On the flip side, trying to clean a stone-cold engine isn't ideal either. Degreasers and cleaning chemicals just work better with a little bit of warmth.
The sweet spot is a slightly warm engine. If you've just come back from a drive, just pop the hood and let it sit for about 15 to 20 minutes. You want it to be warm to the touch, but not so hot that you can't comfortably keep your hand on the engine block. That little bit of residual heat will give your cleaners a huge boost in cutting through stubborn grease.
Removing Loose Debris First
Next, let's get rid of all the easy stuff. Your engine bay is a magnet for leaves, twigs, dirt, and all sorts of other junk. You want to get this out now, before you add water and turn it all into a soupy, muddy mess.
A simple, soft-bristled detailing brush is perfect for sweeping out debris from corners and crevices. If you want to be more thorough, a shop vac with a narrow attachment or even a leaf blower on its lowest setting does a fantastic job. This little step makes the actual washing so much easier.
Protecting Your Vital Electronics
Okay, this is where you really need to pay attention. Modern cars are packed with sensitive electronics, and water is their worst enemy. The goal here is simple: make a waterproof shield around anything that could be fried by moisture.
Taking an extra five minutes to meticulously cover these components is the best insurance policy against an expensive trip to the mechanic. Don’t rush this part.
Here’s my personal checklist of things you absolutely must cover:
- Alternator: Find the component driven by the serpentine belt—you can usually see the cooling fins inside. It needs to be covered completely.
- Air Intake: Whether you have an aftermarket cold air intake with an exposed filter or just the stock airbox, seal the opening. Water in your intake is a catastrophic failure waiting to happen.
- Fuse Box: Find the main fuse and relay box and wrap the entire thing, lid and all.
- Exposed Wiring and Sensors: Scan the engine bay for any clusters of connectors, wiring harnesses, or visible electronic sensors. When in doubt, cover it up.
You don't need fancy materials. I just use plastic grocery bags or standard kitchen plastic wrap. They create a great seal. To hold them in place, grab some painter’s tape—it has enough stick to hold everything down but peels off cleanly without leaving gunk behind. Once you've got all your sensitive bits wrapped up tight, you're finally ready to start cleaning.
The Engine Bay Cleaning Process
With all your prep work done, we get to the fun part: washing away years of built-up grime and seeing that engine shine again. This is where your careful planning pays off. Let's walk through the actual hands-on process, from the first rinse to the final spray-down, to make sure you get a fantastic result without damaging a thing.
First things first, you'll want to give the engine bay a gentle pre-rinse. Grab your garden hose with a standard spray nozzle. The key here is to never use a high-pressure stream. Your goal isn’t to blast anything clean just yet; you're just lightly wetting all the surfaces to help the degreaser do its job. A low-pressure mist is perfect, as it won’t force water past the plastic bags and foil you so carefully put in place. Think of it as priming the canvas before you start painting.
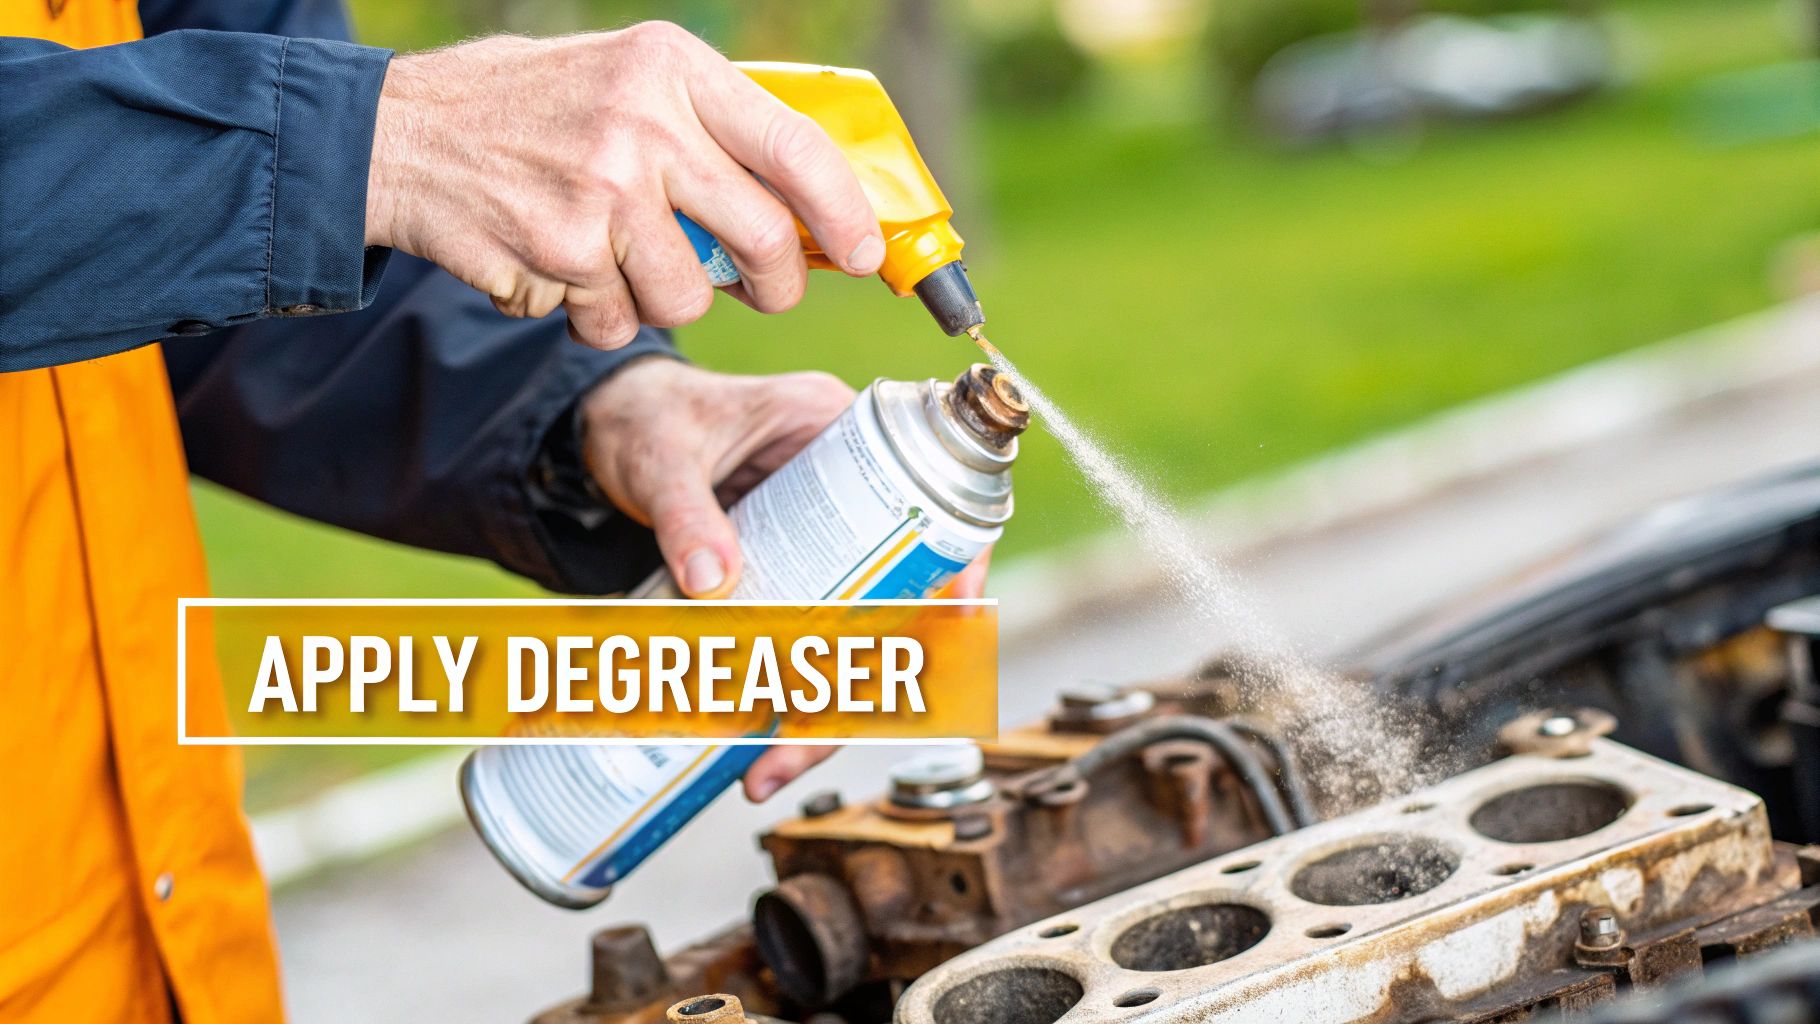
Applying and Agitating Your Cleaner
Now it's time for the degreaser. Whether you're using a simple spray bottle or a more advanced tool, the aim is to get even coverage. I always start from the bottom of the engine bay and work my way up. This little trick prevents the cleaner from dripping down over dry, dirty areas and creating streaks.
For truly professional-level results, a foam gun is the way to go. If you want to dive deeper, you can learn how to properly use a foam gun. It lays down a thick, clinging foam that gives the cleaner maximum time to break down stubborn grease and oil without drying out too quickly. Let the product sit for the time recommended on the bottle, which is usually somewhere between 5-15 minutes. You need to give it time to work its magic, but don't let it dry on the surface.
A classic mistake I see people make is letting the degreaser dry completely. This can leave behind a chalky, hard-to-remove residue. If you notice it starting to dry, especially on a warm day, just give it a quick, light mist of water to keep it active.
Once the degreaser has had a chance to work, it’s time to get your hands dirty. This is the step that separates a decent clean from a truly great one. Grab your detailing brushes and get to work.
- Stiff Brushes: Use these for the heavy lifting. They're perfect for scrubbing tough metal parts like the engine block, valve covers, and intake manifold where the grime is really baked on.
- Soft Brushes: Switch to your softer brushes for all the plastic covers, rubber hoses, and any areas near the electrical connectors you protected. They'll clean effectively without scratching or damaging more delicate surfaces.
Work methodically, focusing on one section at a time. It’s the combination of the chemical cleaner and the mechanical scrubbing that really lifts away that deep, caked-on dirt.
Rinsing for a Spotless Result
After you've scrubbed every surface you can reach, it's time for the final rinse. Just like the pre-rinse, this has to be done with low pressure. Set your garden hose nozzle to a gentle "shower" or "mist" setting.
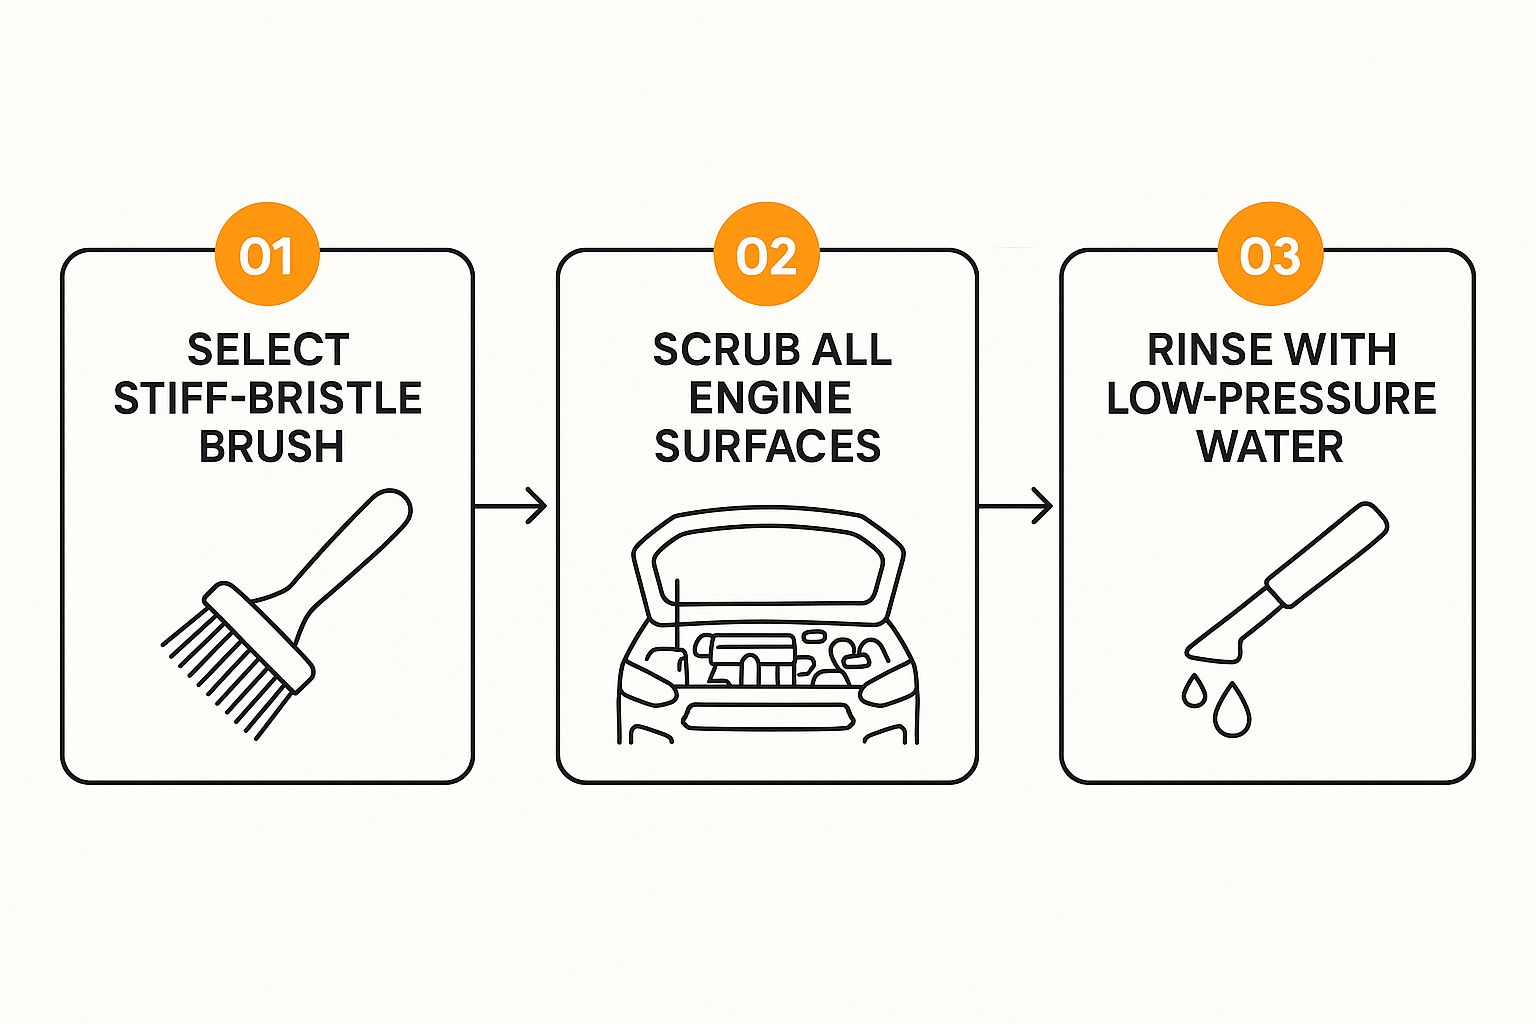
This image sums it up nicely: a proper engine bay clean comes down to the right tools, some good old-fashioned elbow grease, and a careful, low-pressure rinse to finish the job.
Always start rinsing from the top and let the water flow downwards. This ensures all the dirt and degreaser residue gets washed down and out of the engine bay, rather than resettling on spots you've just cleaned. You want to be really thorough here. Any leftover degreaser can become a magnet for new dirt and leave a hazy film when it dries.
Keep rinsing until you don't see any more soapy suds running out onto the ground. Don't rush this part—a meticulous rinse is the secret to a truly clean, residue-free finish.
Drying and Protecting for a Lasting Finish
You’ve done the hard work of degreasing and rinsing, but don't close the hood just yet. The drying and protecting phase is what separates an okay job from a truly professional one. This is where you lock in that showroom look and, more practically, make your next engine cleanup a whole lot easier.
If you rush this part, you're asking for trouble. Water spots are one thing, but leaving moisture in electrical connectors is another beast entirely. A little patience here goes a long way toward a flawless, long-lasting result.
Forced Air for a Touchless Dry
First things first: we need to get all that standing water out of there. Sure, you could start wiping with a towel, but you'll never reach the water hiding in all those tight spots. This is the perfect job for forced air.
I always reach for my leaf blower or an air compressor with a blower nozzle. Work systematically across the engine bay, using powerful bursts of air to chase water out from behind brackets, around connectors, and from all the engine's nooks and crannies. It's infinitely more effective than just trying to mop it all up with a towel.
For a deeper dive into drying methods for the rest of your vehicle, take a look at our guide on the best way to dry your car after washing to achieve that perfect, spot-free shine.
Remember that meticulous five-minute prep job you did covering sensitive electronics? Now is the time to carefully remove all those plastic bags and painter’s tape. Make sure you do this before applying any dressing.
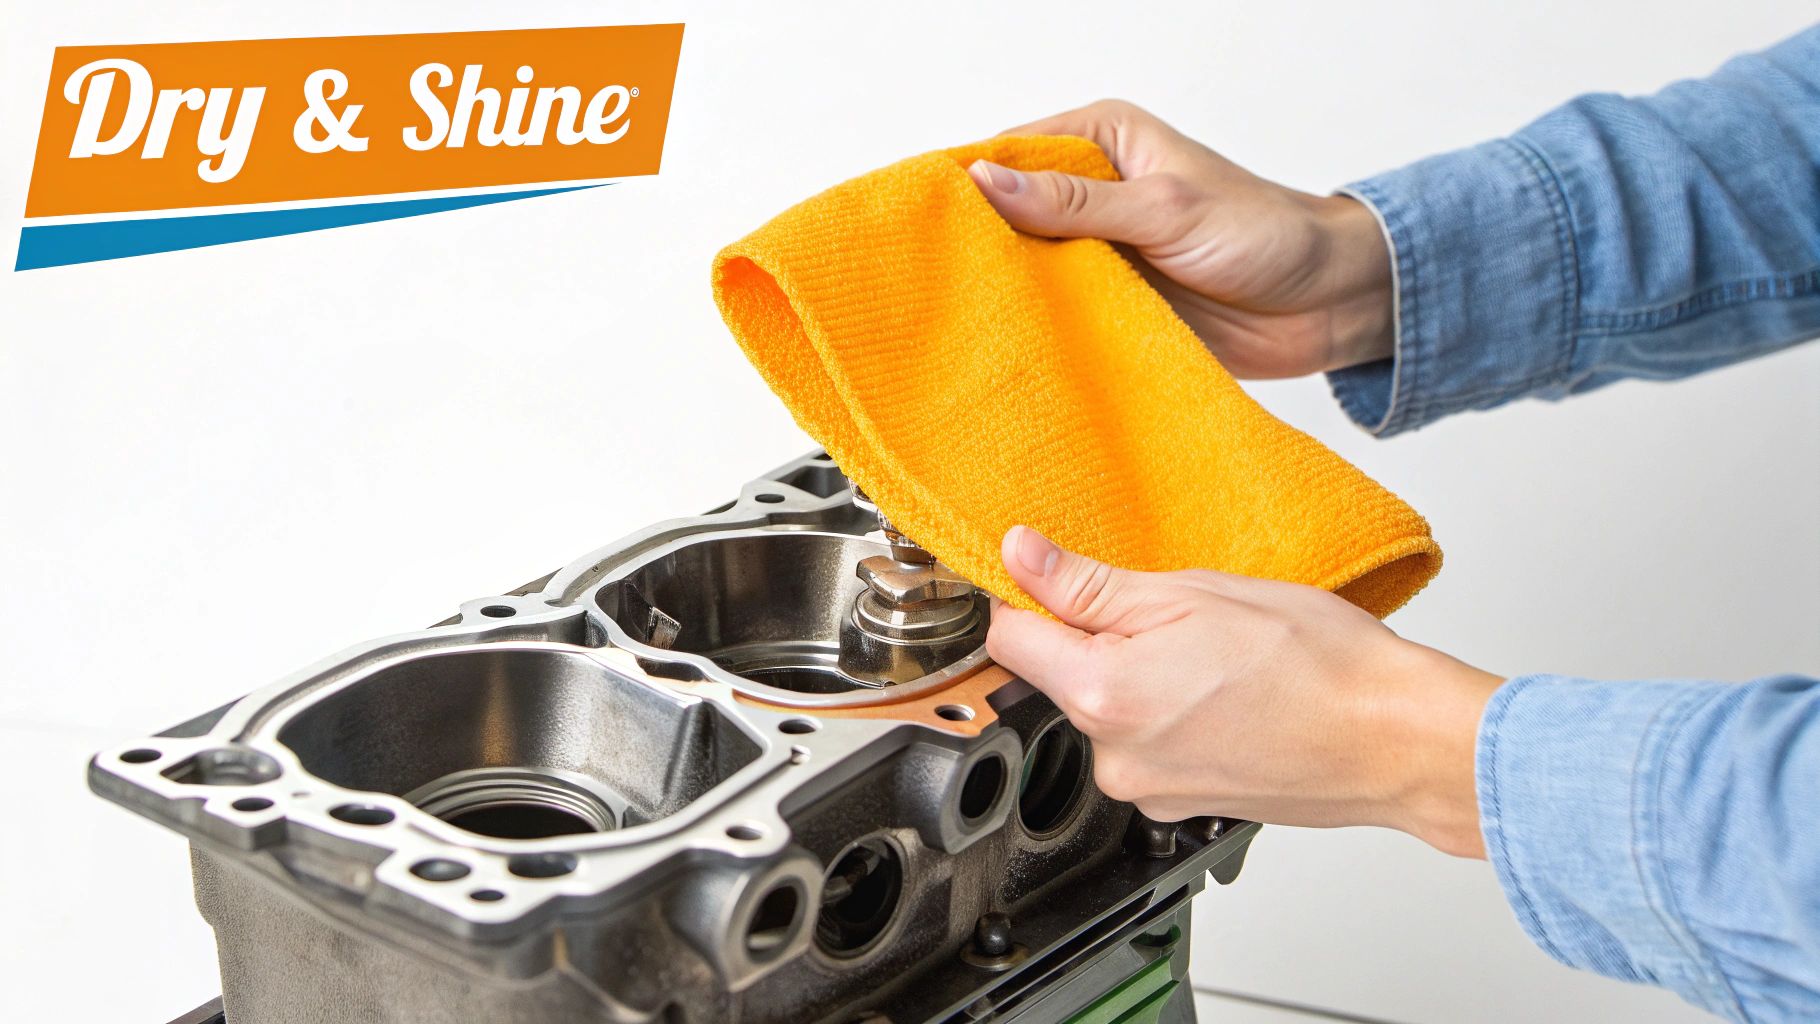
After blowing out most of the water, grab a clean, high-quality microfiber towel for one final pass. This quick wipe-down will sop up any stray droplets and get the surfaces perfectly prepped for the final protective layer.
Applying Protective Dressing
With the engine bay clean and bone-dry, it's time to bring back the richness and protect all that plastic and rubber. A quality engine dressing or protectant will restore that deep, factory-fresh color to your hoses and plastic covers. The real benefit, though, is that these products help repel dust and grime, keeping everything cleaner for much longer.
You'll generally find two types of protectants on the shelf:
- Water-Based Dressings: These are my go-to. They leave a more natural, satin finish that doesn't feel greasy and, crucially, doesn't attract a ton of dust. It just looks clean and professional.
- Silicone-Based Dressings: These are for you if you love a high-gloss, "wet" shine. They look great, but the trade-off is that they can feel a bit slick and tend to attract more airborne dirt and dust over time.
For the best results, spray the dressing onto a microfiber applicator pad or a folded towel—never directly onto the engine components. This simple step gives you total control, preventing overspray from landing on painted fenders or other surfaces where it doesn't belong. Gently wipe a thin, even coat onto all the plastic and rubber you see.
Once everything is coated, that's it. Close the hood, step back, and admire your handiwork.
Common Engine Cleaning Questions Answered
https://www.youtube.com/embed/HtCBMMMwoIU
Even with the best guide in hand, it’s natural to still have a few questions. When you're about to spray water and cleaner around your car's engine, a bit of extra assurance can make all the difference. Let's tackle some of the most common things I get asked, so you can move forward with confidence.
One of the first questions that always comes up is about frequency. So, how often should you really be cleaning your engine bay? For the average person driving to work and back, a good cleaning once or twice a year is plenty to keep grime from building up. But, if you're dealing with harsh conditions—think road salt in the winter or dusty country roads—you might want to bump that up to a seasonal cleaning, maybe every 3-4 months.
Then there's the great pressure washer debate. Can you use one? Yes, but with a major caveat: only use the absolute lowest pressure setting. High pressure is a surefire way to blast water past the electrical connectors you so carefully covered. That can quickly lead to a car that won't start and an expensive chat with your mechanic. Honestly, a regular garden hose with a decent spray nozzle is the safer, smarter choice.
Is It Safe to Clean an Older Engine?
Cleaning the engine of a classic car or a vehicle with high mileage is not only possible but also a great idea. You just have to be a little more careful. Over the years, the rubber hoses and plastic wire sheathing on older cars can get brittle and fragile.
With these vehicles, it's wise to skip the aggressive, solvent-based degreasers. Instead, reach for a gentler, pH-neutral all-purpose cleaner or a citrus-based product. You'll also want to use a delicate touch when you scrub—think soft-bristled brushes only. The goal here is patient, gentle cleaning, not brute force.
If there’s one thing to remember, it’s this: A successful engine detail is 90% meticulous preparation and just 10% actual washing. Taking the time to protect electronics and use the right water pressure is what separates a great result from a costly mistake.
It's great to see more car owners taking engine care seriously. This is part of a much bigger trend in the automotive world. The global car detailing market was valued at about USD 37.41 billion in 2024 and is on track to grow substantially. It just shows how much people value keeping their vehicles in top condition. You can discover more insights about engine cleaning market trends on imrmarketreports.com.
Ready to get that deep, professional-level clean without all the fuss? The SwiftJet foam gun turns your standard garden hose into a serious foaming machine. It helps your degreaser stick to every nook and cranny for maximum effect. Get your SwiftJet foam gun today and make your next engine detail the best one yet!