
So, how does a simple foam gun turn a dribble of car soap and water from your garden hose into that thick, satisfying foam? It’s all about a brilliant bit of fluid dynamics, creating a blanket of suds without needing a pressure washer.
As water flows from your hose and into the gun, it passes through a narrow chamber. This constriction forces the water to speed up, which in turn creates a vacuum—a little low-pressure zone. This vacuum is strong enough to siphon soap right out of the bottle you've attached. It's a clever trick that pulls just the right amount of concentrate into the stream.
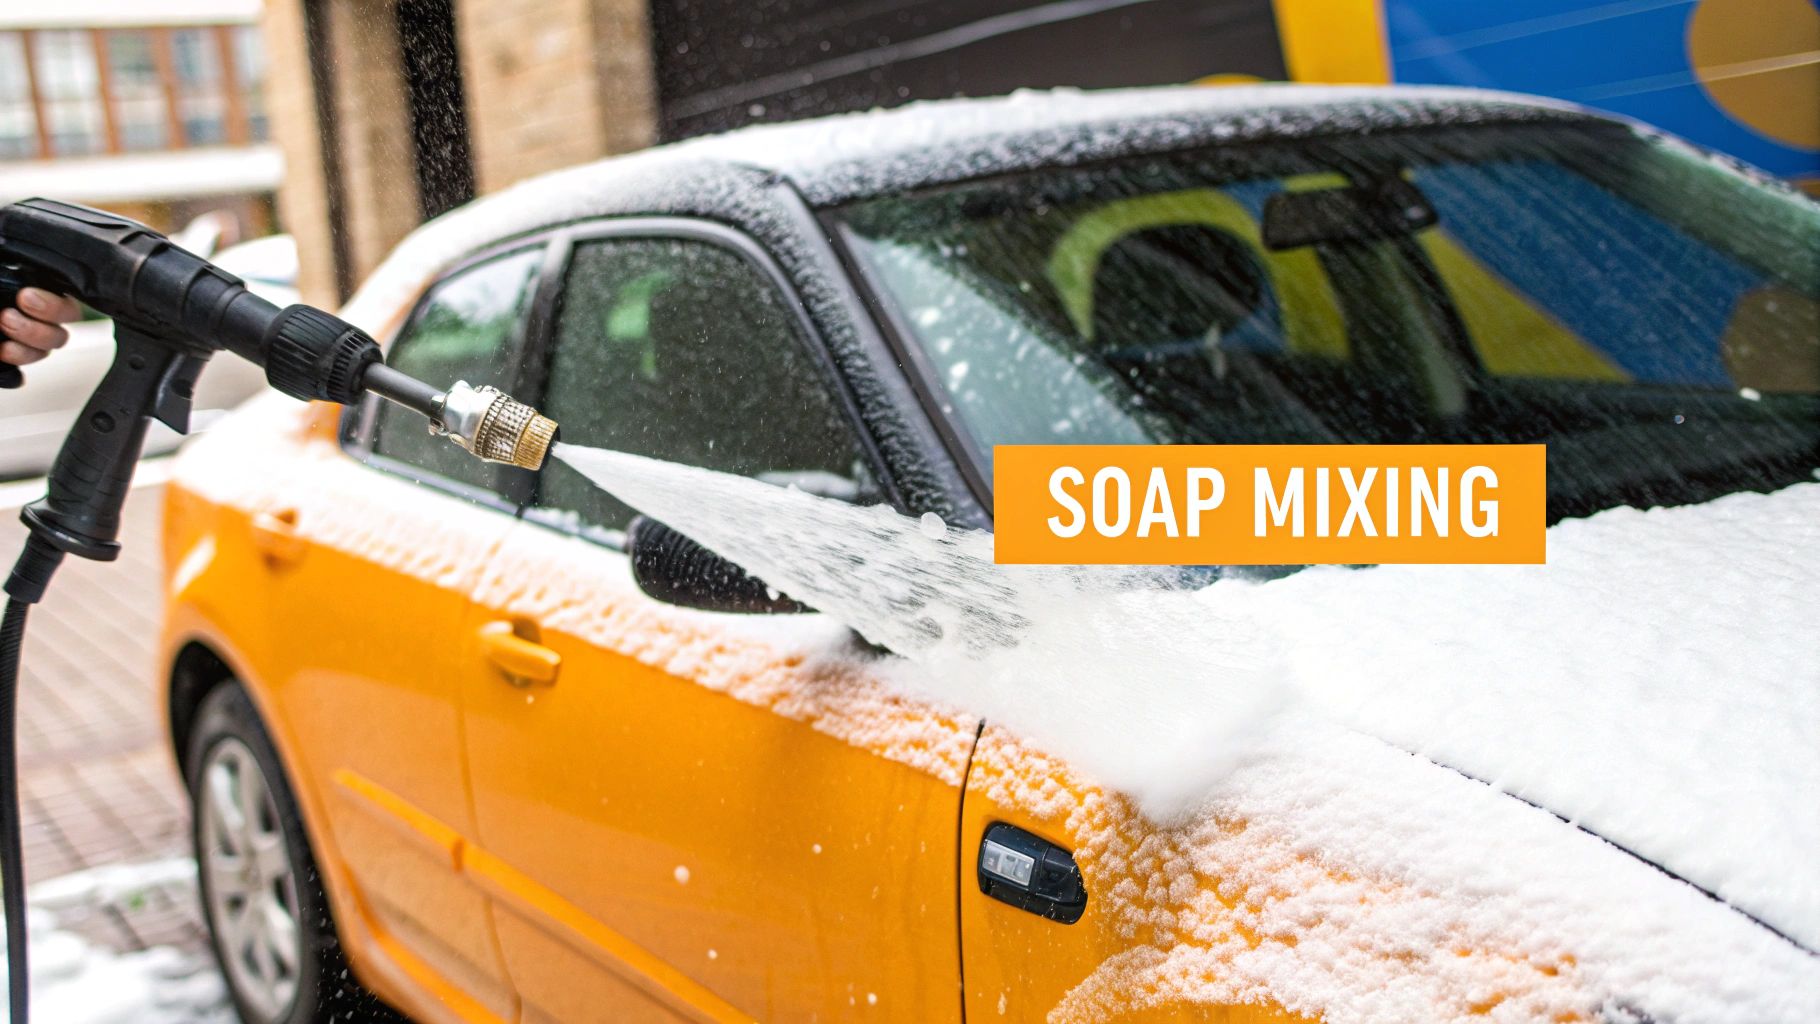
This soap-and-water mix is then shot through a special aerator, which is basically a mesh screen or series of small holes. Air gets forcefully mixed in, whipping the liquid into the clinging foam that’s perfect for safely lifting dirt off your car's paint.
Unlocking the Secret of Suds
Ever wondered how a simple garden hose attachment can create such rich foam? It all comes down to a clever bit of physics and smart design, bringing a pro-level wash into your own driveway.
Unlike a high-powered foam cannon that needs a pressure washer to work, a foam gun is built to run on the much gentler flow from a standard home spigot. This makes it a safer and incredibly convenient tool for keeping your car looking its best week after week.
The magic behind it all is a scientific principle known as the Venturi effect. This is the secret sauce that makes the whole thing work. The gun essentially becomes a miniature foam factory in your hand, turning a simple mix of soap and water into a powerful cleaning agent.
The Core Operating Principles
Let's break down exactly what’s happening inside that little device. It’s a beautifully simple, four-step process.
- Water In, Pressure Up: Your garden hose pushes water into the foam gun’s body, providing the initial force.
- The Siphon Effect: As that water is forced through a narrow point, it creates a low-pressure zone that sucks the car shampoo up from the reservoir. Think of it like a tiny straw.
- Whipping It into Foam: The soap-and-water solution is then blasted through an aerator. This injects air and agitates the mixture, whipping it into a thick, bubbly foam.
- Ready for Application: Finally, a nozzle shapes the foam into a wide, even spray pattern, letting you coat your vehicle in seconds.
This is what allows the foam to cling to your car's paint, giving the soap’s cleaning agents enough time to surround and loosen stubborn dirt and grime.
The real win here isn’t just making foam for show. That thick layer of suds provides essential lubrication between your wash mitt and the paint, which dramatically cuts down on the risk of creating swirl marks and fine scratches.
To make it even clearer, let's look at the entire process from start to finish.
The table below breaks down each core step of the operation, from the moment you squeeze the trigger to when the foam hits your car. It’s a great way to see how each part of the process builds on the last.
Key Stages of Foam Gun Operation
| Stage | What Happens | Key Principle |
|---|---|---|
| 1. Water Entry | Water from a standard garden hose enters the foam gun's main body. | Initial Force: The hose provides the necessary water pressure to start the process. |
| 2. Venturi Effect | Water is forced through a narrow orifice, causing it to speed up and create a low-pressure area. | Fluid Dynamics: Faster-moving fluid exerts less pressure, creating a natural vacuum. |
| 3. Soap Siphoning | The vacuum pulls car soap concentrate from the attached canister into the water stream. | Pressure Differential: The higher atmospheric pressure in the bottle pushes soap into the low-pressure stream. |
| 4. Aeration | The soap and water mixture is injected with air as it passes through a mesh screen or aerator tip. | Agitation: Forcibly mixing air into the liquid creates a stable bubble structure, or foam. |
| 5. Foam Application | The fully formed foam is projected through a nozzle, allowing for even coverage on the vehicle. | Dispersion: The final nozzle shapes the foam into a wide, controllable spray pattern. |
As you can see, it's a straightforward but highly effective system. Each stage plays a critical role in transforming basic ingredients into a high-performance cleaning foam, all without the need for expensive equipment.
Breaking Down the Foam Gun: A Look Inside the Tool
To really get a feel for how a foam gun turns a trickle of soap and water into a blizzard of suds, you have to look at its individual parts. It’s not some overly complicated machine; think of it more like a handheld foam factory where every component has a specific job to do. When they all work in harmony, you get that thick, satisfying foam that makes washing your car so effective.
This handy tool connects right to a standard garden hose, making it a go-to for DIY detailers everywhere. It’s a low-pressure system, which means it’s both water-wise and incredibly gentle on your car’s paint. This is a big difference from high-pressure foam cannons that require a pressure washer, making foam guns ideal for more delicate finishes.
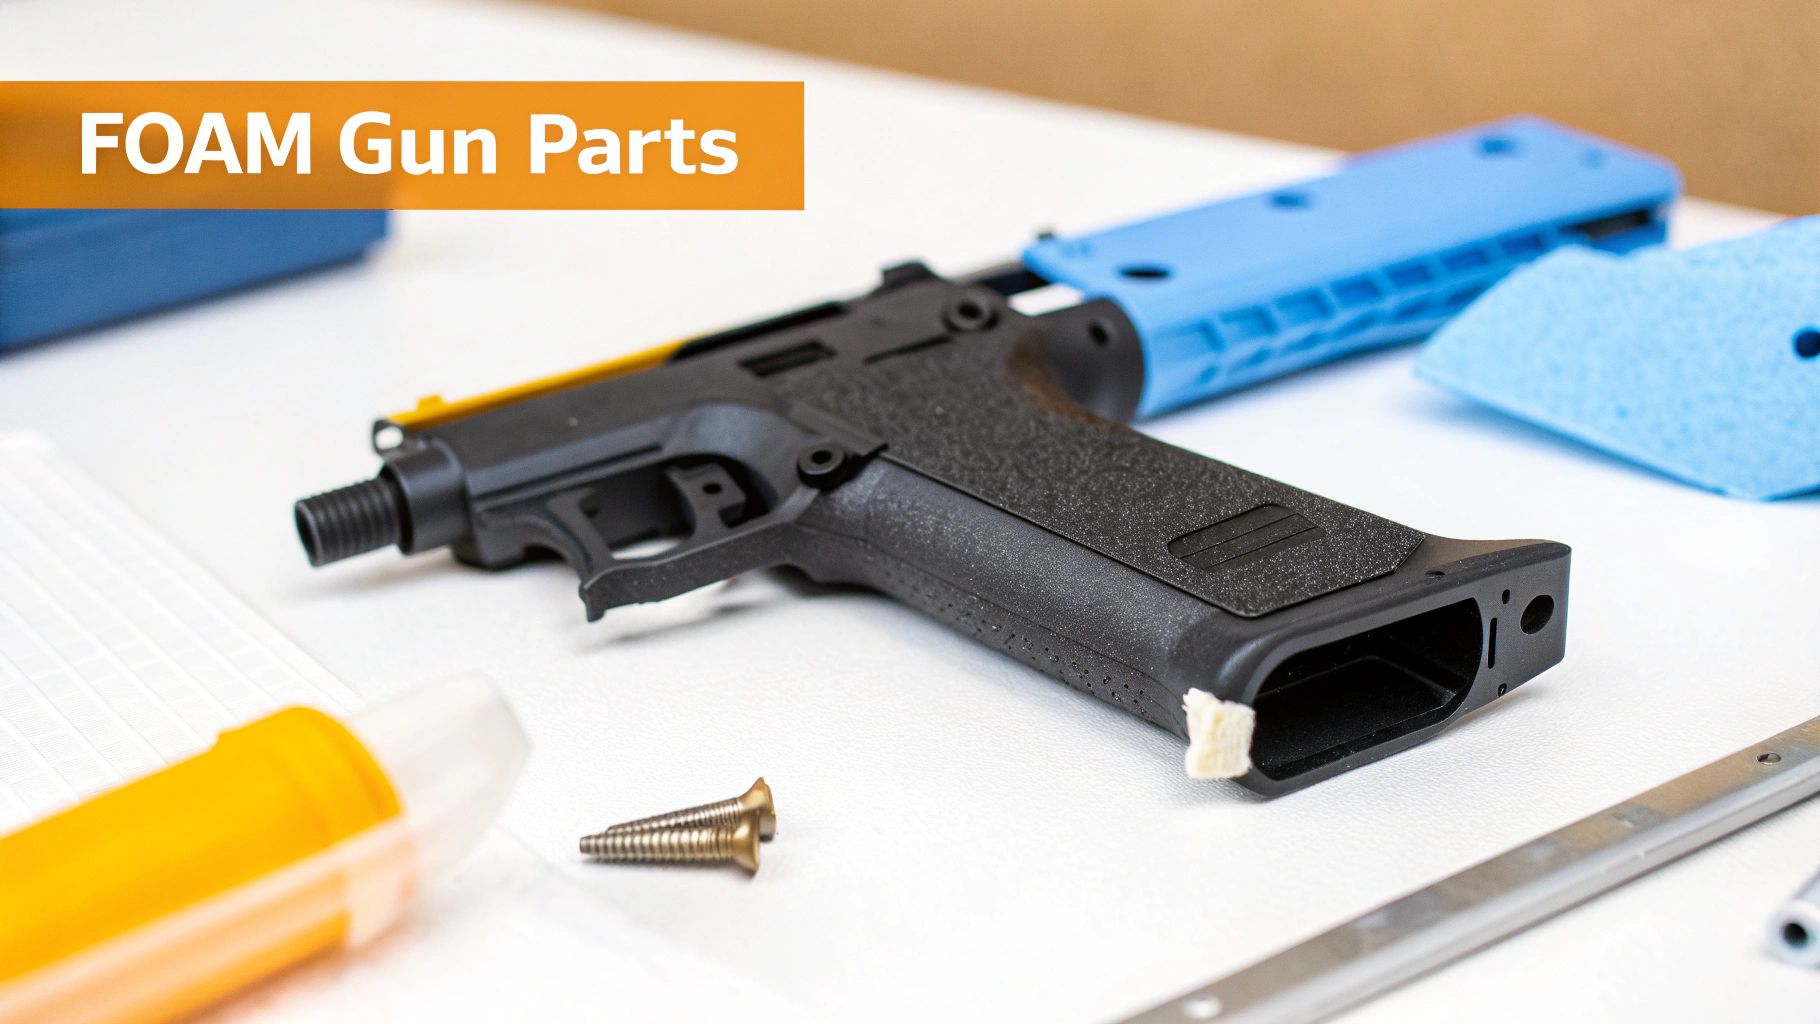
The Core Components and Their Roles
At its core, a foam gun is a pretty straightforward assembly. Let's pop the hood and see what makes it tick.
-
Hose Nozzle/Connector: This is where it all begins. Typically made from tough brass or high-impact plastic, this piece creates a solid, leak-free seal with your garden hose. No drips, no fuss—just a steady stream of water into the gun.
-
Main Body/Trigger Assembly: Think of this as the chassis. It's the central hub that contains all the internal plumbing. Water rushes through here, creating the suction that pulls soap into the mix. The trigger is your command center, giving you instant on/off control.
-
Soap Canister: This is your mixing tank. It's usually a clear bottle where you’ll combine your concentrated car soap and water. Most have handy measurement marks right on the side to help you nail the perfect dilution ratio for thick, clingy foam.
Creating and Controlling the Foam
The real magic, however, happens in the smaller, more precise parts of the tool. These are the components responsible for turning a simple soap-and-water solution into a powerful cleaning foam.
The most crucial parts are the siphon tube and the mixing dial. One pulls the fuel (soap) into the engine, while the other lets you control how rich the mixture is. Mastering these two elements is the key to perfect foam every time.
The siphon tube works just like a drinking straw. It runs from the gun's main body down into the soap canister. As water shoots through the gun at high speed, it creates a low-pressure zone—a vacuum—that sucks the soap solution up the tube and injects it directly into the water stream.
That's where the mixing dial comes in. This little knob is your secret weapon for foam control. By turning it, you can adjust exactly how much soap gets siphoned into the water. This lets you go from a light, watery lather for a quick rinse all the way to a super-thick, shaving-cream-like foam for cutting through heavy grime. If you're looking for help on what to buy, you might be interested in our ultimate guide to choosing an auto foam gun for perfect car cleaning.
Finally, the spray nozzle at the very tip shapes the final product. It often has a built-in aerator screen that violently whips air into the soap and water mixture. This is what generates that rich, bubbly foam just before it’s sprayed out in a wide, fan-like pattern for maximum coverage on your car.
The Simple Science of Creating Car Wash Foam
The thick, satisfying foam that erupts from your foam gun isn't magic—it's just a clever bit of physics in action. The whole process hinges on a really neat principle called the Venturi effect. Once you get this one concept, you'll understand exactly how your foam gun creates such amazing suds using nothing more than a standard garden hose.
Think about putting your thumb over the end of that hose. The water speeds up, right? That’s the core idea. When water is forced through a narrowed section of a pipe, its speed increases, and its pressure drops. This drop in pressure is the secret ingredient the foam gun is built to create.
Inside the gun’s main body, there's a small chamber designed to be that choke point. Water from your hose rushes in, accelerates through this narrow space, and creates a small pocket of low pressure. Essentially, it becomes a tiny, powerful vacuum.
The Power of the Vacuum
This vacuum is the engine that drives the whole foam-making show. A siphon tube runs from this low-pressure zone down into your soap canister. Suddenly, the normal air pressure inside the soap bottle is way higher than the pressure in the fast-moving water stream.
That pressure difference does all the work, pushing car soap up the tube and injecting it right into the water. It’s the same basic idea behind a perfume atomizer or a simple spray bottle—a rush of air or water creates suction that pulls liquid up and into the flow.
The Venturi effect provides a brilliant, non-mechanical way to mix soap and water perfectly. There are no pumps or complicated parts; the gun just uses the water pressure you already have to do all the heavy lifting.
Once the soap concentrate gets pulled into the stream, it’s instantly mixed. But at this point, it's just soapy water, not the thick foam we’re after. The final, and most important, step is still to come. If you're new to this, getting the steps right is key, which is why we put together a full guide on https://www.swiftjetusa.com/blogs/news/how-to-use-a-foam-gun for the best results.
From Soapy Water to Thick Foam
The last part of the transformation happens right at the nozzle. This freshly mixed soap-and-water solution is blasted through a mesh screen or a series of tiny, specialized holes. This part is often called an aerator.
As the mixture is forced through the aerator, it gets churned up violently, infusing it with air. This process whips the liquid into a stable structure of tiny, uniform bubbles, creating the thick, clinging foam you want for washing your car. The entire sequence—from water entering the gun to foam hitting your car—happens in the blink of an eye.
Here’s a quick recap of the journey:
- Acceleration: Water from your hose speeds up as it passes through a narrow chamber in the gun.
- Suction: This high-speed flow creates a low-pressure zone (the Venturi effect), siphoning soap from the canister.
- Aeration: The soap-and-water mix is then blasted with air, turning it into dense foam.
This simple three-step process is a perfect example of fluid dynamics turning basic ingredients into a powerful and effective cleaning tool.
From Turning on the Tap to Covering Your Car
Knowing the individual parts is one thing, but seeing how they all dance together is where the magic really happens. Let’s trace the journey from the moment you turn on your garden hose to when your car is wrapped in a thick blanket of suds. This is how a foam gun actually works in practice, step-by-step.
It all kicks off the second you squeeze the trigger. Water from your hose rushes into the gun's body and is immediately forced through a narrow internal channel, causing it to speed up dramatically. This sudden acceleration is the engine that drives the entire process.
This high-speed water jet creates the low-pressure zone we talked about—that classic Venturi effect—which acts like a tiny, powerful vacuum. In an instant, the soap solution you mixed in the canister is sucked up through the small tube and injected right into that fast-moving stream of water. It's a remarkably efficient mixing process that happens with zero moving parts.
Controlling Your Foam Consistency
This is the point where you take control. The mixing dial, usually found on top of the foam gun, is your command center for foam thickness. It works by simply adjusting the size of the opening that lets the soap into the water stream.
- Thinner Foam: A lower setting on the dial means less soap is pulled in. This creates a lighter, runnier lather that’s perfect for a quick rinse or a maintenance wash on a car that's not too dirty.
- Thicker Foam: Cranking the dial to a higher setting opens that valve up, allowing more soap concentrate to join the party. The result? That dense, shaving-cream-like foam that’s ideal for breaking down heavy dirt and grime.
This simple adjustment is what makes the foam gun such a flexible tool for any detailing job.
The image below breaks down these three core stages, from the initial water pressure to the rich foam that comes out the other end.
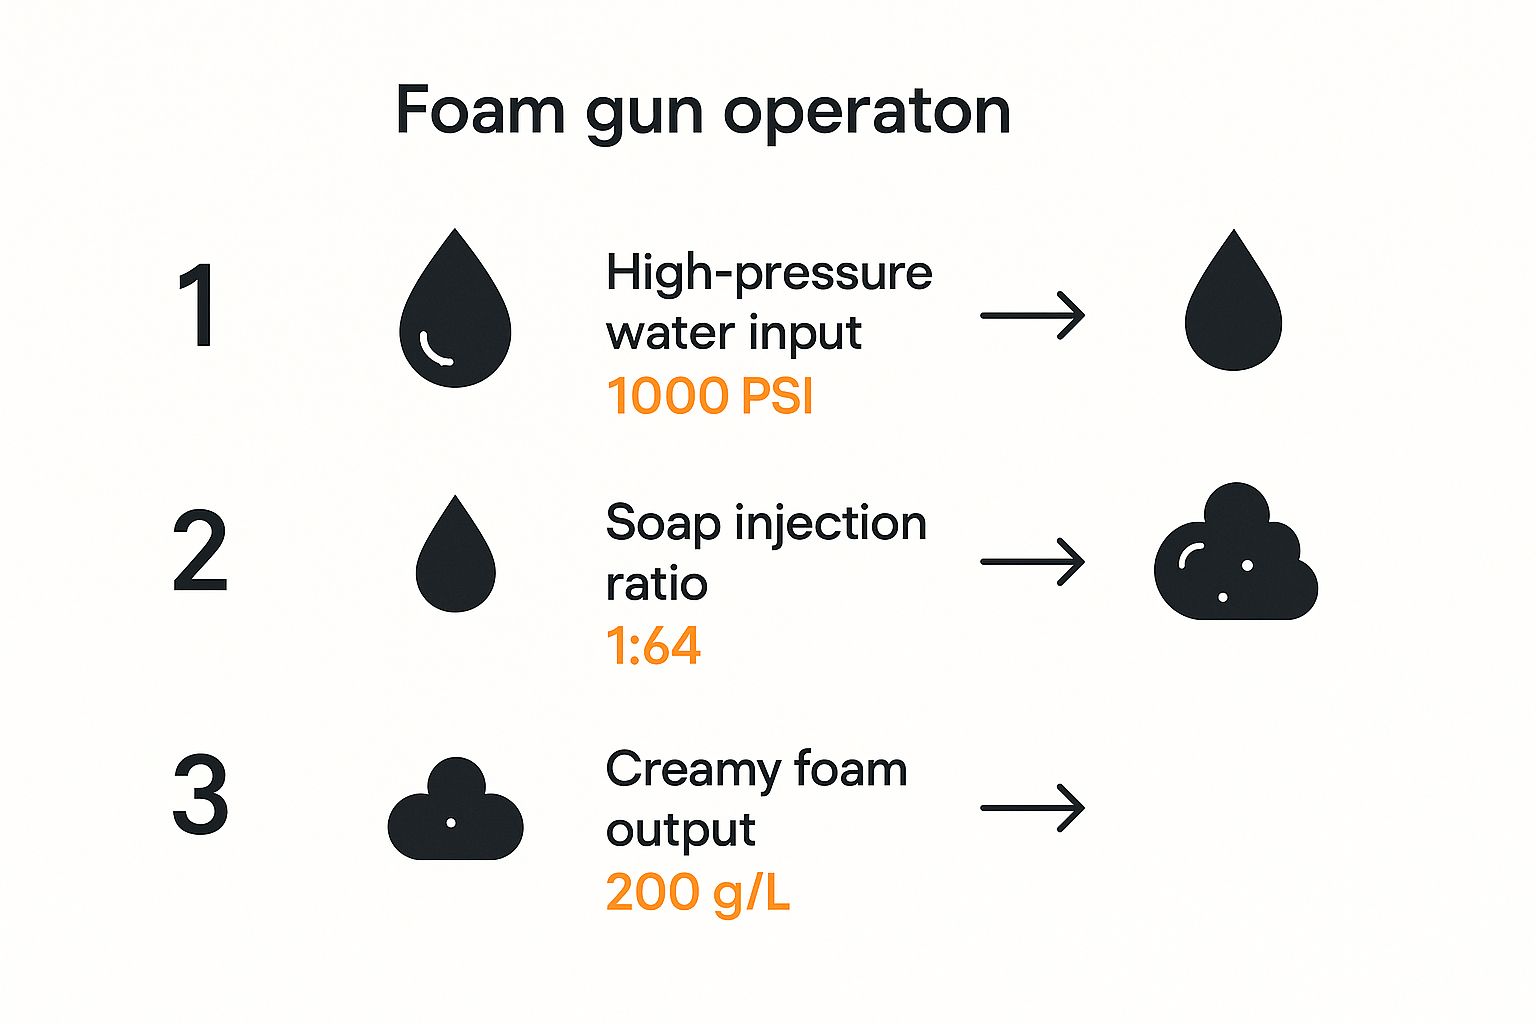
As you can see, each stage directly sets up the next one. It's a chain reaction that turns your garden hose into a high-quality foam-generating machine.
The Final Transformation into Suds
Now, the perfectly blended mix of soap and water embarks on its final, transformative journey. It’s blasted at high speed through a mesh aerator screen tucked inside the spray nozzle. Think of it like a whisk in a mixing bowl. This violent agitation is the last critical step, forcefully whipping air into the liquid and exploding it into millions of tiny, stable bubbles.
Getting the soap dilution right is key here. While the ideal ratio can vary depending on the soap, a good starting point is usually around one ounce of soap for a standard wash. From there, you can experiment. For some great tips on dialing in the perfect mix and seeing it in action, check out this helpful video guide.
The final result is a wide, fan-shaped spray of thick, clinging foam that blankets your vehicle. In just a few seconds, the foam gun has taken simple tap water and a splash of soap and turned them into a powerful, paint-safe cleaning solution, ready to lift dirt away.
Why Foam Guns Are a Detailer's Best Friend
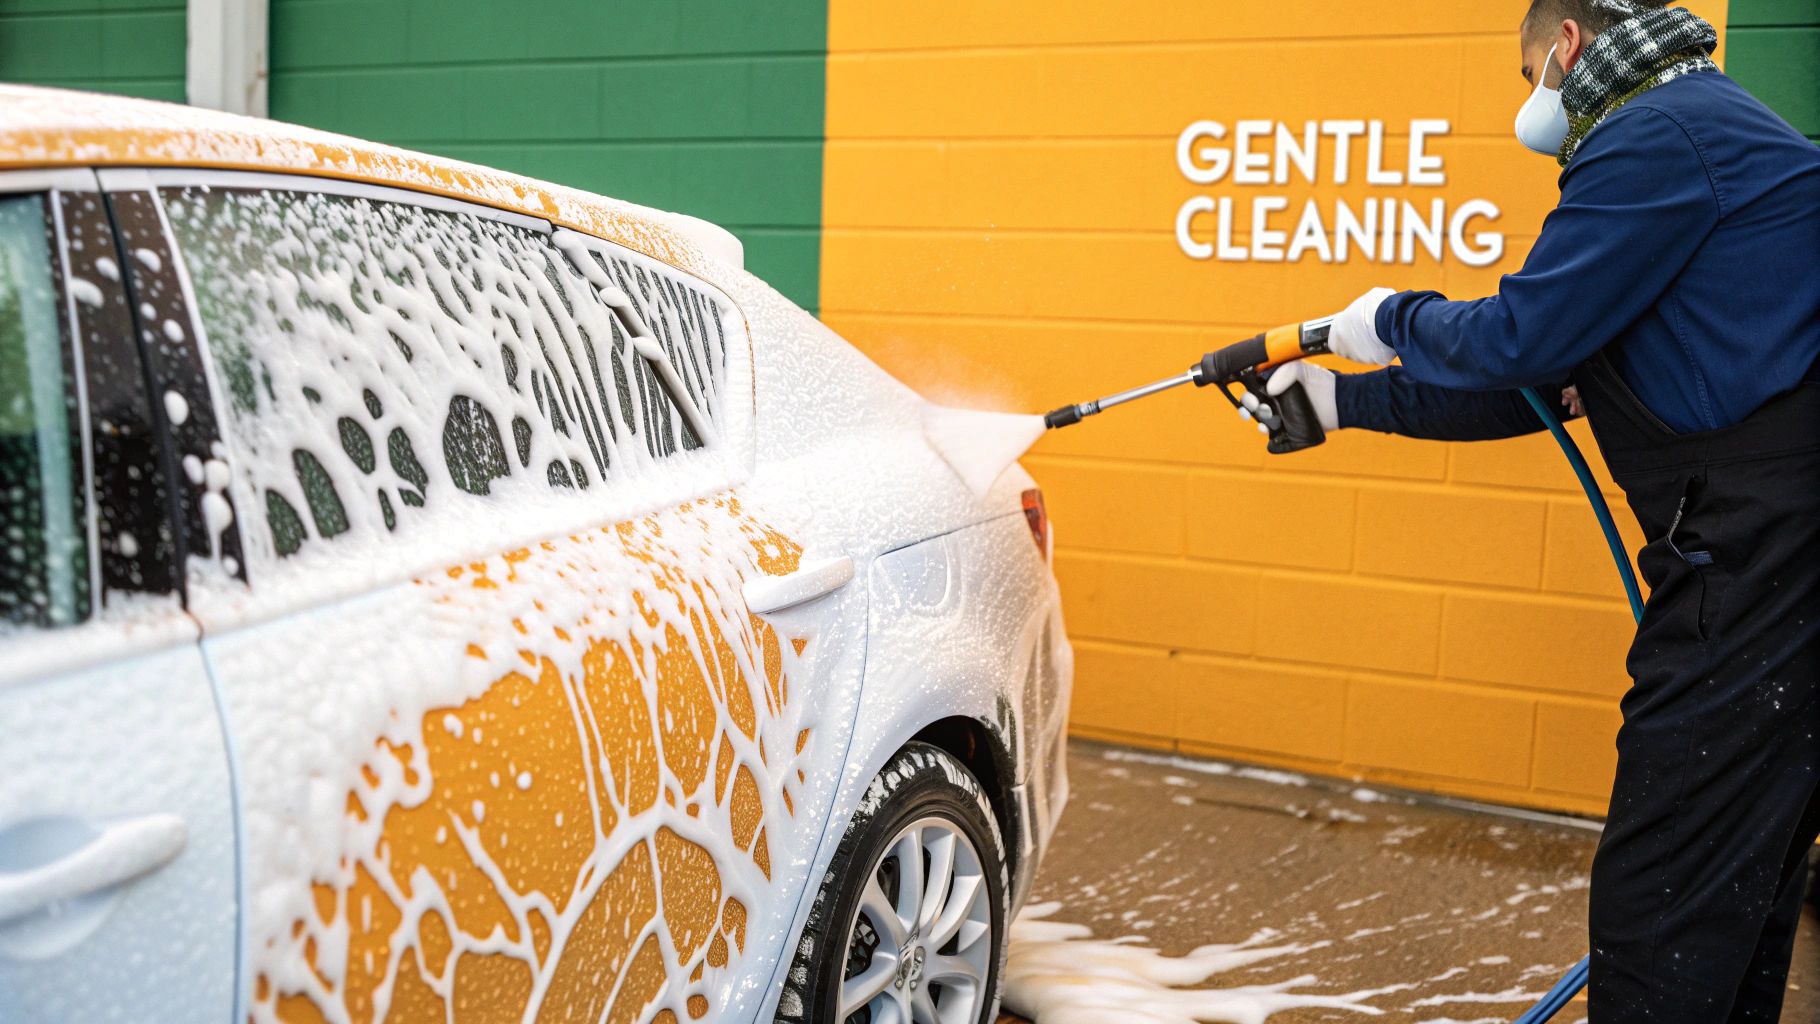
If you really want to understand why a foam gun is an absolute must-have for anyone serious about their car's finish, you need to look at how it works. That thick, shaving-cream-like foam isn't just for show; it's your first and best line of defense against the number one cause of paint damage—bad washing habits.
When you blanket your car in that rich layer of suds, you're kicking off a critical pre-soak. The foam gets to work right away, softening and lifting away all the nasty, abrasive stuff like dirt, sand, and road grit. By the time you actually touch the paint with a wash mitt, the most damaging particles have already been loosened, ready to be rinsed away harmlessly.
The Swirl Mark Prevention System
Swirl marks are the mortal enemy of a perfect finish. Those tiny, circular scratches are caused by dragging grit across your paint during a wash. A foam gun is one of the most effective tools to fight this because it creates a super slick, lubricated barrier between the paint and your wash mitt.
Think of the suds as a cushion. Your mitt glides effortlessly over the surface instead of grinding in the dirt. This gentle touch is the key to keeping that deep, mirror-like shine on your paint for years. For more tips on getting it right, check out our guide on how to wash your car at home for perfect results.
By pre-soaking with foam, you transform your car wash from a potentially abrasive process into a gentle, protective treatment. It’s the difference between scrubbing a dirty pan and letting it soak first—one method requires force, while the other lets the cleaning agents do the heavy lifting.
Gentle Power for Delicate Surfaces
Unlike a pressure washer that can force water into places it shouldn't go, a foam gun works with your standard garden hose pressure. This makes it a much safer bet for the more fragile parts of your vehicle.
Here’s why that matters:
- Protecting Waxes and Sealants: The lower pressure won't strip away your expensive protective coatings, helping that wax or sealant job last much longer.
- Safe for Trim and Emblems: It's gentle enough for plastic trim, rubber seals, and intricate emblems that a high-pressure blast could easily damage.
This combination of low-pressure and high-efficiency is what makes the foam gun a detailer's secret weapon. It makes the entire wash process safer and more effective, which aligns perfectly with good car maintenance tips. The growing popularity of these tools shows a big shift toward DIY car care, with more owners wanting pro-level results from gear they can actually use. The fact that you just click it onto a garden hose has made it a garage staple everywhere, as you can see in this overview of modern detailing tools.
Troubleshooting Common Foam Gun Issues
Even the best tools have an off day. When your foam gun suddenly stops cooperating, a few simple checks are usually all it takes to get back to covering your car in thick, satisfying suds. Knowing what makes these things tick is half the battle when it comes to fixing them.
Most of the time, the problem comes down to a handful of usual suspects related to the flow of water and soap. The most common complaints I hear are about thin, watery foam or the gun refusing to pull any soap at all. Luckily, the fixes are almost always quick and easy.
What to Do When Your Foam is Watery
If you're getting a weak, runny lather instead of shaving cream-like foam, the first place to look is your soap-to-water ratio. Using too little car soap concentrate is the number one cause of pathetic foam. Always check the soap bottle for the recommended foam gun dilution—it’s usually quite different from what you'd use in a regular wash bucket.
Another culprit could be your water pressure. You need a good, strong flow from your garden hose for the foam gun to work its magic. Make sure your spigot is cranked all the way open and that your hose isn't kinked up, strangling the flow. That water velocity is what creates the suction to pull soap from the canister in the first place.
Here's a pro tip: pop open the sprayer housing and check the small mesh filter inside. Over time, that little screen can get gunked up with dried soap or hard water minerals. A clogged filter kills the aeration process, leaving you with sad, droopy foam.
How to Fix a Gun That Won't Siphon Soap
Is your foam gun spraying nothing but plain water? This almost always points to a problem with the siphon tube. The first check is the simplest: make sure the tube is pushed firmly onto the gun's body and that the other end is actually sitting in the soap solution inside the canister.
If it’s connected properly, the tube itself might be blocked. Pull it off and run some warm water through it to flush out any hardened soap crud. You should also check your soap's consistency. Some super-thick concentrates might need a splash of water mixed in with them in the canister to thin them out enough to be siphoned easily.
Here’s a quick checklist to run through:
- Weak Foam? Add more car soap concentrate to the canister.
- Low Pressure? Open the spigot fully and straighten out any kinks in your hose.
- No Soap? Check the siphon tube for clogs and rinse it with warm water.
- Still Weak? Clean the internal mesh filter to restore proper aeration.
Working through these points methodically will solve 99% of foam gun frustrations and get you back to enjoying a proper car wash.
Your Top Foam Gun Questions, Answered
Even after getting the full rundown on how these things work, there are always a few questions that come up. Let's tackle them head-on, because a little extra know-how is what separates a good wash from a great one.
Foam Gun vs. Foam Cannon: What's the Real Difference?
This is probably the most common point of confusion, but the answer is refreshingly simple.
It all comes down to the power source. A foam gun hooks up to a regular garden hose, making it a super accessible tool for just about anyone. A foam cannon, on the other hand, needs a pressure washer to do its thing.
Because of this, foam guns are a gentler, lower-pressure option. They're perfect for your regular maintenance washes because they won't blast off the wax or sealant you've worked so hard to apply. Foam cannons create that crazy-thick, shaving-cream-style foam thanks to high pressure, but that comes with the added cost and complexity of a pressure washer.
How Can I Get Thicker, Richer Foam?
"Can I just use my regular car soap?" Yes, you can, but you'll get way better results with a soap made specifically for foaming.
Soaps formulated for foam guns are packed with surfactants—the magic ingredients that get bubbly when mixed with air and water. Switching to a dedicated foaming soap is hands-down the easiest upgrade you can make to your suds game.
Want to take it even further? Here are a few tricks I've learned over the years:
- Dial in Your Soap-to-Water Ratio: The instructions on the bottle are just a starting point. Feel free to experiment by adding a little more soap concentrate to get that perfect, clingy consistency.
- Know Your Water: If your home has hard water, you might notice your soap doesn't lather up as well. The minerals can interfere with sudsing, but you can usually fix it by simply adding a bit more soap to your mixture.
- Max Out the Dial: On your foam gun, you'll see a mixing dial. To get the thickest foam possible, crank that dial to the richest setting to pull the maximum amount of soap into the stream.
At the end of the day, a foam gun is an incredibly effective and safe tool for any enthusiast. Its real power lies in its ability to pre-soak your car, loosening up all that dirt and grime so you can wash it away without grinding it into your paintwork.
Ready to see what a difference a blanket of paint-saving foam can make? The SwiftJet Car Wash Foam Gun is designed to give you that pro-level clean right in your own driveway. Check it out and transform your wash day at SwiftJetUSA.com.