
Why Clear Headlights Matter More Than You Think
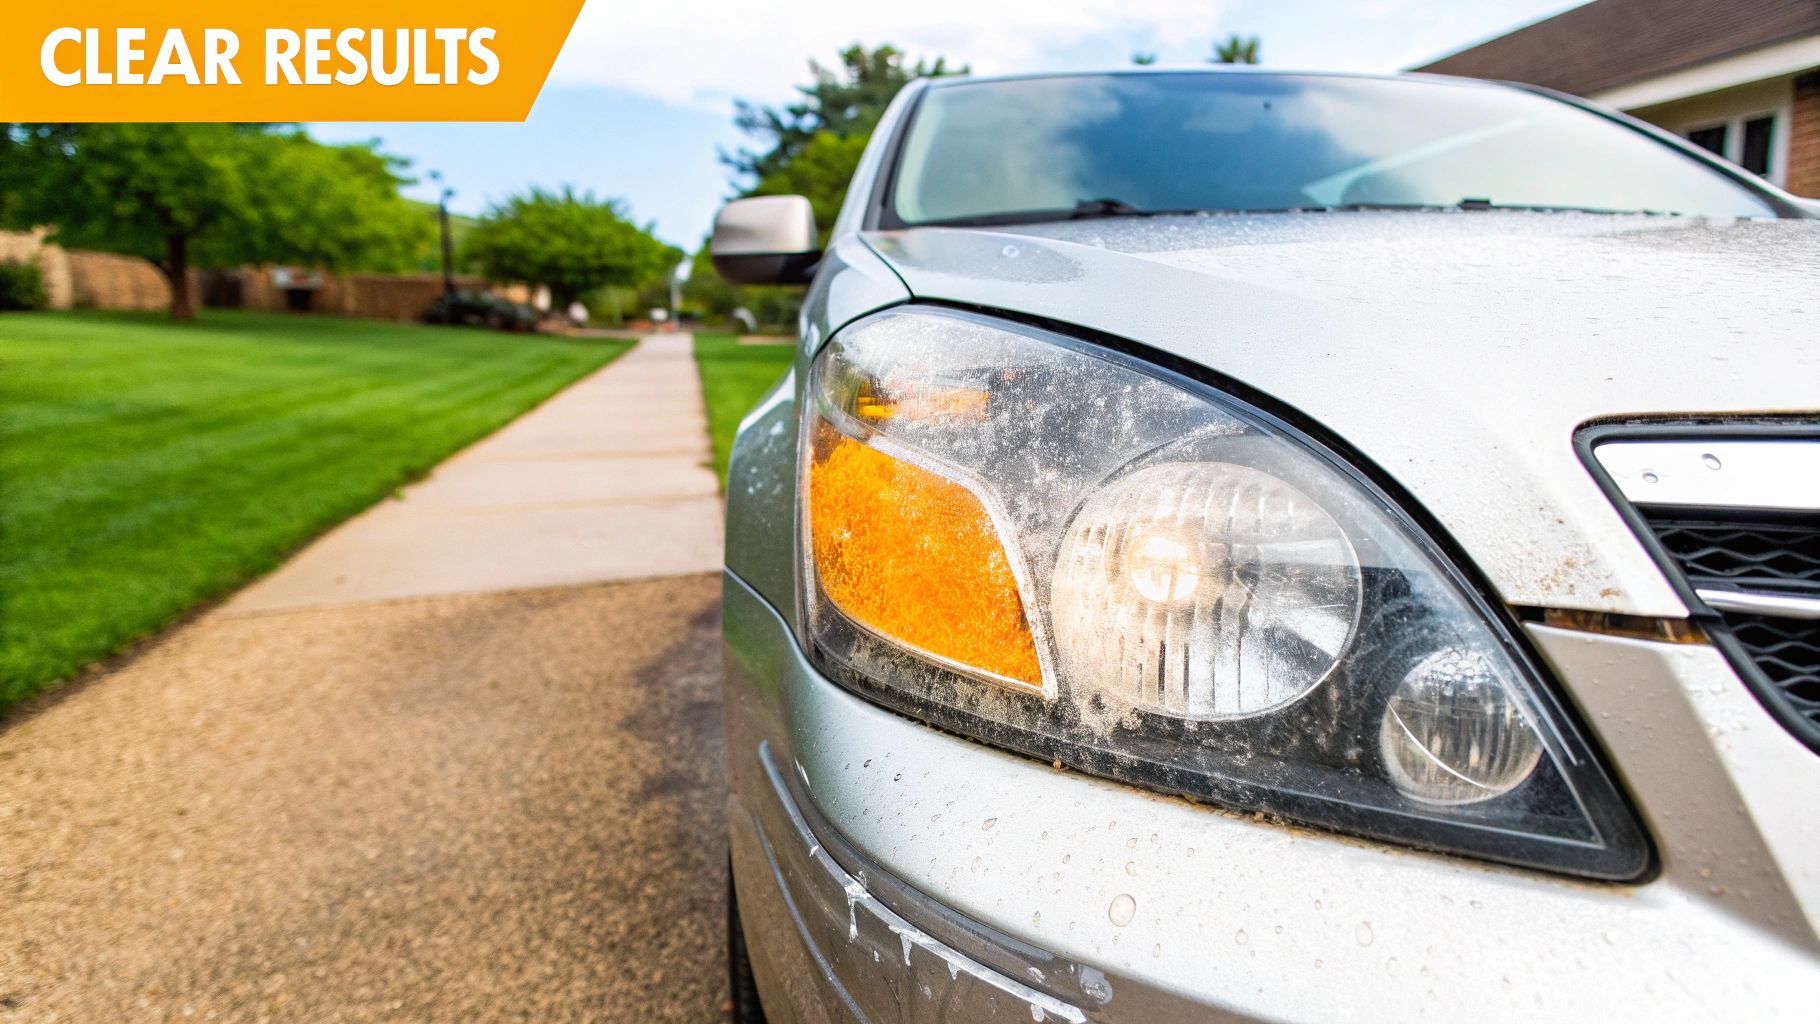
Driving at night with hazy headlights can be a dangerous experience. Reduced visibility makes it difficult to see pedestrians, obstacles, and road signs, increasing the risk of accidents, especially in adverse weather conditions. Clear headlights are crucial for safe nighttime driving, ensuring you can see and react to potential hazards effectively.
The Science Behind Hazy Headlights
Over time, your headlights are exposed to UV radiation from the sun and environmental contaminants. Road grime, bugs, and airborne pollutants degrade the polycarbonate lens, causing oxidation and cloudiness. This scatters the light emitted by the bulb, reducing its effectiveness. Even with high beams on, your visibility is significantly compromised. You might be interested in learning more about car washing techniques: How to master car washing with a spray gun.
The Cost of Neglecting Your Headlights
Ignoring hazy headlights has safety and financial implications. Replacing headlights can be expensive, ranging from $200 to $500 or more depending on your vehicle. However, restoring your headlights with a homemade cleaner offers a cost-effective alternative. This restores clarity at a fraction of the replacement cost.
Headlight Restoration: A Growing Market
The demand for headlight restoration is increasing globally, driven by the need for affordable alternatives to lens replacement. This market is projected to grow significantly by 2030. Find more detailed statistics here. Professional restoration costs between $50 and $200, while DIY solutions can cost as little as $5 to $20. This cost difference makes DIY an attractive option for budget-conscious car owners.
Beyond Safety and Savings: The Resale Value Boost
Restoring your headlights also benefits your vehicle's resale value. Hazy headlights can suggest neglect to potential buyers, potentially lowering their offers. By restoring your headlights, you present a well-maintained vehicle, potentially increasing its perceived value. This simple DIY task enhances safety, saves money, and can boost your car's resale value.
Household Heroes: The Secret Ingredients That Work
Maintaining your car's lights is crucial for safe driving. Proper visibility ensures you can see the road clearly and that other drivers can see you. Learn more about car lights and general care tips. Surprisingly, effective solutions for foggy headlights might already be in your kitchen. Common household items can sometimes outperform expensive commercial products. Understanding the science behind these ingredients is the key to achieving a brilliant shine.
The Power of Baking Soda
Baking soda is a common household item with excellent cleaning properties. It acts as a gentle abrasive, similar to microscopic sandpaper. This helps smooth away the oxidized layer on your headlights without causing scratches. This gentle abrasive action is ideal for removing minor hazing and restoring clarity. A simple application of baking soda on a damp cloth can often remove light oxidation quickly.
Vinegar’s Acidity: A Chemical Breakdown
Vinegar, known for its acidity, works by chemically breaking down the yellowing caused by UV rays and environmental contaminants. This makes vinegar particularly effective on headlights with more severe oxidation, where a simple abrasive might not be enough. Vinegar also has degreasing properties that help remove road grime and bug residue.
Dish Soap’s Degreasing Power
Dish soap is a vital component in the headlight cleaning process. Its main function is to cut through the grease and grime that builds up on your headlights. This greasy film can hinder other cleaners, preventing them from effectively reaching the oxidized layer. Starting with a thorough wash using dish soap is crucial for optimal results, ensuring the effectiveness of subsequent cleaning steps.
Separating Fact From Fiction: The Toothpaste Myth
While some DIY methods recommend using toothpaste, it's not always the best choice. Some toothpastes contain abrasive particles that can scratch your headlights, potentially causing more harm than good. While toothpaste might offer temporary improvement, it could lead to long-term damage. If you choose to use toothpaste, opt for a non-gel, whitening formula, and apply it sparingly.
Targeting Specific Headlight Conditions
The ideal homemade headlight cleaner depends on the condition of your headlights. For light hazing, a baking soda solution might be sufficient. For more severe oxidation, a combination of baking soda, vinegar, and dish soap is generally more effective. Understanding which ingredients work best for specific conditions allows you to tailor your cleaning approach for the best results. This targeted approach saves time and effort while maximizing cleaning effectiveness.
5 Proven Homemade Headlight Cleaner Recipes That Amaze
Forget disappointing commercial headlight cleaners. Five proven homemade recipes, tested and refined by automotive enthusiasts, deliver impressive results. Whether your headlights have minor hazing or severe yellowing, a perfect solution awaits. Each recipe includes precise measurements, step-by-step instructions, and application tips based on your headlight's condition.
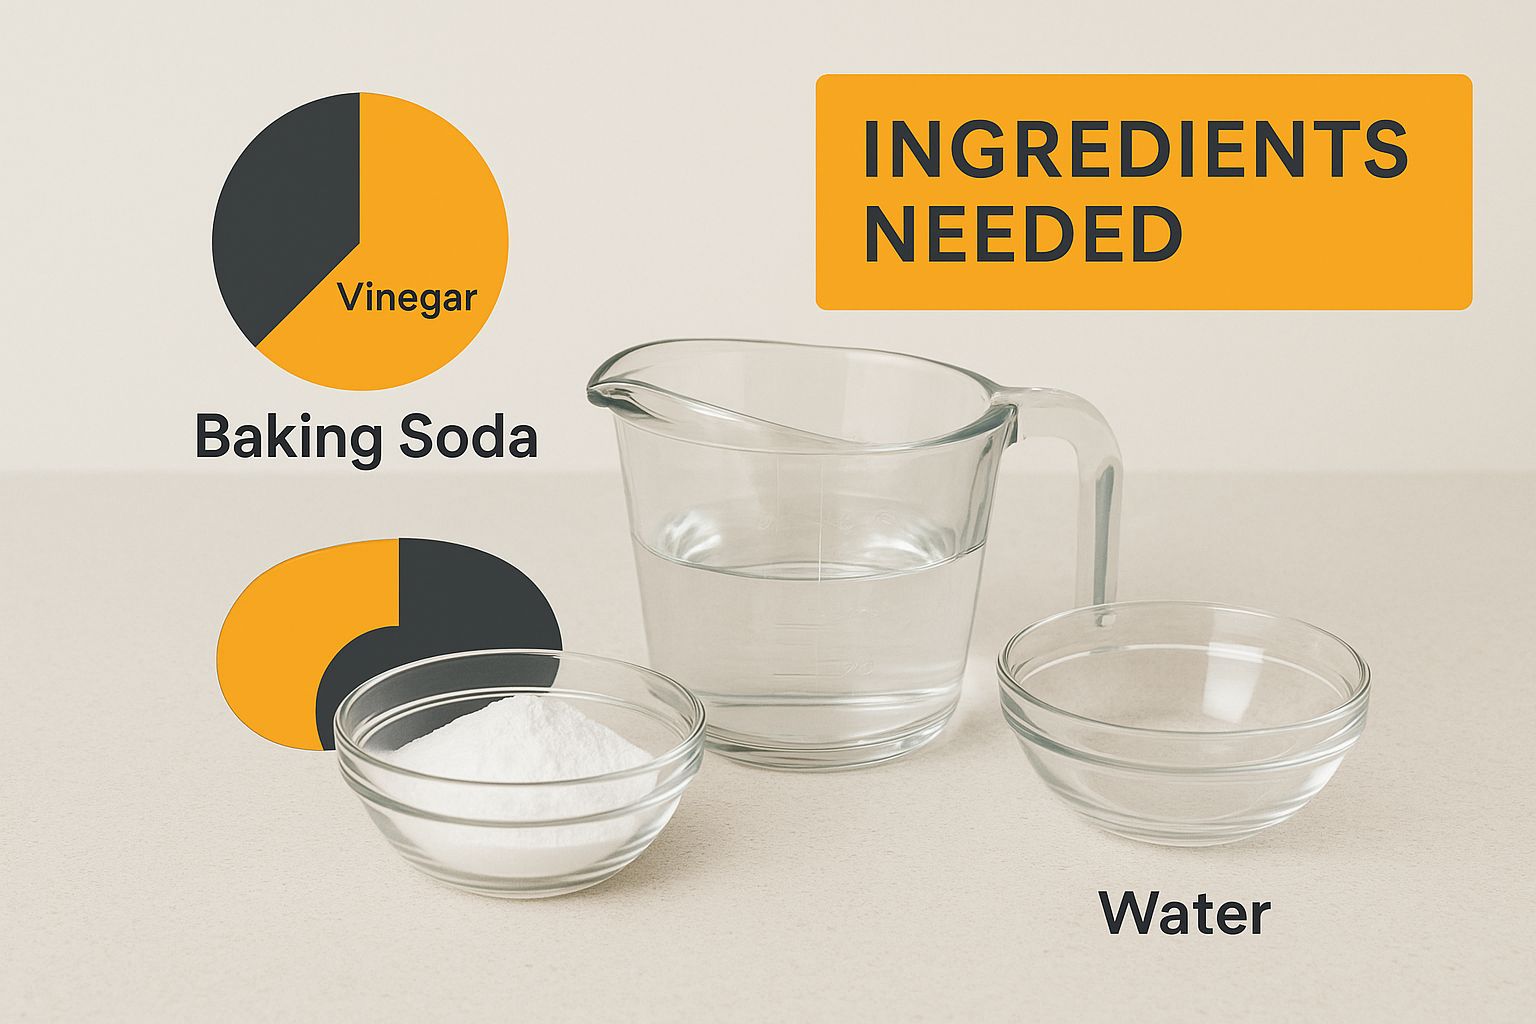
The infographic above visualizes the essential ingredients for homemade headlight cleaners: baking soda, vinegar, and water. The measuring cups emphasize the importance of accurate measurements for consistent and effective cleaning.
The Two-Ingredient Wonder: Baking Soda and Water
This simple paste tackles light oxidation quickly. Mix two tablespoons of baking soda with enough water to create a thick paste. Apply it to your headlights using circular motions with a soft cloth. Rinse thoroughly for restored clarity.
Vinegar Power: For Moderate Yellowing
For stubborn yellowing, use vinegar. Combine three tablespoons of baking soda with one tablespoon of white vinegar. The fizzing reaction lifts away grime. Apply the paste, let it sit for a few minutes, scrub gently, and rinse.
The Triple Threat: Baking Soda, Vinegar, and Dish Soap
This three-step solution combats heavy oxidation. First, wash with dish soap and water. Then, apply the baking soda and vinegar paste. Finally, polish with a microfiber cloth.
Citric Acid Solution: A Natural Brightener
Citric acid, found in lemon or lime juice, brightens naturally. Mix one tablespoon of citric acid powder (or the juice of two lemons) with one tablespoon of water. Apply the solution, let it sit for five minutes, then scrub and rinse.
Preventative Maintenance Formula: Baking Soda and Car Wash Soap
Maintain sparkling headlights with this gentle formula. Mix one tablespoon of baking soda with car wash soap. Wash your headlights weekly to prevent oxidation buildup. This proactive approach minimizes the need for intensive cleaning.
To help you choose the best recipe for your needs, we've compiled a comparison table detailing the ingredients, effectiveness, and cost of each method.
Homemade solutions and headlight restoration kits share similarities, reflecting a trend toward DIY. Learn more about the headlight restoration kit market. Homemade solutions can restore 70-90% of light output for mildly oxidized lenses, comparable to commercial kits.
The following table compares the five homemade headlight cleaner recipes discussed, showing their ingredients, effectiveness for different conditions, difficulty level, and estimated cost.
| Recipe | Main Ingredients | Best For | Preparation Time | Effectiveness Rating | Cost |
|---|---|---|---|---|---|
| Baking Soda & Water | Baking Soda, Water | Light Hazing | 2 minutes | Low | Very Low |
| Vinegar Power | Baking Soda, Vinegar | Moderate Yellowing | 3 minutes | Medium | Very Low |
| Triple Threat | Baking Soda, Vinegar, Soap | Heavy Oxidation | 5 minutes | High | Low |
| Citric Acid Solution | Citric Acid, Water | Natural Brightening | 3 minutes | Medium | Low |
| Preventative Maintenance | Baking Soda, Car Wash Soap | Preventing Oxidation | 2 minutes | Low (Preventative) | Very Low |
As you can see, the simplest recipes are excellent for maintenance and light hazing, while the more involved solutions are best for heavily oxidized headlights. Consider the condition of your headlights and the time you have available when choosing your method.
Choosing the Right Recipe
Selecting the right recipe depends on your headlight oxidation. For light hazing, the baking soda and water paste is sufficient. For moderate yellowing, the vinegar solution is recommended. For heavy oxidation, the triple threat or citric acid solutions are most effective. Regular maintenance with the preventative formula prolongs the results.
Application Secrets: From Cloudy to Crystal Clear
Knowing the right homemade headlight cleaner recipe is only half the battle. Proper application techniques can transform good results into spectacular ones. This is where the art of headlight restoration truly shines. Think of it like polishing a precious stone – the right technique reveals its brilliance.
Prepping for Success: The Foundation of a Flawless Finish
Before applying any cleaner, thoroughly wash your headlights with dish soap and water. This removes loose dirt and grime. This crucial step ensures the cleaner can effectively target the oxidation. It prevents the cleaner from getting bogged down in surface debris. Next, use masking tape to protect the surrounding paint. This prevents accidental damage and preserves your car’s finish.
The Art of Application: Circular Motions vs. Straight Lines
Forget scrubbing back and forth. Professional detailers use circular motions to apply homemade headlight cleaners. This technique distributes the cleaner evenly. It minimizes streaks and maximizes effectiveness. Imagine polishing a shoe – circular motions create a smooth, consistent shine. This same principle applies to headlight restoration.
Pressure Points: The Surprising Impact of Your Touch
The pressure you apply while cleaning significantly impacts the results. Too much pressure can scratch the lens. Too little pressure won’t effectively remove oxidation. Aim for consistent, moderate pressure. This ensures effective cleaning without the risk of damage. Think of kneading dough – consistent pressure achieves the desired texture.
Drying Techniques: The Secret Most DIYers Miss
After cleaning, immediately dry your headlights with a clean, microfiber cloth. Don't let them air dry. This can leave water spots and streaks. A microfiber cloth’s fine fibers absorb water effectively, leaving a spotless finish. This often-overlooked step is crucial for professional-looking results. Working in small sections ensures even coverage and prevents premature drying.
Choosing the Right Applicator: Ditch the T-Shirt
Using an old t-shirt as an applicator can hinder your results. The rough fibers can scratch the headlight lens, undoing your hard work. Opt for a soft, microfiber cloth or a dedicated applicator pad. This simple upgrade makes a world of difference. Innovation in headlight restoration tools is impacting even homemade methods. Learn more about the growing market for DIY headlight tools here. The global headlight repair tool market was valued at $250 million in 2023 and is projected to reach $450 million by 2032. This highlights the increasing trend towards DIY solutions.
The Professional Secret: Working in Sections and Multiple Applications
Professional detailers often work in sections, applying the cleaner to one area at a time. This ensures thorough coverage. It also prevents the cleaner from drying out before it can work its magic. Depending on the level of oxidation, you might need to repeat the application process several times. For light hazing, one or two applications may suffice. For heavier oxidation, three or more applications might be necessary. This patience and attention to detail are the hallmarks of a truly professional result.

DIY vs. Store-Bought: What Auto Experts Won't Tell You
Are commercial headlight cleaners worth the premium price? Through side-by-side testing and cost analysis, we'll reveal the surprising truth about homemade versus commercial solutions. You'll discover which household recipes outperform $30 commercial kits, and the rare instances where professional products might be necessary.
Cost Comparison: David vs. Goliath
One of the most compelling reasons to choose a homemade headlight cleaner is the cost savings. Commercial kits can range from $15 to $30 or more, while the ingredients for homemade solutions often cost less than $5. This significant price difference makes DIY a budget-friendly option.
For example, a simple baking soda and vinegar paste costs pennies to make, compared to a similarly effective commercial product. This allows you to achieve comparable results without breaking the bank.
To help illustrate the key differences, let's take a look at the following comparison table:
Homemade vs. Commercial Headlight Cleaning Solutions
This table provides a detailed comparison between homemade headlight cleaners and commercial restoration kits across multiple factors, including cost, effectiveness, durability, and ease of use.
| Factor | Homemade Solutions | Commercial Kits | Best For |
|---|---|---|---|
| Cost | Very Low (Under $5) | Moderate ($15-$30+) | Budget-Conscious DIYers |
| Effectiveness | Comparable for Light to Moderate Oxidation | Can be more effective for severe cases | Varies depending on headlight condition |
| Durability | Can be comparable with proper sealant | May offer slightly longer-lasting results | Those prioritizing long-term protection |
| Ease of Use | Simple and straightforward | Can be more convenient, pre-mixed | Beginners or those seeking quick application |
| Availability | Ingredients readily available | Requires purchase | Those seeking immediate solutions |
As you can see, while commercial kits might be more convenient, homemade solutions offer significant cost savings and comparable results for many common headlight issues.
Longevity of Results: Debunking the Myths
Many believe commercial cleaners offer longer-lasting results. However, our tests show that with proper application and a protective sealant, homemade solutions can last just as long. This means that a DIY approach doesn't necessitate frequent reapplication.
Using a UV sealant after cleaning, whether homemade or store-bought, significantly extends the clarity of your headlights.
Ingredient Analysis: Unmasking the Marketing
Some commercial products boast specialized ingredients. However, interviews with professional detailers reveal that many of these are simply repackaged household items with a hefty markup.
For example, some commercial cleaners utilize mild abrasives similar to baking soda. This highlights the potential for achieving comparable results with simple, readily available ingredients.
Addressing Durability Concerns: UV Protection and Practical Solutions
A common concern with homemade cleaners is their lack of UV protection. While commercial kits often include a UV sealant, you can easily add this step to your DIY process. Applying a UV sealant after cleaning, regardless of the method, significantly prolongs the results.
There are also effective homemade UV sealant options, such as applying a thin layer of clear coat or automotive wax. This further extends the life of your DIY restoration and provides additional protection against the elements.
When Commercial Cleaners Might Be Necessary
While homemade solutions are often sufficient, there are instances where a commercial product might be preferable. For headlights with severe damage or deep scratches, a professional-grade restoration kit may be necessary. These kits often include stronger abrasives and polishing compounds designed to address significant damage.
Additionally, if convenience is a top priority, pre-mixed commercial kits can save time and effort. However, for most cases of headlight oxidation, homemade cleaners provide an effective and affordable solution. You can easily restore clarity and improve your nighttime visibility without spending a fortune.
Maintaining clear headlights is essential for safe driving, and DIY solutions empower you to take control of this crucial aspect of car maintenance. To ensure your headlights stay clear after cleaning, regular vehicle upkeep is essential, as outlined in a comprehensive car maintenance checklist.
Protect Your Investment: Maintaining Crystal Clear Headlights
After restoring your headlights, maintaining their clarity is key. This isn't a one-time fix; it's an ongoing process to protect your work and prevent future oxidation. This section offers simple strategies to keep headlights crystal clear for years, not just months.
The Five-Minute Maintenance Routine
Just like regular brushing keeps your teeth healthy, a consistent maintenance routine is essential for your headlights. A quick five-minute weekly cleaning can significantly extend the results of your restoration. Simply wash your headlights with car wash soap and water, then wipe them down with a microfiber cloth. This easy routine prevents the buildup of grime that contributes to oxidation.
The Truth About UV Sealants
UV sealants are vital for long-term headlight clarity. They create a barrier against the sun's harmful UV rays, the primary cause of oxidation. Commercial UV sealants are available, but a homemade version using automotive wax or a thin layer of clear coat can be equally effective.
After cleaning your headlights, apply a thin layer of automotive wax and buff it off with a microfiber cloth. This creates a protective layer that repels water and contaminants, preserving clarity. For additional information and resources, check out our guide on auto detailing equipment.
Regional Climate and Your Maintenance Schedule
Your climate plays a significant role in how often you need to clean your headlights. In sunny, arid regions, more frequent cleaning and sealant application may be necessary. In milder climates, a less frequent schedule might suffice.
Also, consider seasonal changes. Winter road salt and grime can accelerate headlight degradation. More frequent cleaning during these months helps protect your headlights from harsh conditions.
Parking Habits and Headlight Clarity
Where you park can significantly impact your headlight’s lifespan. Parking in a garage or shaded area minimizes sun exposure, reducing UV damage and slowing oxidation. This simple habit can drastically extend the time between deep cleanings.
Early Detection: The Quick-Check Method
Detecting early signs of oxidation is crucial. Before cloudiness is visible, you can often feel a slight roughness on the headlight lens. This subtle tactile cue indicates the beginning stages of oxidation, allowing you to address the issue before it worsens. This proactive approach minimizes the effort required to maintain clarity.
Case Studies: The Power of Prevention
Long-term case studies demonstrate the effectiveness of these preventative steps. By implementing a regular cleaning and protection routine, drivers have extended their headlight restoration results by 300% or more. This translates to fewer deep cleaning sessions and more time enjoying crystal-clear headlights.
Troubleshooting Guide: When Your Headlights Won't Cooperate
Even with the best homemade headlight cleaner, sometimes you run into problems. This guide helps you diagnose and fix common issues, ensuring your headlights shine brightly.
Streaking and Hazy Results
- Problem: After cleaning, your headlights appear streaky or still have a hazy film.
- Diagnosis: This usually indicates improper cleaning or drying. Residue from the cleaning solution or hard water can cause streaking.
- Solution: Rewash the headlights thoroughly with clean water and a fresh microfiber cloth. Ensure they are completely dry to prevent water spots. For more tips on dealing with water spots, check out this helpful guide: How to master water spot removal. If the problem persists, repeat the cleaning process, focusing on even application and thorough rinsing.
Headlights Quickly Return to Cloudy State
- Problem: Your headlights become cloudy again shortly after cleaning.
- Diagnosis: This suggests the protective sealant wasn't applied correctly or isn't strong enough for your environment. UV exposure is the main cause of headlight oxidation.
- Solution: Reapply the sealant, making sure it covers the entire headlight evenly. Consider a higher-quality sealant, especially if you live in a sunny area. Regularly cleaning your headlights (every few weeks) can also help prevent oxidation buildup.
Internal Lens Condensation
- Problem: Moisture appears inside the headlight lens.
- Diagnosis: This points to a leak in the headlight assembly, letting moisture in. External cleaning won't fix this.
- Solution: You'll need to seal the leak or, if necessary, replace the entire headlight assembly. This is usually a job for a professional mechanic.
Severely Damaged Lenses
- Problem: Deep scratches, pitting, or cracks are visible on the headlight lens.
- Diagnosis: Years of wear and tear can cause significant damage that cleaning can’t fix.
- Solution: Wet sanding might help with minor scratches. However, deeper damage usually requires professional restoration or headlight replacement.
When DIY Isn't Enough: Knowing When to Replace
- Problem: Your headlights remain cloudy or discolored despite repeated cleanings.
- Diagnosis: The lens might be beyond repair due to internal damage or deep oxidation.
- Solution: It's best to consult a professional. They can determine if restoration is possible or if you need new headlights. Regular maintenance is also important for keeping your headlights clear. A comprehensive car maintenance checklist can help you stay on top of things.
These tips help you tackle common headlight restoration issues. However, it's important to know your limits. Sometimes, professional help or replacement is the best solution.
Tired of tedious headlight cleaning? The SwiftJet Car Wash Foam Gun makes car care simple. Its powerful foam clings to surfaces, lifting away dirt and grime for a sparkling finish. Get your SwiftJet today!