
If you're looking to step up your at-home car wash game, the single best tool you can add to your arsenal is a foam gun garden hose attachment. This simple device completely changes your washing routine, turning it from a weekend chore into a process that's not only more effective but also much safer for your car's paint.
The idea is simple: it mixes your favorite car soap with water and air, creating a thick, shaving-cream-like foam that clings to every surface. This foam is the key to drastically reducing the risk of swirl marks.
Why a Foam Gun Will Transform Your Car Wash
For years, the standard was a bucket of soapy water and a sponge or mitt. We all did it. But we also know the frustrating result: fine scratches and swirls that only show up in direct sunlight. A foam gun that hooks up to any standard garden hose is a massive leap forward. It’s not about making your driveway look like a professional detail shop; it’s about using smart science to get a better, safer clean.

The Science of a Safer Wash
It all comes down to one crucial word: lubrication.
When you scrub a dirty car with a wash mitt, you're essentially dragging tiny, sharp particles of dirt and grit across your clear coat. That friction is what causes those ugly swirl marks and micro-scratches that dull your car's finish. A foam gun creates a protective barrier of thick suds to prevent exactly that.
Here’s how that layer of foam works its magic:
- Encapsulates Dirt: The suds get in and around every little dirt particle, lifting them off the surface so they can be rinsed away safely.
- Increases Dwell Time: Unlike soapy water that just runs off, foam clings to vertical panels. This gives the soap more time to work, breaking down road grime, bugs, and other contaminants.
- Provides Superior Lubrication: When it's finally time to use your wash mitt, you're gliding it across a slick, foamy cushion instead of grinding dirt directly into the paint.
This whole process is often called a "touchless" or, more accurately, a "less-contact" wash. You're letting the foam do the initial heavy lifting, which means you minimize the physical scrubbing that causes 90% of paint damage. It’s the best way to preserve your vehicle's value and keep it looking new.
More Than Just a Toy
Let’s be honest, covering your car in a mountain of foam is fun. But this is a serious detailing tool, not just a gimmick. The huge spike in popularity proves it. The global market for these tools is exploding, with the high-pressure foam gun segment alone projected to hit $750 million by 2025.
This isn't just a niche product for hardcore enthusiasts anymore. Everyday car owners and professional detailers are driving this demand because they want solutions that work better and save time. If you want to dive deeper, you can read the full market research about high-pressure foam guns. This shift isn't a passing trend; it's a fundamental change in how people take care of their cars.
Getting Your New Foam Gun Ready for Action
Alright, let's get that new foam gun out of the box and ready to make some suds. The whole point of these things is to be quick and easy, so going from unboxing to washing should only take a few minutes. We'll use the popular SwiftJet model as our guide here since its setup is typical for most garden hose foam guns.

When you open everything up, you’ll see the main spray body (the part with the trigger), the big plastic canister for your soap, and a skinny little siphon tube. You should also have a quick-connect adapter for your hose and a couple of different spray nozzles.
Assembling Your Foam Gun Correctly
First things first, grab that small, flexible siphon tube. This little piece is the heart of the operation—it’s what pulls the soap up from the canister into the water stream. You need to push one end of it firmly onto the brass fitting you’ll find on the bottom of the main spray head. A weak connection here is the #1 reason for watery foam, so give it a good push to make sure it’s on there tight.
Now for the soap canister. A common mistake people make is accidentally cross-threading it, which leads to leaks and can wreck the plastic threads. Here’s a simple trick to avoid that: place the canister on the threads and turn it backwards (counter-clockwise) just a little until you feel a small "click." That means the threads are perfectly aligned. Now, go ahead and tighten it clockwise for a perfect, leak-free seal.
Pro Tip: Before you even think about connecting this to your garden hose, find the quick-connect adapter. Look inside and make sure the small black rubber gasket is sitting flat. That tiny ring is what prevents annoying drips and sprays right where you're holding it.
Understanding Your Attachments
The last piece of the puzzle is hooking it up to your hose. Most foam gun garden hose kits, SwiftJet included, make this super simple with a quick-connect fitting. Just screw the female part onto your hose, pull back the spring-loaded collar, and snap it onto the male end of the foam gun. You'll hear a solid click to let you know it's locked in place.
You’ll also notice you have a choice of nozzles. They actually serve very different functions.
- Wide Fan Nozzle: This is your workhorse for applying foam. It gives you great coverage for blanketing large surfaces like car doors and hoods in a hurry.
- Jet Stream Nozzle: Save this one for rinsing. The powerful, focused stream is perfect for blasting away all that loosened dirt, especially from tight spots and wheel wells.
Taking a minute to see how these simple parts fit together will make you much more confident when you start using it. If you're the curious type and want to dive deeper into the science of how it all works, our article on how a car wash foam gun works is a great read. Understanding the mechanics helps you get the best performance and easily fix any little issues that might pop up.
Nailing the Perfect Soap Ratio for Thick Foam
The secret to that satisfying, shaving-cream-like foam doesn't come from your hose pressure—it's all about what's inside the canister. Getting the soap-to-water ratio just right is the single most important variable you control. It’s the difference between watery, useless suds and thick, clinging foam that actually melts away grime.
Think of it like making a great cocktail. Too little soap gives you weak foam that just runs right off the paint, doing next to nothing. Go too heavy, and you're just wasting product and leaving behind a sticky film that's a pain to rinse away. You're looking for that sweet spot: foam that’s rich enough to dwell on vertical panels but not so goopy that it won't rinse clean.
Dialing in Your Dilution
Your starting point will always depend on how concentrated your car soap is. A professional-grade, super-concentrated soap requires a lot less product than a standard shampoo you'd grab off the shelf at any auto parts store.
Always check the soap manufacturer’s recommendation on the bottle first, and use that as your baseline. From there, you'll fine-tune it.
Pro Tip: Always add water to the canister before the soap. If you pour the soap in first, the stream of water will create a mountain of suds right inside the bottle. This throws off your mixture and leaves you with a canister full of air instead of a proper solution.
The fill lines on your foam gun canister are there to help. For a typical 32 oz canister, a great starting point is usually:
- 1-2 ounces of a highly concentrated car soap.
- 3-4 ounces of a standard, less concentrated car wash shampoo.
Once the soap is in, fill the rest of the canister with clean water, but leave a little space at the top. This gap lets the solution mix properly when you gently swirl it together. You never want to shake the canister—that just creates the same premature sudsing issue we mentioned. For a much deeper dive, check out our complete foam cannon soap ratio guide for detailed charts.
To help you get started, here are some common starting points for different types of soap.
Recommended Soap Dilution Starting Points
This table provides a general guide for mixing various car wash soaps in your foam gun canister. Remember to use these as starting points and adjust based on your water hardness and desired foam thickness.
| Car Soap Type | Soap to Water Ratio | Best For |
|---|---|---|
| Standard pH-Neutral Soap | 3-4 oz soap per 32 oz water | Routine maintenance washes on protected paint. |
| High-Concentrate Soap | 1-2 oz soap per 32 oz water | Getting maximum value and foam thickness. |
| Wash & Wax Soap | 2-3 oz soap per 32 oz water | Adding a quick layer of hydrophobic protection. |
| Strip Wash / Decon Soap | 4-5 oz soap per 32 oz water | Removing old waxes, sealants, or heavy grime. |
Finding the perfect mix is an art, but once you find what works for your specific soap and water, you'll be able to replicate it every time.
Adjusting for Real-World Conditions
Believe it or not, your local water quality plays a huge role. If you have hard water, which is full of minerals like calcium and magnesium, you’ll probably need to add a bit more soap to get good suds. Those minerals actively fight against the soap's ability to foam up. On the flip side, if you have soft water, you can often get away with using less product to achieve the same thick foam.
It's no surprise that the most popular foam guns make this process easy. Market data shows that top-selling products, like the SwiftJet Car Wash Foam Sprayer Gun which sells over 6,700 units monthly, are loved because their adjustable ratio dials give users precise control on the fly. This level of control, combined with an affordable price point, is a major reason for its high ratings, a trend you can see in these insights on best-selling garden hose foam guns.
Ultimately, finding the perfect ratio for your specific setup is a game of small experiments. Don't be afraid to tweak the amount by half an ounce at a time. Once you find that magic formula, you’ll be able to nail it every time for a consistently awesome and safe wash.
Your Guide to the Perfect Foam Wash
Alright, you’ve got your soap mixed and your foam gun is ready to go. This is where the fun begins. We’re about to turn a regular wash into something far more effective—and honestly, way more satisfying. Let's cover the right way to apply foam and rinse it off to ensure you get a sparkling, scratch-free finish every single time.
First, Always Pre-Rinse
Before you even think about covering your car in a blanket of foam, grab your hose and give the vehicle a solid rinse. You can do this by simply popping the soap canister off your SwiftJet or using the included rinse nozzle. The idea is to blast away all the loose stuff—dust, pollen, light mud, you name it.
This step is absolutely critical for a safe wash. Skipping it means you risk grinding that loose grit and grime right into your paint when you start the contact wash later on. Think of it as clearing the deck before the deep clean.
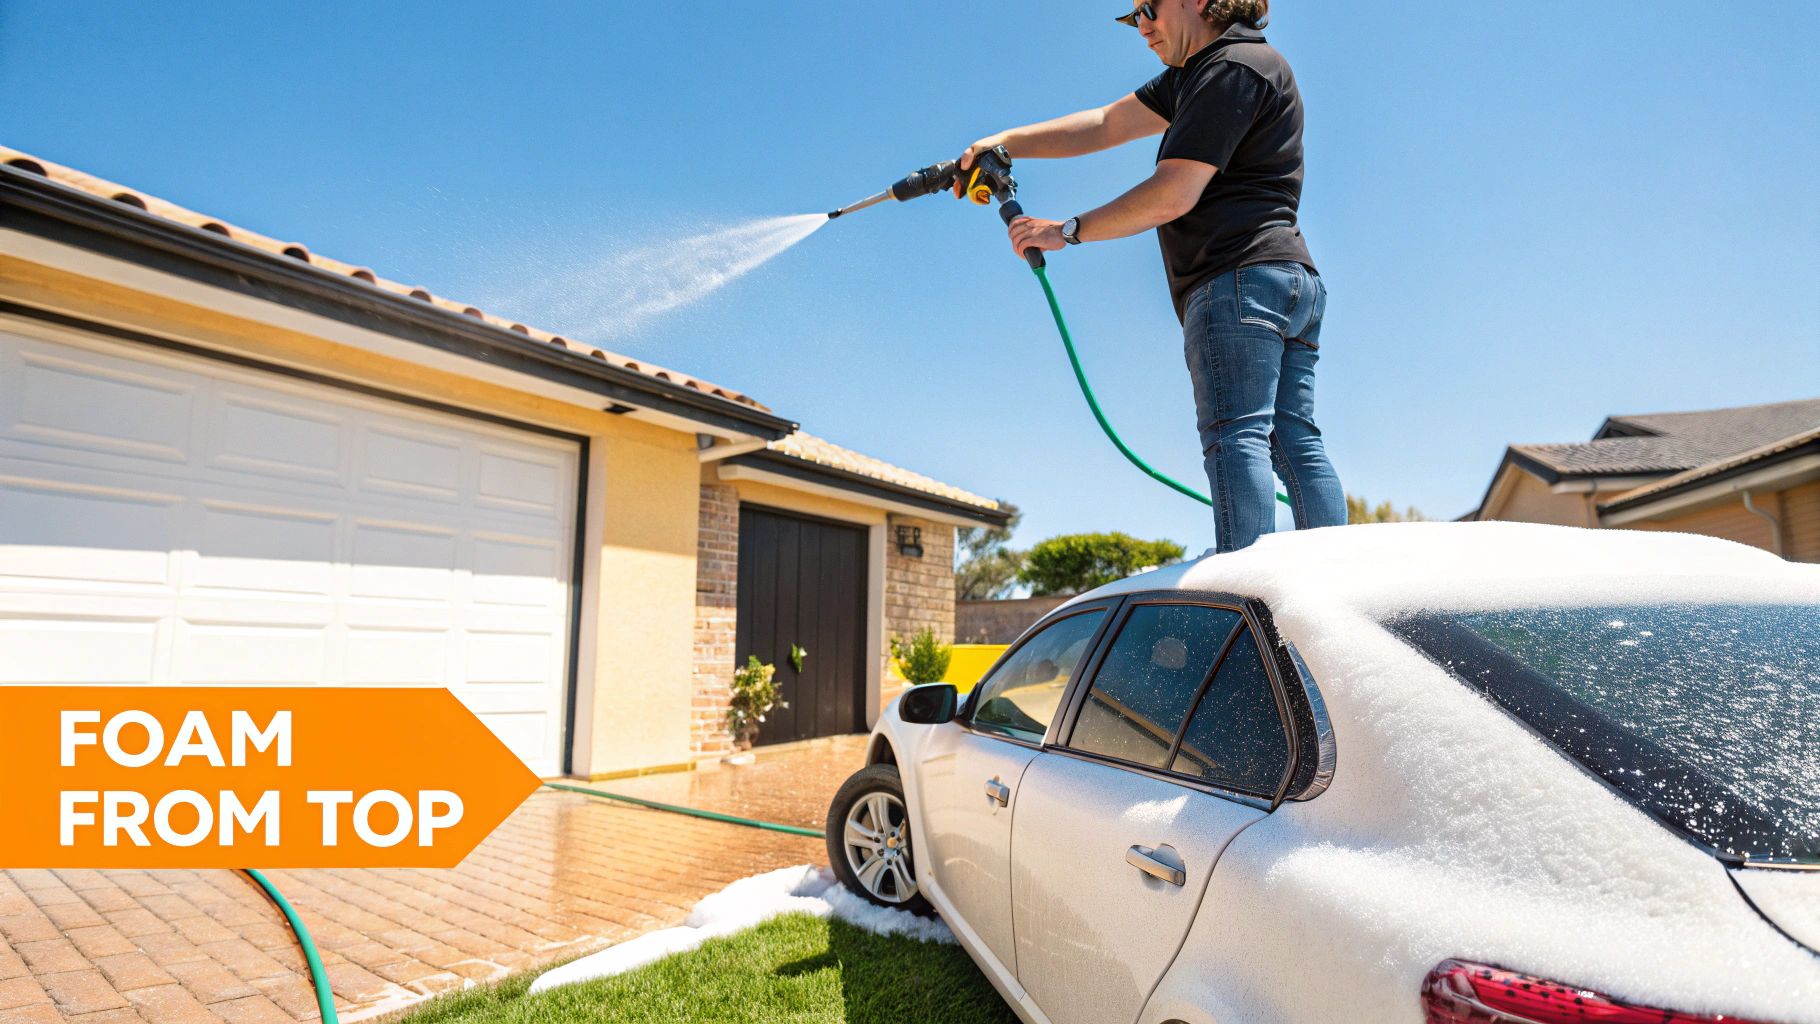
Nailing Your Foaming Technique
The golden rule here is simple: start high, finish low. Begin with the roof and let gravity do the work. Move from the roof to the glass, then the hood and trunk, and finally, coat the sides and lower panels. This method ensures the foam has the most contact time on the dirtiest parts of your car, like the bumpers and rocker panels.
As you spray, play around with the adjustment dial on your foam gun garden hose attachment. This is your secret weapon for controlling the foam’s consistency in real-time.
- Turn it toward “+” for more soap, which creates that thick, shaving-cream-like foam.
- Turn it toward “-” for a wetter, more liquidy spray, which is great for a quick, light wash.
You’re looking for that sweet spot where the foam is thick enough to cling to vertical surfaces but not so heavy it just plops off in clumps. Getting this right is what separates a good wash from a great one. The foam tool market is set to be worth $500 million by 2025, but a surprising 23.5% of negative reviews complain about tools being hard to use. Simply mastering this dial puts you way ahead of the game.
Pro Tip: Let the foam sit and work its magic for a few minutes. You’ll literally see the dirt getting lifted and dripping away. Just don't let it dry on the surface, especially in the sun—that’s a one-way ticket to stubborn water spots and soap residue.
The Final Rinse for a Flawless Finish
After the foam has had a moment to dwell, switch back to your rinse nozzle. Just like when you applied the foam, rinse from the top down. This pushes all the dirty suds off the car, preventing them from running over areas you’ve already cleaned.
If you’re aiming for a truly deep clean, this is your chance to use a wash mitt (like the soft microfiber one included with your SwiftJet) to gently agitate the foam before rinsing. The foam acts as a fantastic lubricant, creating a safe barrier between the mitt and your paint. For a more detailed walkthrough, check out our full guide on how to use a foam gun. This process is the key to getting a brilliant shine without ever touching your car's clear coat with a gritty sponge.
Simple Maintenance for Lasting Performance
Want to know the secret to getting that thick, satisfying foam from your foam gun wash after wash, year after year? It’s all about proper care. I'm not talking about complex teardowns or needing a special set of tools. It's a simple routine that takes just a few minutes after each use but prevents 99% of the common problems I see people run into.
If you skip this, you’re setting yourself up for weak foam, sputtering, and annoying leaks down the road.
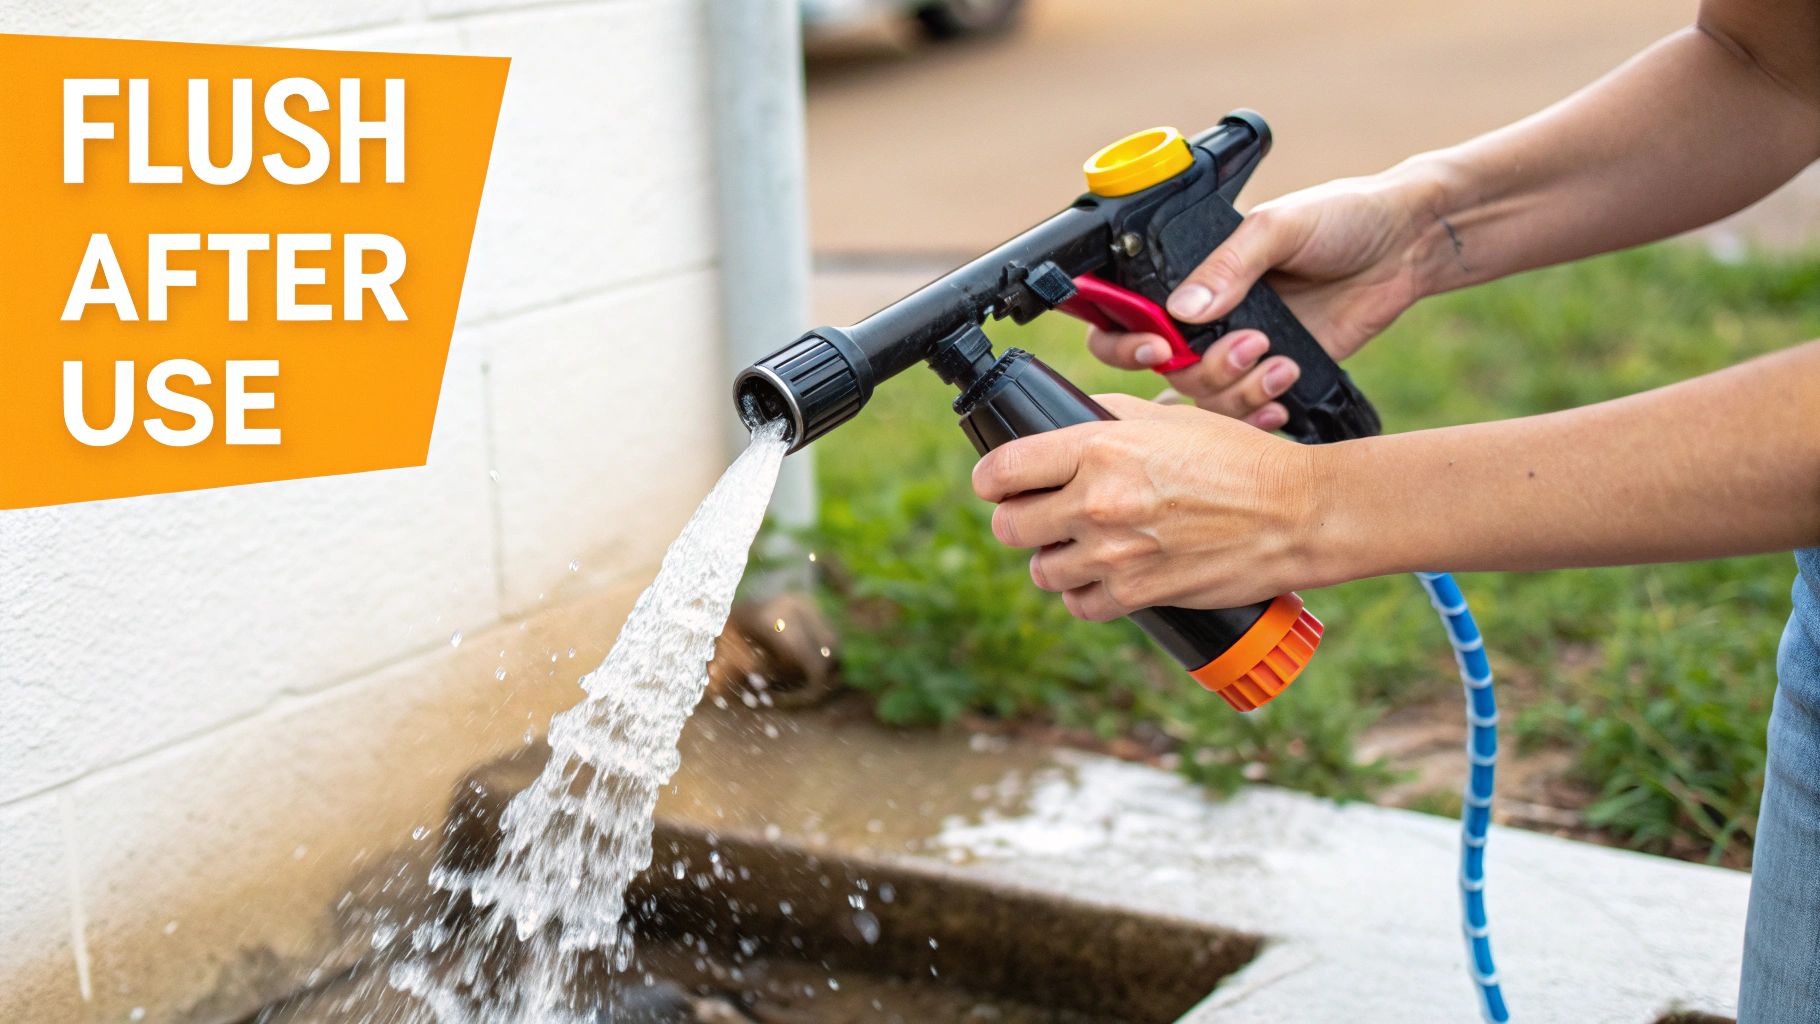
The single most critical thing you can do is flush the system with clean water. Think of it like rinsing out your coffee mug right after you finish your drink. If you let it sit, that residue dries and becomes a real pain to clean. Dried soap is the ultimate enemy of a foam gun, as it solidifies and clogs up all the important internal parts.
The All-Important Post-Wash Flush
Once you're done washing your car, resist the urge to just disconnect the foam gun and toss it on the shelf. Any leftover soap solution sitting in the siphon tube, mixing chamber, and nozzle will dry into a gunky, solid residue. From my experience, this blockage is the number one reason a gun starts producing weak, watery foam—or no foam at all.
Here’s the simple two-minute routine that makes all the difference:
- First, unscrew the soap canister and dump out whatever soap solution is left.
- Next, fill that same canister about halfway with clean water right from your garden hose.
- Finally, screw the canister back onto the foam gun. Squeeze the trigger and just let plain water run through the whole system for about 30 seconds. You'll see the last of the suds wash out, followed by a clear stream of water.
And that's literally all it takes. This quick rinse keeps the internal mesh filter—the little part that’s crucial for aerating the soap—from getting clogged. A blocked filter is like trying to breathe with a stuffy nose; the gun just can't do its job right.
Take it from me: that quick flush is the best investment you can make in your tool's longevity. It stops dried soap from turning into a rock-hard blockage that’s ten times harder to deal with later.
Long-Term Care and Storage
Beyond the flush, a couple of other good habits will keep your foam gun in prime condition. How you store it and a few quick checks will prevent leaks and guarantee it’s ready to go every time you need it.
Here’s my simple checklist for long-term care:
- Check the O-Rings: Every so often, take a look at the small black rubber O-rings. Pay close attention to the one inside the garden hose quick-connect fitting. If it ever looks cracked, brittle, or squashed flat, it's time for a new one. This is a cheap fix that prevents those frustrating drips and sprays.
- Store It Properly: Don't leave your foam gun sitting out in the sun. UV rays can make the plastic canister brittle over time, and extreme hot or cold temperatures will degrade the seals. A garage, shed, or cabinet is the perfect spot.
- Deep Clean as Needed: If you live in an area with hard water and notice performance starting to dip, you might have some mineral buildup. An occasional deep clean by soaking the internal brass components in a vinegar-and-water solution will dissolve those stubborn deposits and get it working like new.
Running Into Trouble? Let's Get Your Foam Gun Working Again
Even the most dependable tools have their off days. If your foam gun is acting up, don't sweat it. The fix is almost always something simple, and a few quick checks will get you back to laying down thick foam in no time. Most problems boil down to just a handful of common culprits.
Let's start with the biggest complaint we hear: weak, watery suds instead of that rich, clingy foam you're after. Before you start questioning the tool itself, take another look at your soap mixture. An improper dilution ratio is the number one reason for poor foam. Try adding a bit more soap concentrate to the canister—that often does the trick.
Another thing to check is your water supply. Is the spigot opened all the way? Do you have any kinks in your garden hose that might be choking off the flow? A foam gun needs decent water pressure to properly mix air, soap, and water. Low pressure in equals low-quality foam out.
Diagnosing Leaks and Blockages
Seeing a spray or drip right where the gun meets your hose? That’s almost certainly a bad gasket. Go ahead and unscrew the quick-connect adapter from your hose and peek inside.
You’re looking for a small, black rubber ring. If that gasket is missing, cracked, or not sitting perfectly flat, you've found the source of your leak. Popping in a new one will fix this instantly.
What if you pull the trigger and get nothing but a sad dribble, or even no water at all? You’ve likely got a blockage.
The very first place to check is the siphon tube inside the canister. This thin plastic tube can sometimes pop off the brass fitting on the spray head. If you see it just floating around in your soap solution, it can't pull any soap into the mixing chamber.
Just push it firmly back onto the fitting and you should be good to go. If the tube is already attached, the clog might be from dried soap scum inside the gun's filter, especially if it wasn't flushed with clean water after its last use. Running warm water through it for a minute can often dissolve those little blockages.
Quick Troubleshooting Guide
Feeling stuck? Identify and solve common foam gun problems with these straightforward solutions.
| Problem | Potential Cause | Solution |
|---|---|---|
| Weak or No Foam | 1. Incorrect soap-to-water ratio. 2. Low water pressure. |
1. Add more soap concentrate to the canister. 2. Ensure your water spigot is fully open and the hose is not kinked. |
| Leaking at the Hose Connection | The rubber gasket in the quick-connect adapter is missing, damaged, or misaligned. | Inspect the gasket. Replace it or re-seat it properly. |
| No Soap/Water Flow | 1. The siphon tube has detached. 2. The internal filter is clogged. |
1. Re-attach the siphon tube securely to the spray head. 2. Flush the foam gun with warm water to clear any dried soap residue. |
| Foam is Too Thick or Runny | The foam adjustment dial is set incorrectly for your current soap/water pressure combination. | Turn the dial on top of the gun. Adjust it left or right until you achieve your desired foam consistency. |
Most of the time, one of these simple fixes will solve your issue. Taking a minute to diagnose the problem correctly saves a lot of frustration and gets you back to what you wanted to do in the first place—washing your car.
Even after you get the hang of it, a few questions tend to bubble up. Let's walk through some of the most common things people ask, so you can get the absolute best results from your foam gun garden hose setup.
Can I Use Any Car Soap in My Foam Gun?
This one comes up all the time. Technically, most car wash soaps will create some suds, but you'll get a very different experience depending on what you choose.
If you’re after that thick, satisfying lather, you really want to grab a soap formulated specifically for foam guns. These are more concentrated and designed to create incredible suds when mixed with air and water. Think of it like using the right fuel for a high-performance engine—it just works better.
Whatever you do, never use household dish soap. It’s a paint-stripper in disguise, pulling off all the protective waxes and sealants you've worked so hard to apply. Stick to dedicated car care products.
Foam Gun vs. Foam Cannon: What's the Real Difference?
It’s easy to get these two mixed up, but the distinction is pretty simple and comes down to one thing: power.
- A foam gun (like the SwiftJet) is built to work with the standard pressure from your garden hose. It’s convenient, easy, and gets the job done beautifully.
- A foam cannon is the heavy-hitter that needs a pressure washer to operate. This setup produces that super-dense, shaving cream-like foam you see in professional detailing videos.
For most enthusiasts washing their car at home, a quality foam gun provides the perfect balance of performance and convenience without needing to drag out a pressure washer.
Pro Tip: Your foam quality is directly tied to your water pressure. If you're getting weak foam, first check that your spigot is cranked all the way open and there are no kinks in your hose. If you just have low water pressure at home, try adjusting your dilution ratio with a bit more soap to help beef up the suds.
Ready to transform your car wash routine? Grab the SwiftJet today and experience a faster, safer, and more effective clean. Visit the official SwiftJet website to get yours now.