
Drying your car with a chamois is all about gliding a damp, clean cloth across the vehicle's surface in flat, overlapping strokes. The real magic happens because a chamois can soak up several times its own weight in water. This ability dramatically cuts down your drying time and is your best defense against those annoying water spots, leaving you with a perfect, streak-free shine.
Why a Chamois Is Your Secret Weapon for a Spotless Car

Drying your vehicle is that final, crucial step that takes a clean car and makes it look professionally detailed. While there are plenty of tools out there, the classic chamois—whether it's natural sheepskin or a modern synthetic version—has remained a trusted favorite for both pros and die-hard enthusiasts for a reason.
What makes a chamois so special? It's that unique combination of incredible absorbency and a perfectly smooth, non-abrasive texture. This lets it lift water right off the paintwork without leaving behind pesky lint or, worse, creating the fine swirl marks that can dull your car's finish over time.
The Art of a Streak-Free Dry
A regular cotton towel often just pushes water around, but a chamois is engineered to pull moisture completely away from the surface. The secret is its porous structure, which acts like a powerful sponge.
A chamois’s ability to hold water up to four times its weight makes it highly efficient in reducing drying time and preventing water spots.
This super-high absorption rate means you're making fewer passes over each panel, which is great because less contact means less risk to your paint. Achieving a spotless car is a goal shared by many enthusiasts across the automotive industry.
Chamois vs. Microfiber Towel: A Quick Comparison
While the chamois is a classic, many detailers also rely on high-quality microfiber towels. Both have their strengths, and understanding the differences can help you choose the right tool for the job.
| Feature | Chamois | Microfiber Towel |
|---|---|---|
| Absorbency | Excellent; absorbs and holds water well | Very high; absorbs quickly into fibers |
| Texture | Smooth, gliding surface | Plush, soft fibers |
| Lint | Virtually lint-free | High-quality versions are lint-free |
| Drying Action | Pulls water in a sheet-like motion | Wicks water into its deep pile |
| Maintenance | Needs to be stored damp; can stiffen if dry | Easy to wash and dry with other microfibers |
| Best For | Final wipe-downs, large flat panels | General drying, intricate areas, door jambs |
Ultimately, many professionals keep both on hand. A chamois excels at quickly clearing water from large areas like the hood and roof, while a plush microfiber is perfect for getting into tighter spots and for a final buff.
Market Growth and Popularity
Even with all the new gadgets out there, the popularity of manual drying tools isn't fading. In fact, the automotive dryer market, which includes tools like the chamois, was valued at around USD 1.2 billion in 2023 and is projected to nearly double by 2032. This just goes to show how much people still trust these proven methods to get a professional finish right in their own driveway.
When you dry a car with a chamois, you're not just wiping off water—you're using a tool specifically designed for a flawless result. It’s about protecting your investment and achieving that coveted, showroom-quality shine that makes all the effort worthwhile.
Getting Your Chamois Ready for Action
A perfect, streak-free dry doesn't just happen. It all starts with getting your chamois prepped and ready to go before it ever touches your paintwork. A stiff, dry chamois is your worst enemy here—it's useless at best and can even damage your finish.
Your first move is always to bring it to life with some clean, cool water. Whether it’s fresh out of the package or has been sitting in storage, dunk it in a bucket and let it soak until it's completely soft and flexible.
Then, give it a good wring-out. You want it damp, not sopping wet. The goal is for the chamois to have enough moisture to glide smoothly across the surface but enough capacity left to actually absorb the water off your car. This is a non-negotiable step; a properly prepped chamois is the secret to an effortless, effective dry.
Start with a Spotless Surface
Just as crucial as prepping the tool is prepping the car itself. Trying to dry a car that isn't 100% clean is the fastest way to put fine scratches and swirl marks into your paint.
A Hard-Learned Lesson: Think of it this way: any speck of dirt or leftover soap scum your wash mitt missed will get picked up by that chamois. It instantly turns your drying towel into a piece of fine-grit sandpaper, dragging those abrasive particles all over your beautiful finish.
Before you even think about drying, give your vehicle one last, thorough rinse. Start from the top and work your way down. I always pay extra attention to those little spots where grime loves to hide, like around the badges, door handles, and along the lower body panels.
Taking an extra minute or two for this final rinse ensures you have a pristine canvas. It's the only way to guarantee your chamois is only touching paint and water, which is how you get that flawless, professional-looking shine every single time.
Mastering the Art of Drying Your Car
With your car rinsed and your chamois ready, you're at a critical stage. This isn't just about wiping off water; it’s about applying a technique that makes the difference between a good-enough shine and a truly flawless, professional finish. The goal is to prevent those annoying water spots and streaks before they even think about forming.
The first rule of thumb? Work from the top down. It sounds simple, but it’s a game-changer. Start with the roof, then tackle the windows and glass. Gravity will be on your side, so you won't have water dripping down onto panels you just finished drying. It’s a small adjustment that yields a much cleaner result.
This infographic lays out the prep work perfectly—it’s the foundation for a great dry.
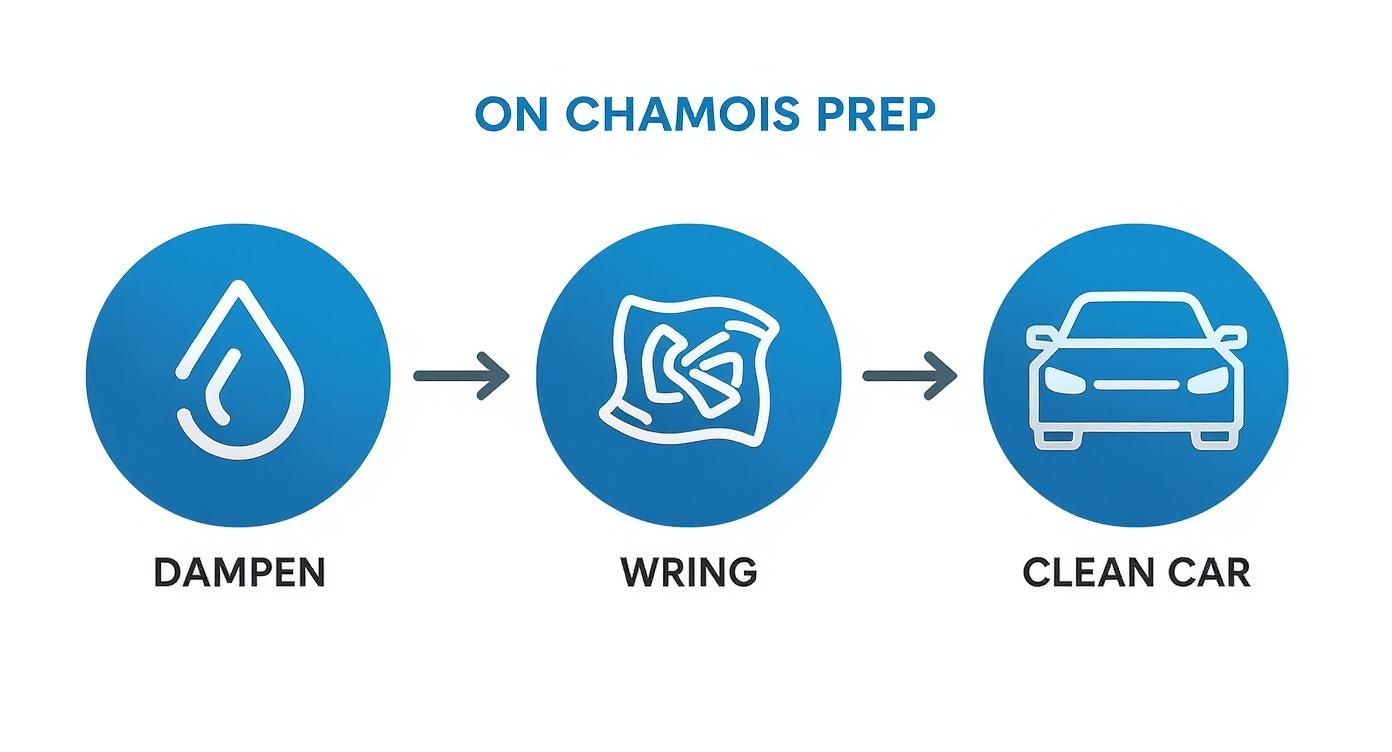
As you can see, a pristine finish is a two-way street. A properly prepped chamois is just as crucial as the clean surface you’re drying.
The Gentle Drag Technique
When you get to the big, flat surfaces—the hood, roof, and doors—the "gentle drag" is your go-to move. Lay your damp, folded chamois completely flat on the panel. Use just enough pressure to make full contact, then pull it smoothly toward you in one long, straight line.
What you'll see is the chamois lifting a sheet of water right off the paint, leaving a nearly bone-dry surface behind. It's so much more effective than rubbing back and forth and, more importantly, it's way safer for your car's clear coat. Let the material’s absorbency do the work for you.
The Blot and Lift Method
Of course, not every part of your car is a flat panel. When you get to the trickier spots like mirrors, spoilers, or around badges and emblems, you need to switch up your technique. This is where the "blot and lift" comes in.
- First, fold the chamois into a thick, manageable pad.
- Next, gently press the pad onto the wet spot. Don't wipe.
- Then, lift it straight up to absorb the water.
- Just repeat this dabbing motion on any remaining wet areas.
This method keeps you from snagging your chamois on sharp edges and is perfect for soaking up water that pools in tight corners. If you're looking for more pro-level strategies, check out these top tips for achieving a spotless finish after washing.
One of the biggest mistakes I see people make is trying to dry a car with a waterlogged chamois. The second you feel it leaving moisture behind instead of picking it up, it's time to stop. Wring it out completely, and then get back to work. You want to remove water, not just spread it around.
Troubleshooting Common Drying Problems
Even the most careful among us run into little issues that can spoil a perfect finish. It happens. The real key is knowing how to fix them quickly without making things worse. Let's walk through a few common headaches and how to solve them like a pro.
The most common culprit? Water spots. You finish drying, step back to admire your work, and there they are. These are just mineral deposits left behind as water evaporates, a common problem if you have hard water. Don't panic and rewash the whole car. Just grab a good quick detailer spray and a fresh microfiber towel. A light spritz and a gentle wipe-down is all it takes to make them vanish. For a deeper dive, learning some pro techniques for avoiding water spots in the first place is a game-changer.
Dealing With Pesky Drips
You know the feeling. The car looks immaculate, and then a rogue drip snakes its way out from under a side mirror, leaving a streak right down the door. Water loves to hide in tight spots—places your chamois just can't reach.
The trick I've used for years is a quick blast of compressed air. Before you even start drying the main panels, target these common hiding spots:
- Around your side mirrors
- Along all the window trim and rubber seals
- Inside the door handles
- Behind emblems and badges
This little step blows all that trapped water out into the open, so you can wipe it up once and be done with it. No more surprise streaks.
One thing to remember: If you drop your chamois, it's done. Stop immediately. Hitting the ground means it's now covered in dirt and grit, and using it will be like rubbing sandpaper all over your paint. Rinse it out completely or, better yet, just grab a clean one.
Even with perfect prep, sometimes spots can be a real pain. If you've got some that won't budge, knowing how to remove stubborn water stains is a skill every car owner should have.
Here’s a quick guide to some of the most common issues you might face and how to get back on track.
Common Drying Issues and Their Solutions
| Problem | Primary Cause | Effective Solution |
|---|---|---|
| Water Spots | Mineral deposits left from evaporating hard water. | Mist the area with a quick detailer spray and wipe with a clean microfiber towel. |
| Streaks | Chamois was too wet, or you used a dirty cloth. | Wring out your chamois until it's just damp, not soaking. Or, switch to a fresh chamois. |
| Last-Minute Drips | Water trapped in tight spaces like mirrors or trim. | Use compressed air to blow water out of crevices before you start drying the body panels. |
| Lint or Fibers | Using a low-quality or new, unwashed chamois/towel. | Always wash a new chamois before its first use. Ensure your tools are clean and high-quality. |
| Fine Scratches | A dirty chamois picked up grit from the ground or a missed spot on the car. | Stop immediately. Thoroughly rinse the chamois or get a new one. Polish the scratches if necessary. |
Think of this table as your go-to cheat sheet. A little bit of know-how turns a potential disaster into a minor, two-minute fix, keeping your car looking its absolute best.
Keeping Your Chamois in Perfect Condition
A good chamois can be your trusted drying companion for years, but only if you treat it right. The secret isn't complicated; it just requires a little care after each wash. As soon as you're done drying your vehicle, give the chamois a thorough rinse in clean, cool water. Keep rinsing until you see the water run completely clear—this flushes out any trapped dirt or leftover car soap.
Every so often, it'll need a bit more than a rinse. For a deeper clean, hand wash it gently in lukewarm water using just a tiny bit of mild, pH-neutral soap. Whatever you do, never use harsh detergents or fabric softeners. These chemicals are the enemy of a natural chamois, as they strip away its essential oils, leaving it stiff, brittle, and practically useless.
Proper Storage Is Key
Once your chamois is clean, gently squeeze out most of the water. Now for the most critical rule of chamois care: never let it dry out completely. If a natural leather chamois becomes hard and crispy, there's no bringing it back. It will lose its signature softness and absorbency for good.
The trick is to always store your chamois slightly damp. Keep it in the ventilated tube it came in or a sealed plastic bag. This simple step keeps it soft, pliable, and ready to go for your next car wash.
Taking care of quality tools like this is becoming more popular. It’s no surprise that the global car care products market is expected to reach USD 16.5 billion by 2034, with much of that growth coming from people choosing durable, reusable products over disposable ones.
These simple habits will protect your investment and ensure it keeps delivering that perfect, streak-free finish you're after. And if you're curious about how a chamois stacks up against other options, check out our guide to the best car drying towels.
Common Chamois Questions, Answered
Even after you've got the basic technique down, a few questions always seem to come up. Let's tackle some of the most common ones I hear so you can dry your car like a seasoned pro.
Is It Okay to Use a Chamois on Car Windows?
You bet. In fact, a clean, damp chamois is one of the best tools for getting a perfectly clear, lint-free shine on your windows and mirrors. The secret is to treat the glass just like your car's paint.
Just glide a flat, folded section smoothly across the surface. The key here is to make sure the chamois is thoroughly wrung out first—too much water is the enemy of a streak-free finish. A damp chamois, not a wet one, is what you're after.
Natural vs. Synthetic Chamois: What's the Real Difference?
This is a classic debate. A natural chamois is made from genuine sheepskin, and it's famous for being incredibly soft and absorbent. Funnily enough, they actually get better with age, but they do demand a bit more care to keep them from getting stiff.
On the other hand, a synthetic chamois is usually made from a material like PVA (polyvinyl alcohol). These are workhorses—tough, resistant to mold, and super easy to look after. While it might not have the same luxurious feel as natural leather, a quality synthetic chamois still does a fantastic job and is often a more practical, budget-friendly choice.
How Do I Break In a New Natural Chamois?
When you first unbox a natural chamois, it's going to feel stiff. That's just the leftover oils from the tanning process, and you need to wash them out to get it ready for action.
Think of it like conditioning the leather. You're washing away the tanning residue to unlock its natural softness and absorbency.
To do this, soak it in a bucket of lukewarm water with just a drop or two of a mild, pH-neutral car soap. Gently work the soapy water into the material, then rinse it completely with clean water. Wring it out and repeat the whole process two or three times. You'll know it's ready when it feels supple and soft in your hands.
How Long Does a Chamois Last?
This all comes down to care. A well-maintained natural chamois can honestly last for years—I've had some that have been in my detailing kit forever. A synthetic one will typically give you one to three years of solid service, depending on how often you're washing your car.
It’s time for a new one when you notice these signs:
- It feels stiff or brittle even after being soaked.
- It just doesn't seem to be soaking up water like it used to.
- You see visible signs of tearing or it starts to fall apart.
Simply cleaning it after each use and storing it properly is the best way to get the most life out of your chamois.
Ready to perfect your car washing routine? The SwiftJet Car Wash Foam Gun turns any garden hose into a professional-grade foamer, lifting dirt and grime for a safer wash and easier dry. Complete with a free microfiber mitt, it’s the perfect first step for a flawless finish. Discover the SwiftJet difference today.