
A proper car detail is a systematic process, not just a car wash. Think of it in four main phases: the pre-wash and wash, paint decontamination, paint correction, and finally, applying protection. Following this roadmap is how you safely lift away all the contaminants before you even think about polishing the paint. It's the key to getting that mirror shine and sealing it against the elements, all without adding swirl marks.
Building Your Foundation for a Flawless Finish
Before you even turn on the hose, understand that a great detail starts with a solid plan. It's not about just grabbing a sponge and soap; it's about a methodical approach that protects your car's paint every step of the way. Knowing why you're using a specific tool or technique is what separates a quick wash from a professional-level detail.
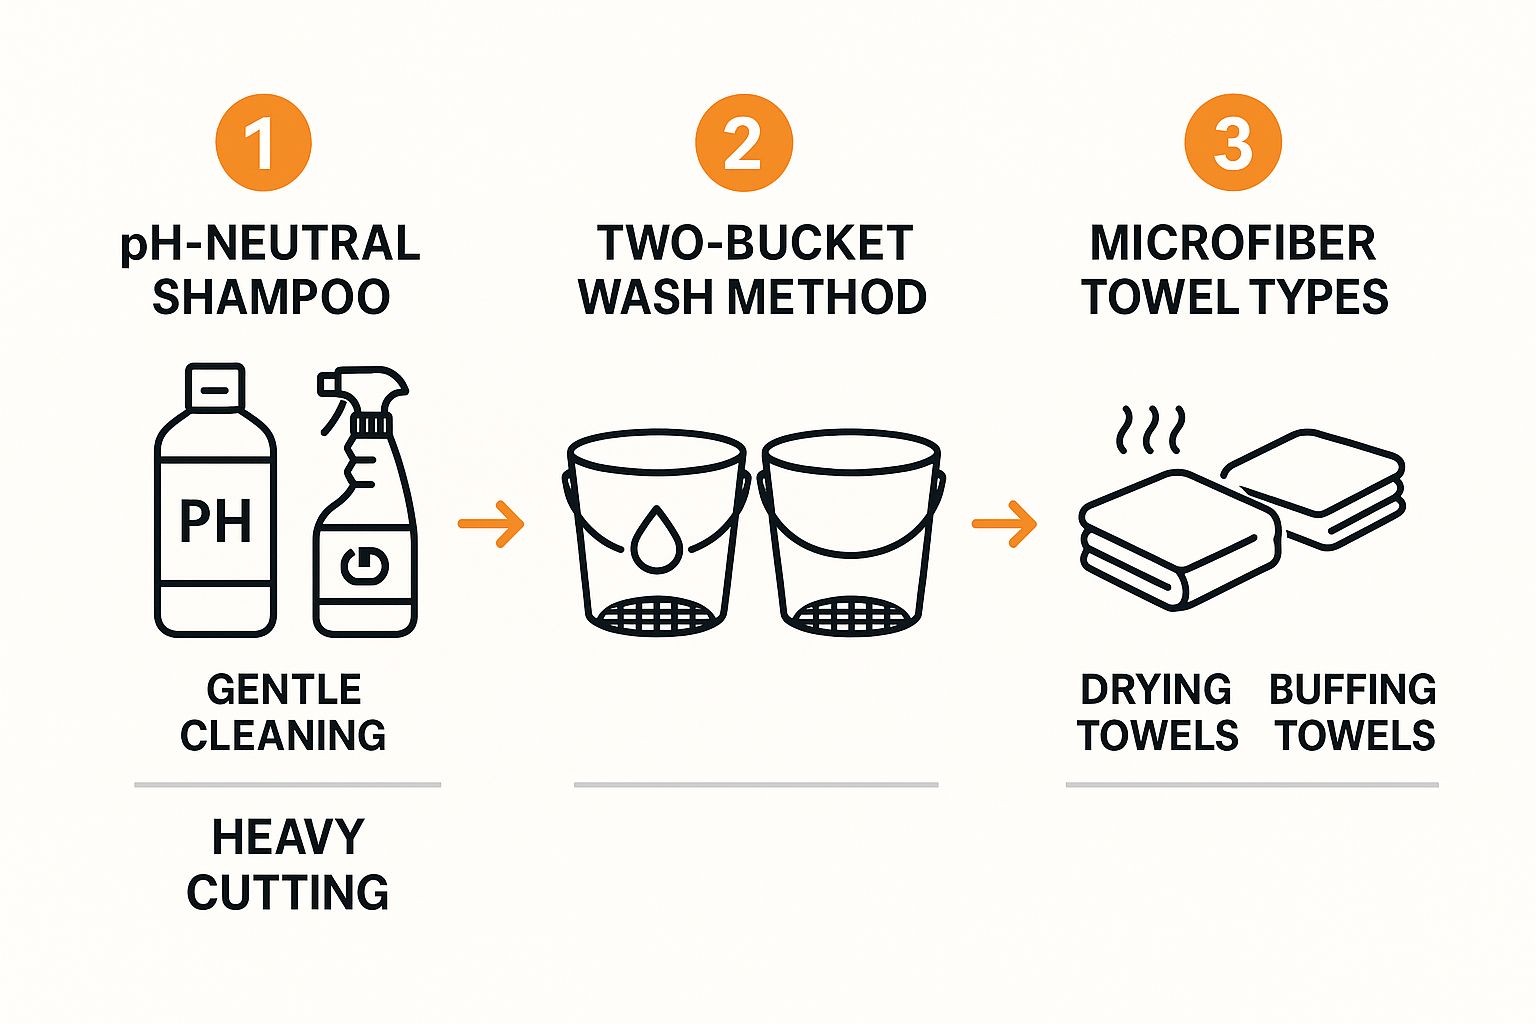
For example, choosing your car shampoo isn't a minor detail. A gentle, pH-neutral shampoo is designed to lift dirt without stripping the wax or sealant you've already applied, making it ideal for regular maintenance. On the other hand, a heavy-duty degreaser is a powerful solvent you'd use for an engine bay or to remove baked-on tar—it’s far too aggressive for your car's clear coat.
Choosing the Right Tools for the Job
The same logic applies to your towels. A plush, high-GSM (grams per square meter) microfiber towel is built for one thing: soaking up water. Its deep pile safely traps any lingering dirt particles, pulling them away from the paint as you dry. A towel with a shorter, tighter weave is what you want for buffing off polish or wax, giving you just enough bite to remove residue without scratching the finish you just perfected.
This infographic really drives home the core concepts that form the bedrock of safe and effective detailing.
Every choice matters. Making an informed decision comes from understanding the science behind effective cleaning and how different products interact with your vehicle's surfaces.
The Logic Behind Professional Methods
If there's one non-negotiable technique in detailing, it's the two-bucket wash method. It’s a brilliantly simple system that's your best defense against causing swirl marks, which are just microscopic scratches from dragging dirt across the paint.
The two-bucket method is your single greatest defense against wash-induced swirls. By separating your clean soapy water from your rinse water, you stop contaminants from being reintroduced to the paint via your wash mitt.
Here’s the breakdown:
- Wash Bucket: This one holds your car shampoo solution.
- Rinse Bucket: This one has plain, clean water and a grit guard at the bottom.
You load up your wash mitt from the soap bucket, wash a small section of the car, and then dunk the mitt in the rinse bucket. Rub it against the grit guard to dislodge all the dirt and grit you just picked up. Only then do you go back to the soap bucket for more suds. It’s a disciplined rhythm that keeps your wash mitt clean.
This kind of meticulous attention to detail is why the car care industry is booming. The global car detailing market hit an estimated $48.6 billion in 2025, with exterior services making up about 64% of that demand—because that's what people see.
To get started, it's crucial to have the right gear on hand. This table provides a quick look at the essential tools you'll need for each stage of the detailing process.
Essential Detailing Toolkit Overview
| Detailing Phase | Essential Tools | Recommended Products | Primary Purpose |
|---|---|---|---|
| Wash | Two Buckets w/ Grit Guards, Wash Mitt, Pressure Washer, Foam Cannon | pH-Neutral Car Shampoo | Safely remove loose dirt and grime without scratching the paint or stripping protection. |
| Decontamination | Clay Bar/Mitt, Detailing Lubricant, Iron Remover | Clay Lube Spray, Iron Fallout Remover | Remove embedded contaminants (industrial fallout, tar) that washing leaves behind. |
| Correction | Dual-Action (DA) Polisher, Various Polishing Pads | Compound & Polish | Abrasively remove paint defects like swirl marks, scratches, and oxidation. |
| Protection | Microfiber Applicator Pads, Plush Microfiber Towels | Wax, Sealant, or Ceramic Coating | Apply a protective layer to shield the paint from UV rays, water, and contaminants. |
Having a well-stocked toolkit ensures you're prepared for whatever your car's finish needs. It turns a chore into a craft.
Your next step is building out that toolkit. Take a look at our complete guide on the must-have auto detailing equipment for 2025 to make sure you have everything you need. Now that we've covered the roadmap, the next sections will dive deep into each step, turning theory into action.
Getting Down to the Pre-Wash and Contact Wash
Alright, this is where the magic happens and your car starts its journey from dirty to showroom-ready. But before you get too excited, let's talk about the most important rule of washing a car: do no harm. A great wash isn't about scrubbing harder; it's about being smart and getting the dirt off without leaving scratches and swirls behind.
The single most important part of this is the pre-wash. I can't stress this enough. Think of it as a touch-free first step to lift away all the heavy, gritty stuff before your wash mitt ever touches the paint. Skipping this is like taking sandpaper to your clear coat. You’re just asking for trouble.
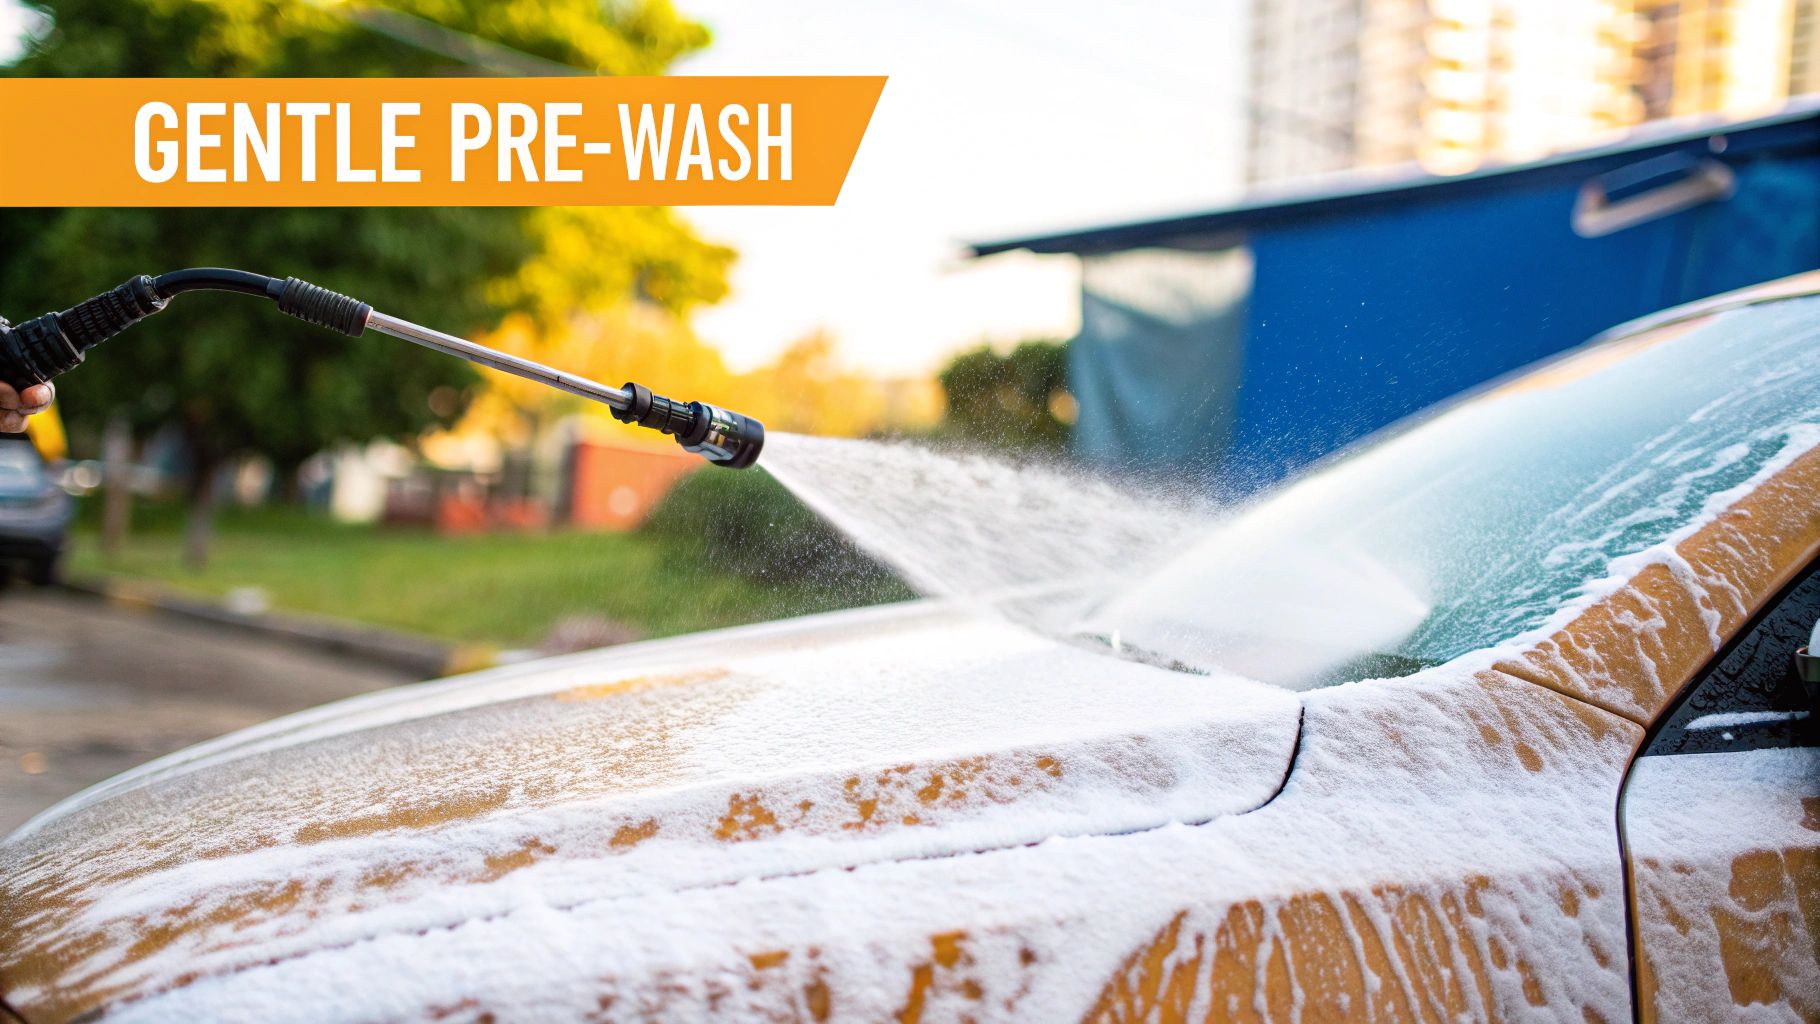
For a solid pre-wash, you can use a pre-wash spray, but a foam cannon is the real game-changer. Something like the SwiftJet Foam Gun hooks right up to a standard garden hose and covers your car in a thick blanket of suds. This foam isn't just for show; it gets in there, loosens up the dirt and grime, and lets gravity do the work of pulling it all safely off your paint.
The Rinse and Foam-Down
First things first, always start with the dirtiest part of the car: the wheels and tires. A classic rookie mistake is washing these last, which just slings brake dust and road filth all over your clean paint. Grab a dedicated wheel cleaner and a few good brushes to get into the wheel faces and barrels.
With the wheels done, give the whole car a good rinse. A pressure washer is a fantastic tool here for knocking off that initial layer of loose dust and debris. If you're looking to get serious, this guide to diesel pressure cleaners offers some great insights into how they operate.
Now for the fun part. Lay down a thick layer of snow foam, starting at the top and working your way down. Let it sit for a few minutes—you’ll actually see it dripping down, taking the dirt with it. The golden rule is never let it dry. Once it’s done its job, rinse it all off, again from top to bottom. You'll be left with a much cleaner surface that’s ready for a safe contact wash.
The Two-Bucket Method: Your Best Friend Against Scratches
Now that the worst of the grit is gone, it's time for the contact wash. This is where the legendary two-bucket method comes into play. It’s the single best technique for preventing wash-induced scratches by keeping your clean, soapy water separate from the dirt you're taking off the car.
The two-bucket method is brilliantly simple but incredibly effective. One bucket holds your suds, the other holds plain rinse water. By rinsing your mitt in the second bucket before getting more soap, you trap the dirt and stop it from going right back onto your paint.
Here's how we do it:
- Get Your Buckets Ready: One gets filled with your pH-neutral car shampoo and water, the other with just plain water. Drop a grit guard into the bottom of both, but it's most important in your rinse bucket.
- Suds Up the Mitt: Dunk a clean, plush microfiber wash mitt into your soap bucket.
- Wash One Panel at a Time: Gently wash a single section, like the roof, using straight-line motions. Avoid going in circles—that's what creates those ugly, spiderweb-like swirl marks.
- Rinse and Repeat: Before you even think about getting more soap, dunk that now-dirty mitt into your rinse bucket. Give it a good scrub against the grit guard to release all the dirt you just picked up.
- Reload and Continue: Now that the mitt is clean again, go back to the soap bucket and move to the next panel. You repeat this process for the entire car.
Following this disciplined routine is the foundation of a safe wash. If you really want to get into the nitty-gritty, we have a whole article that explains why the two-bucket wash method is so crucial for protecting your paint.
Once the last panel is done, give the car a final, thorough rinse from top to bottom. If you let the water flow gently over the panels without a high-pressure nozzle, you can get it to "sheet" off, which pulls most of the standing water with it and helps prevent water spots.
Now you’re left with a truly clean surface, perfectly prepped for the next phase: decontamination.
Decontaminating Paint for a Smooth, Glass-Like Surface
Even after a meticulous wash, your car’s paint is rarely as clean as it looks. Go ahead, try this: put your hand inside a thin plastic sandwich bag and gently glide it over a panel like the hood or roof. Feel that? That gritty, sandpaper-like texture is the hallmark of bonded contaminants that washing just won't budge.
This roughness comes from all sorts of environmental gunk embedding itself into your clear coat. We're talking about industrial fallout, tiny specks of brake dust, tree sap, and road tar. These particles create a stubborn barrier on your paint, which is bad news because it stops polishes and waxes from bonding properly. This decontamination stage is one of the most critical car detail steps if you're serious about getting a slick, glossy finish.
Removing Embedded Grime with Clay
The go-to tool for this job has always been the detailing clay bar. The best way to think of it is as a special-purpose putty for your paint. When you glide it across a well-lubricated surface, it gently grabs and lifts those embedded particles right out of the clear coat, leaving behind a surface that’s as smooth as glass. It's a surprisingly simple mechanical process that delivers incredible results.
A lot of people worry that claying is an abrasive process that scratches or removes paint. The truth is, a quality clay bar is designed to pull contaminants out of the clear coat, not grind them into it. The secret to keeping it safe and effective is using plenty of proper lubricant.
These days, you also have modern options like synthetic clay mitts or towels. These are fantastic because they're reusable and can speed up the process. They use a special rubber polymer face that does the same job as a clay bar, but with a huge bonus: if you drop one, you can just rinse it off. Drop a traditional clay bar on the ground, and it's toast—it has to be thrown away.
To get started, you just need your clay media (bar, mitt, or towel) and a quality clay lubricant.
- Work Small: Tackle one small area at a time, maybe a 2x2 foot section. This keeps your lubricant from drying out before you're done.
- Lube it Up: Don't be shy with the clay lube. You want to create a slick, wet surface for the clay to glide over effortlessly. There's no such thing as too much here.
- Gentle Gliding: Using very light pressure, slide the clay back and forth across the panel in straight lines. You'll actually feel and hear it working as it picks up the grit.
- Feel the Difference: Keep going until the clay moves silently and smoothly. At that point, grab a clean microfiber towel, wipe the area dry, and feel the surface. The difference will be night and day.
- Keep it Clean: If you're using a traditional clay bar, remember to fold and knead it regularly to expose a fresh, clean side.
For a complete breakdown of this essential skill, take a look at our easy step-by-step guide on how to clay bar your car. It covers everything you need to know to get professional results.
Chemical Decontamination for Fallout and Tar
Beyond the contaminants you can feel, there are others that need a chemical approach. This is where specialized sprays come in to dissolve what a clay bar might leave behind.
The two main products you'll need are an iron remover and a tar remover.
-
Iron Removers: Ever seen those tiny, orange rust-colored specks on your paint, especially if you have a white or silver car? That's iron from brake dust and industrial sources. Over time, it can start to corrode your clear coat. An iron remover spray reacts with these particles, causing them to "bleed" a deep purple color as they dissolve. It's wild to watch and shows you just how much was stuck on your paint before you safely rinse it all away.
-
Tar Removers: Those stubborn black dots of road tar that cling to your lower body panels require a solvent-based cleaner. A good tar remover will quickly dissolve these spots, letting you wipe them off with a microfiber towel—no aggressive scrubbing required.
By combining both mechanical (clay) and chemical (sprays) methods, you guarantee the paint is 100% clean. This gives you the perfect, uncontaminated canvas you need before moving on to the exciting part: polishing and paint correction.
Bringing Your Paint to Life with Correction
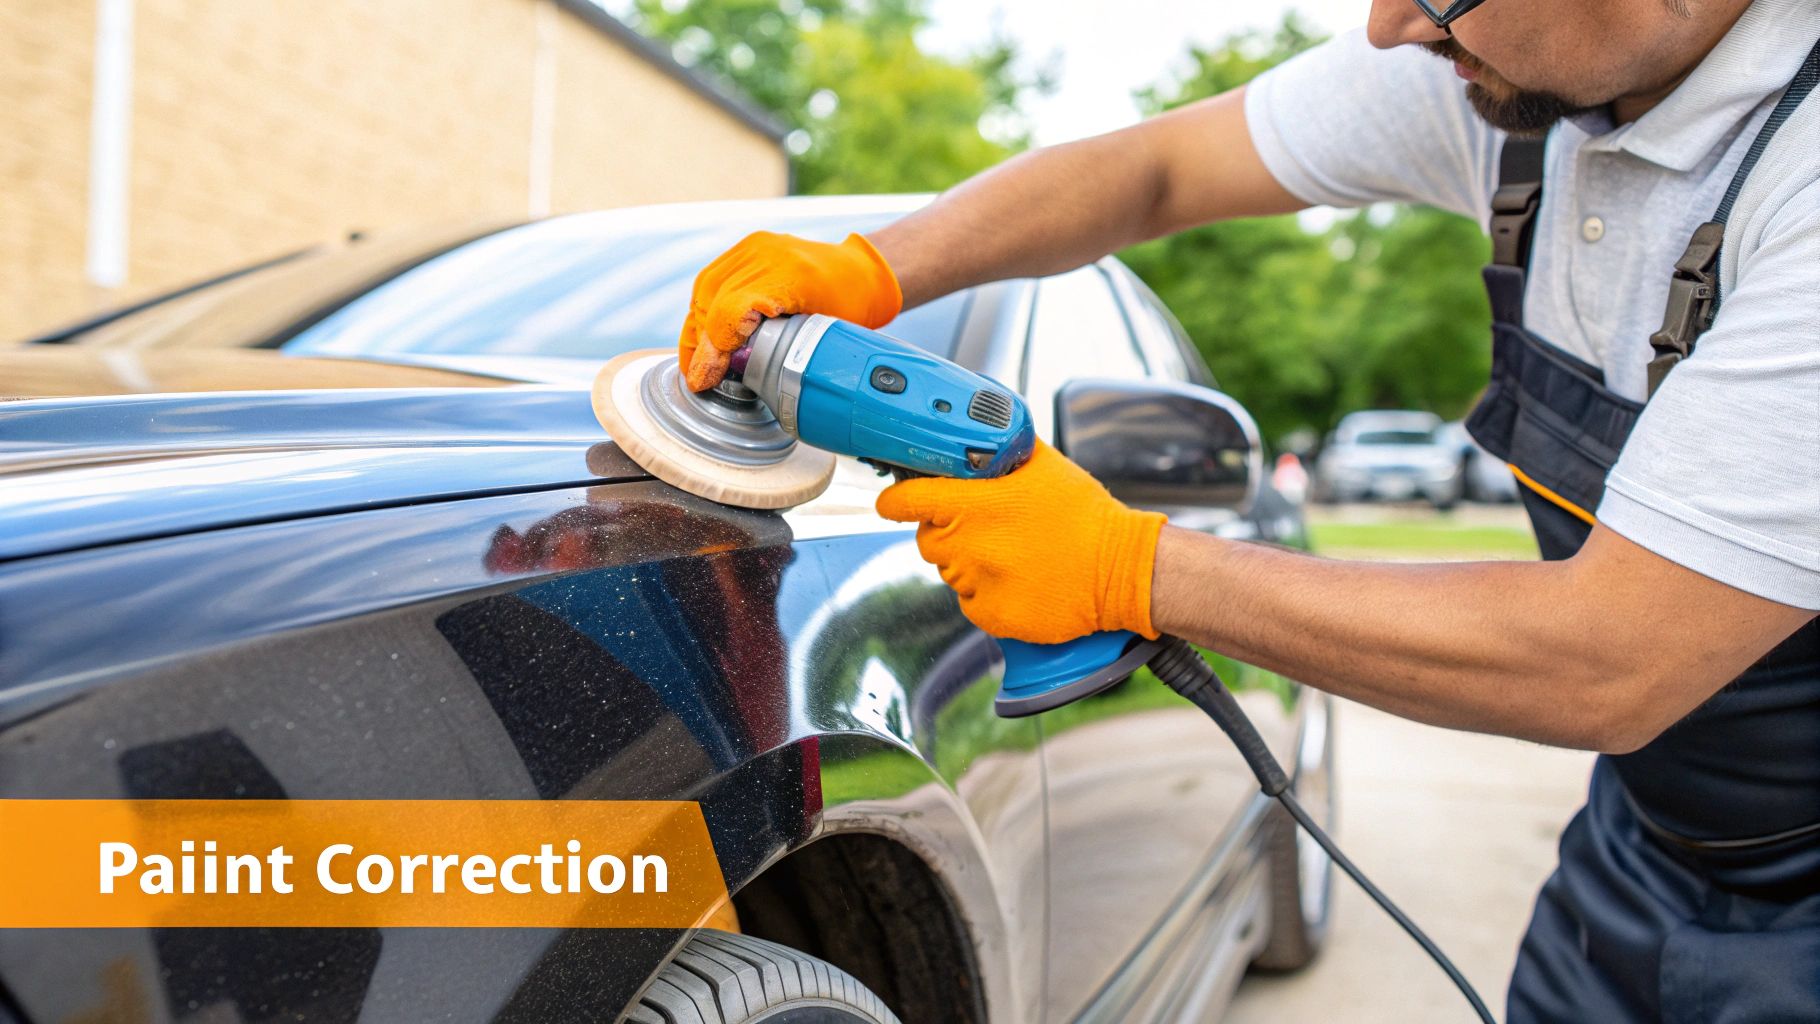
Once you’ve fully decontaminated the paint, you’ve basically created a perfect, clean canvas. Now for the fun part—the step that delivers that jaw-dropping "wow" factor: paint correction.
This is where you physically erase the tiny scratches, swirl marks, and haziness that make a car’s finish look dull and tired. It’s how you unlock a level of gloss and depth you probably didn't think was still in there. Honestly, this is the single biggest difference between just a clean car and a professionally detailed one.
Lots of people hear "paint correction" and immediately picture an aggressive, high-risk process. The reality is, modern tools have made it incredibly safe and accessible for any enthusiast willing to learn. The goal isn’t to strip away paint; it’s to carefully level an almost microscopic layer of the clear coat, just enough to make those imperfections vanish without hurting the paint’s integrity.
This pursuit of a flawless finish has sparked a global obsession with detailing. We're seeing huge growth everywhere, but especially in new markets. For instance, the Asia-Pacific region is set to become the fastest-growing car detailing market, with a projected CAGR of 9.68% between 2024 and 2030. This is largely driven by the influx of luxury and electric vehicles, which owners are eager to protect with services like paint correction and ceramic coatings. You can dive deeper into the trends by checking out the expanding global car detailing market report.
Understanding Compounds and Polishes
Paint correction isn't a one-size-fits-all job. The product you choose depends entirely on how severe the paint defects are. This is where you need to know the difference between compounds and polishes.
- Compounds: Think of these as the heavy hitters. They’re packed with more aggressive abrasives to cut through noticeable scratches, water spots, and heavy oxidation. You bring out a compound when the paint needs serious help.
- Polishes: These are your finishing tools. Polishes use much finer abrasives to refine the surface, clearing up light swirls and the slight haze that a compound might leave behind. This is what creates that crisp, mirror-like shine.
For most DIY detailers looking to fix typical wear and tear, a good medium-cut polish is the perfect starting point. It has enough muscle to correct most common swirls but is gentle enough that you won't get into trouble.
Choosing Your Polisher and Pads
You can technically polish by hand, but for true paint correction, a machine is a must. The dual-action (DA) polisher is the undisputed champion for beginners and pros alike. Its head doesn't just spin; it oscillates, which prevents heat from building up in one spot and virtually eliminates any risk of burning through the paint.
The pad you attach to your polisher is just as critical as the liquid you’re using. Pads come in different materials and levels of "cut," from aggressive to ultra-fine.
- Foam Pads: These are the most common choice. They come in a whole spectrum of densities, from heavy-cutting pads for compounds to soft finishing pads for applying waxes or sealants.
- Microfiber Pads: These pads offer a significant step up in cutting power from foam. They are fantastic for tackling deeper defects when paired with a good compound.
A great, reliable combo to start with is a medium-cut orange or yellow foam pad paired with a versatile one-step polish. This setup is effective enough to remove the majority of imperfections while still being very forgiving for a first-timer.
The Art of the Test Spot
Before you even think about polishing your whole car, you need to do a test spot. This is a non-negotiable safety step. Find a small, out-of-the-way area—a 2x2 foot section on the trunk lid is perfect—and try out your chosen pad and polish combination.
Think of your test spot as a diagnostic tool. It tells you if your process is strong enough to fix the defects but not so aggressive that it creates new problems. This is how you find the perfect recipe for your car’s specific paint.
After working the test area and wiping it clean, get a good light on it. Are the swirls gone? Is the finish glossy and clear? If it looks great, you've found your winning formula. If the defects are still there, you can step up to a slightly more aggressive pad or polish and run the test again.
Perfecting Your Polishing Technique
Once your process is dialed in, you can start working your way around the vehicle. The key here is to be methodical. Stick to small, manageable sections, about the same size as your test spot, to ensure you get complete and even coverage everywhere.
Here’s a simple workflow for a flawless result:
- Prime the Pad: Apply 4-5 pea-sized drops of polish directly onto your foam or microfiber pad.
- Spread the Product: With the machine off, gently dab the pad across your working section. This prevents polish from slinging everywhere when you turn it on.
- Initial Passes: Turn the polisher to a low speed (setting 2 or 3) and make a couple of slow passes to spread the product thin.
- Work the Polish: Now, bump the speed to a medium setting (4 or 5). Move the polisher in a cross-hatch pattern—a few overlapping passes horizontally, followed by a few vertically. Use light, steady pressure and let the machine do the work.
- Finish Down: You'll see the polish start to look clear and a bit oily. This means the abrasives have broken down. Make one final pass with very light pressure to really refine the finish.
- Wipe and Inspect: Turn the machine off, lift it from the paint, and wipe the residue away with a clean, plush microfiber towel. Use your light to inspect the results before moving on.
Following these core steps will help you safely remove those ugly imperfections and bring back a brilliant, head-turning shine. Once you’re done, the paint will be perfectly prepped for its final protective layer.
Locking In Your Shine with Lasting Protection
You've done the hard work. After all the washing, decontaminating, and polishing, your car's paint finally has that deep, liquid gloss you were after. This is the moment it all pays off, but if you stop now, that incredible shine will be short-lived. This final stage is all about locking in that finish and giving your paint a durable shield against the real world.
Think of this protective layer as a sacrificial barrier. It's the first line of defense against UV rays, acid rain, bird droppings, and all the road grime that gets thrown at your car daily. Not only does it preserve the work you just did, but it also makes future washes a whole lot easier. Dirt just can't stick to a properly protected, slick surface.

When it comes to protection, you have three main paths to choose from. Each has its own personality, application style, and lifespan. The right choice really comes down to what you want to achieve, your budget, and how much time you're willing to put in.
Choosing Your Ideal Paint Protection
The world of waxes, sealants, and coatings can feel a bit overwhelming, but it all boils down to a trade-off between looks, longevity, and the effort it takes to apply. From the warm, classic glow of a natural wax to the rock-hard, candy-like shell of a ceramic coating, there’s a perfect fit for every car and owner.
The best protection for your car is the one you’ll actually apply and maintain. A perfectly applied wax that lasts six weeks is better than a professional ceramic coating that you never get around to using.
Let's look at the main players to help you figure out which one is right for you.
Paint Protection Options Compared
Choosing between a wax, sealant, or ceramic coating depends on your priorities. Are you chasing the deepest possible shine for a weekend car show, or do you need rugged, long-term protection for your daily driver? This table breaks down the key differences to make the decision easier.
| Protection Type | Durability | Gloss Level | Application Difficulty | Ideal For |
|---|---|---|---|---|
| Carnauba Wax | 4-8 weeks | Warm, deep glow | Easy | Enthusiasts who enjoy frequent waxing and want a rich, classic car show look. |
| Paint Sealant | 6-12 months | Sharp, reflective shine | Moderate | The practical daily driver owner seeking long-lasting protection with minimal fuss. |
| Ceramic Coating | 2-5+ years | Candy-like, hard gloss | Difficult | Dedicated owners wanting the ultimate in durability, chemical resistance, and ease of cleaning. |
As you can see, it's a classic balancing act. The products that are easiest to apply generally don't last as long, while the most durable options demand a much more involved process. There's no single "best" answer—only what's best for your car and your routine.
Applying Waxes and Sealants Flawlessly
For old-school carnauba waxes and modern synthetic sealants, the application is very similar and totally beginner-friendly. There's one golden rule that applies to both: thin is in. Slathering on a thick coat doesn't give you more protection; it just makes it a pain to buff off and wastes your product.
Here’s how to get a perfect, streak-free finish every time:
- Prep Your Applicator: Put a few pea-sized dots of product on a soft foam applicator pad. That’s really all you need for an average-sized panel, like a door or fender.
- Spread a Thin, Even Coat: Gently work the product onto the paint. I prefer overlapping straight-line motions to ensure full coverage, but small circles work too. You're aiming for a thin, hazy film, not a thick paste.
- Let It Cure: This is the most important step. You have to let the product dry to a haze. This can take anywhere from 5 to 20 minutes, depending on the product, temperature, and humidity. Always check the directions on the bottle.
- Do the Swipe Test: Lightly swipe your finger across a treated spot. If the residue comes off clean, it's ready. If it smears, give it a few more minutes to cure.
- Buff to a Brilliant Shine: Grab a clean, plush microfiber towel and gently wipe away the haze. Flip the towel to a fresh side for one final pass to bring out that slick, brilliant gloss.
The Commitment of Ceramic Coatings
Ceramic coatings are a different beast entirely. They aren't just a layer sitting on the paint; they form a chemical bond with the clear coat, creating a semi-permanent, hardened glass layer. This is what gives them their incredible durability and resistance to chemicals.
But that permanence means the application is far less forgiving.
- Prep is Non-Negotiable: The paint has to be as close to perfect as possible before you apply the coating. Any swirl mark or scratch you coat over will be locked in underneath that hard shell for years. This is why a full paint correction is mandatory.
- You Need a Controlled Space: Coatings must be applied indoors, away from sun, dust, and moisture. The ambient temperature and humidity can drastically change how the coating behaves and cures.
- The Application is Meticulous: The process involves applying the liquid to a small section at a time, watching for it to "flash" (when the solvents evaporate and it gets a rainbow-like look), and then buffing off the residue within a very tight window. If you wait too long, you'll be left with high spots that are incredibly difficult to remove.
Once it's on, the car has to stay completely dry for at least 24 hours as the coating fully hardens. It’s a serious commitment, but the reward is years of unmatched protection and a gloss that makes keeping your car clean almost effortless.
Your Car Detailing Questions, Answered
Even when you feel like you have a good handle on the detailing process, questions always pop up. That’s a good thing—it means you’re trying to dial in your technique. I've heard these same questions from beginners and weekend warriors alike, so let's clear up a few common hurdles.
Think of this as your go-to troubleshooting guide for getting more consistent, professional-level results.
How Often Should I Really Detail My Car?
This is probably the number one question I get, and the honest answer is: it depends.
A full, top-to-bottom detail—we're talking clay bar, paint correction, the whole nine yards—is something you should only need to do once or twice a year. It’s a major reset for your car's finish, and overdoing it is just a waste of time and product.
Maintenance is a completely different ballgame. A good maintenance wash every one to two weeks is crucial to keep dirt and grime from building up and bonding to your paint.
What’s right for your car? It comes down to a few key things:
- How you use it: A daily driver that sits in traffic is going to need a lot more love than a garaged classic that only sees sunny days.
- Where you live: If you're dealing with road salt in the winter or baking sun in the summer, your paint is under constant attack and needs more frequent protection.
- Where you park: A car that lives in a garage is shielded from the elements. One that’s parked on the street 24/7? It's going to need a full detail more often.
Can I Just Polish My Car by Hand?
You absolutely can, but let’s be realistic about what you'll achieve. Polishing by hand is perfect for applying a cleaner wax or a glaze. It's a great way to add some quick gloss and fill in some very light, microscopic swirls, making the paint look richer.
But if you're trying to achieve true paint correction—actually removing those frustrating swirl marks, light scratches, and oxidation—you need a machine. A dual-action (DA) polisher gives you the consistent speed and power to break down the polish's abrasives and level the paint. Your arm just can't match that. For that deep, flawless, "wet-look" finish, a machine is non-negotiable.
Sealant vs. Ceramic Coating: What's the Real Difference?
This is a great question. The main difference comes down to chemistry and durability.
A paint sealant is a synthetic polymer that sits on top of your paint, creating a slick, protective layer. It offers fantastic shine and protection that usually lasts 6 to 12 months.
A ceramic coating, on the other hand, is made from Silicon Dioxide (SiO2). It creates a chemical bond with your paint, forming a semi-permanent, hardened glass layer.
A simple way to think about it: a sealant is like a top-of-the-line winter jacket for your car. A ceramic coating is more like a permanent suit of armor. Both protect, but one is built for a much longer, tougher battle.
Because of that bond, a coating can last 2 to 5+ years. It provides way better resistance to chemicals, bird droppings, and UV rays, not to mention that insane water-beading (hydrophobic) effect. The trade-off? The prep work has to be absolutely perfect, and the application is much less forgiving than a simple sealant.
Is It Actually Safe to Use a Pressure Washer on My Car?
Yes, it's not only safe—it's one of the best tools you can own for washing your car properly. A pressure washer is your best friend during the pre-wash stage. It has the power to blast away loose grit and grime before you ever touch the paint with a mitt, which is the number one cause of swirl marks.
Safety is all about using the right technique and the right nozzle.
- Stick with a wide fan tip. The 40-degree (white) nozzle is the go-to for automotive use.
- Keep your distance. Always maintain at least 12-18 inches between the nozzle and the car's surface.
- Never, ever use the zero-degree (red) tip. That thing is powerful enough to slice into tires and strip paint right off a panel.
Follow those rules, and you'll get all the benefits of a pressure washer with none of the risks.
Ready to take your car wash to the next level? The SwiftJet Car Wash Foam Gun turns any standard garden hose into a foam-blasting machine, laying down the thick suds you need for a safer wash. Upgrade your car care routine today at swiftjetusa.com.