
The absolute best way to wash your car at home is to combine two key detailing phases: a touchless pre-wash with a foam gun and a meticulous two-bucket contact wash. This approach, trusted by pros, gets rid of all the heavy, scratch-inducing grit before a wash mitt ever makes contact with your paint. It’s a surefire way to get a safer, more brilliant clean than any drive-through wash could ever hope to provide.
Why Washing Your Car Yourself Is a Game-Changer for Your Paint
In a world obsessed with convenience, the allure of the drive-through car wash is strong. You roll in, relax for a few minutes, and drive out with what looks like a clean car. But have you ever considered the hidden cost of that convenience? It often shows up as microscopic scratches and swirl marks, the tell-tale signs of abrasive, dirty brushes and overly aggressive chemicals.
Washing your car yourself is about so much more than saving a bit of cash. It's about taking pride in your vehicle and actively preserving its finish and value.
The tide has certainly turned in how we care for our cars. Back in 1996, more than half of us washed our cars at home. Fast forward to 2023, and the numbers have completely flipped, with a whopping 79% of drivers now heading to professional car washes. This shift is all about speed and new tech, but it overlooks a critical detail: a proper at-home wash gives you total control, which is the key to protecting your paint. You can dig deeper into these consumer trends through detailed industry analysis.
The Trouble with Automated Car Washes
Let's be honest, automated car washes are built for speed and volume, not for delicate, careful cleaning. Think about those giant, spinning brushes—they pick up dirt, sand, and grit from every single car that went through before you. When they slap against your car, they're essentially grinding that abrasive debris into your paint. It’s like a light sanding session you never asked for.
On top of that, many of these places rely on harsh, high-pH soaps to dissolve grime in seconds. They work, but they also strip away your car’s protective wax or sealant. This leaves your clear coat exposed and vulnerable to UV damage, acid rain, bird droppings, and all sorts of other environmental nasties.
The Power Is in Your Hands
When you wash your car at home, you are the one in charge. You pick the soaps, you choose the tools, and you control the technique from start to finish. This gives you the power to use the same proven methods that professional detailers have sworn by for decades to get those jaw-dropping, flawless results.
It all boils down to one simple, non-negotiable rule: never drag grit across your car's paint. A DIY wash is the only way to religiously follow this principle, something an automated system, by its very nature, can't do.
This hands-on process is more than just a cleaning—it's a maintenance ritual. You'll be the first to spot a new rock chip or a small scratch, giving you a chance to fix it before it turns into a bigger headache. By embracing foundational techniques like the two-bucket method and a quality pre-wash using a foam gun like the SwiftJet, you’re not just cleaning your car; you're actively preventing damage. It’s the ultimate way to protect your investment and get a truly satisfying, deep clean.
Building Your Professional Home Wash Toolkit
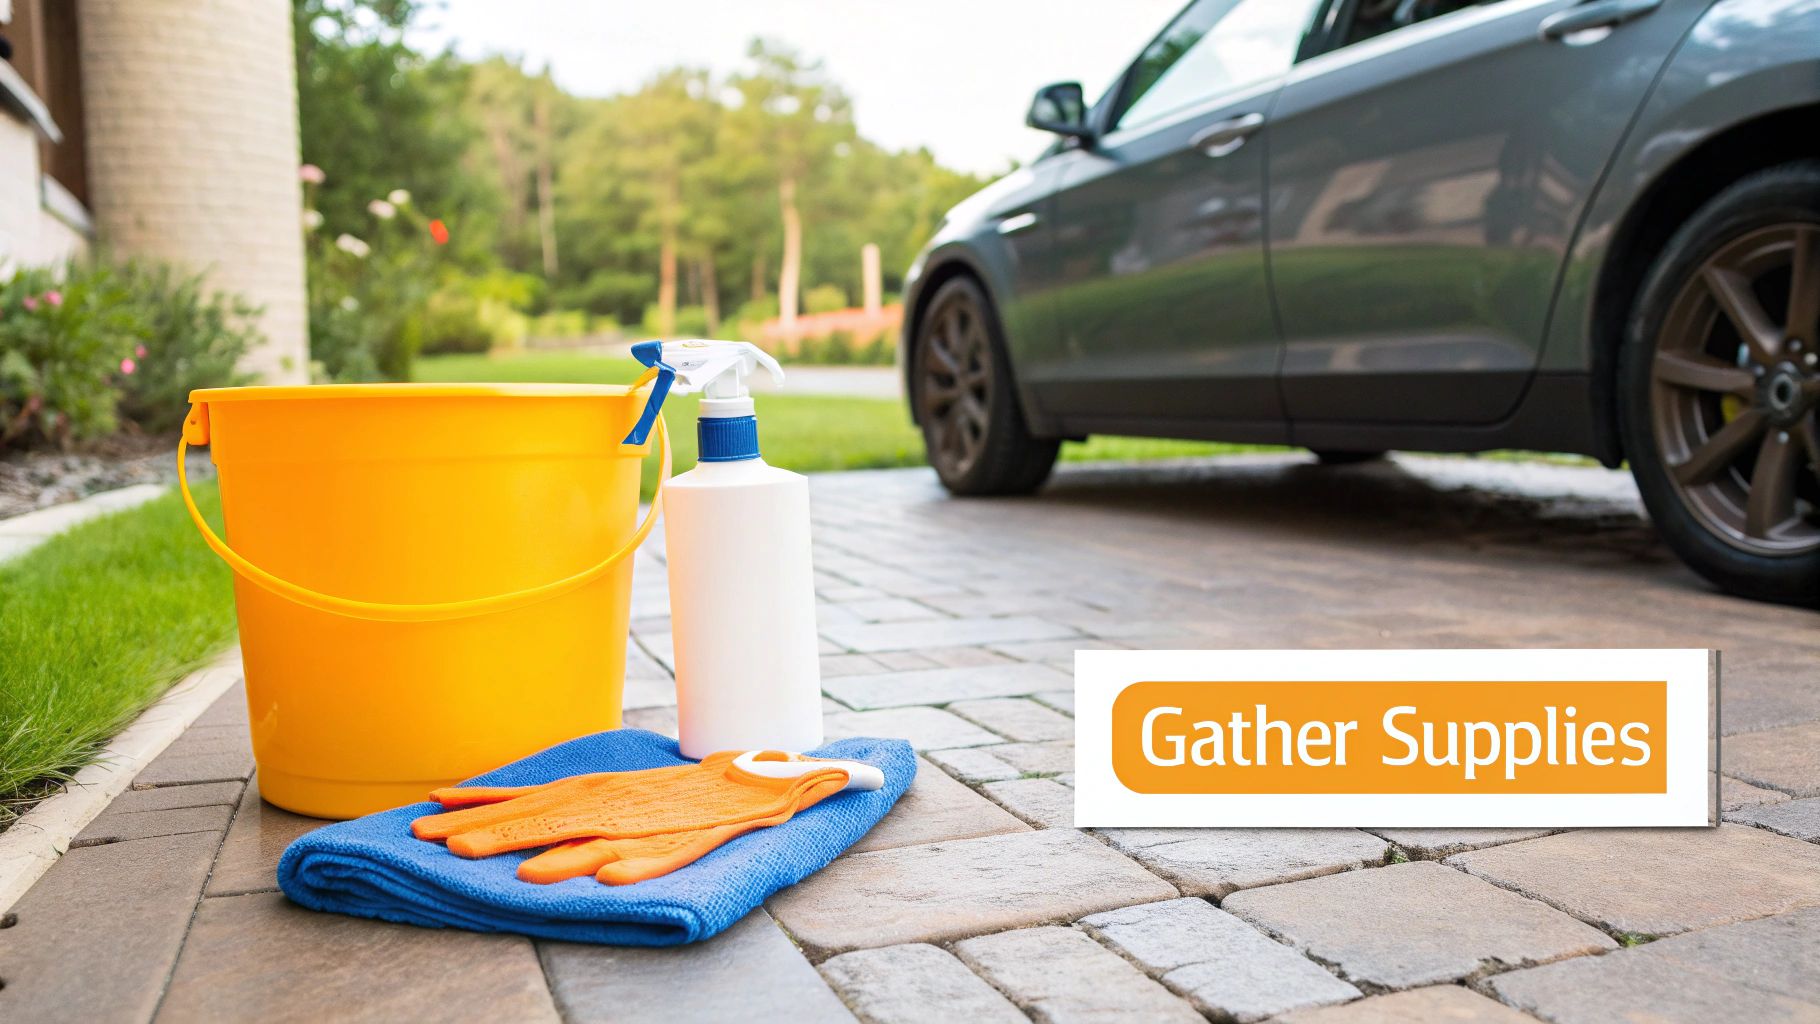
A truly flawless finish doesn't just happen. It all starts with having the right gear on hand before the first drop of water hits your car. If you're still picturing a single bucket, a worn-out sponge, and some dish soap, it's time for an upgrade. To get professional results, you need an arsenal built to clean effectively while protecting your paint. This is the foundation of the best way to wash your car at home.
Gathering the right essential cleaning supplies is the first, most critical step. The whole point is to lift dirt and grime away from the surface safely, not grind it into the clear coat and create a web of new scratches.
The secret lies in tools that minimize direct, abrasive contact. That’s why a quality foam gun, plush microfiber mitts, and dedicated wheel-cleaning gear have become absolute must-haves for anyone serious about their car's appearance.
To see what this looks like in practice, here’s a quick comparison of a basic setup versus what the pros (and serious enthusiasts) use at home.
Essential vs. Pro-Level Home Car Wash Tools
| Tool Category | Essential (Good) | Pro-Level (Best) |
|---|---|---|
| Water Source | Standard Garden Hose & Nozzle | Garden Hose with a Foam Gun |
| Buckets | Single Bucket | Two Buckets with Grit Guards |
| Wash Media | Sponge or Basic Cloth | Plush Microfiber Wash Mitt |
| Cleaning Agent | All-Purpose Car Soap | pH-Neutral Car Shampoo |
| Wheel Cleaning | Old Rag | Dedicated Wheel Brushes & Cleaner |
| Drying | Old Bath Towel or Chamois | Large Microfiber Drying Towel |
As you can see, the "best" tools aren't just fancier—they're specifically designed to prevent the very damage that improper washing causes.
Core Components For A Scratch-Free Wash
Let’s break down the most important items. Your choice of soap is huge. A pH-neutral car shampoo is your best friend here. It's engineered to dissolve tough road grime without stripping away the wax or sealant you've so carefully applied. It’s a world away from harsh dish soaps that can dull your finish.
Next up, think about what physically touches your car. A high-quality microfiber wash mitt has a deep, plush pile that acts like a magnet for dirt. Instead of pushing grit across the paint, it pulls particles deep into its fibers, keeping them safely away from your finish.
This mitt works in tandem with a two-bucket system.
- Two Buckets with Grit Guards: This is your number one defense against swirl marks. One bucket holds your soapy water, the other plain rinse water. The Grit Guard is a simple plastic grate that sits at the bottom, trapping all the dirt you rinse off your mitt so it can't get back on your car.
- Dedicated Wheel Brushes: Your wheels are covered in nasty, corrosive brake dust. Using separate brushes for them is non-negotiable. You never want the abrasive gunk from your wheels to contaminate your wash mitt and touch your paint.
- Microfiber Drying Towels: Forget the chamois or old bath towels. Modern, waffle-weave microfiber drying towels are incredibly absorbent, pulling water off the surface with a single, gentle pass. This drastically reduces the chances of scratching your paint while drying.
The single most transformative tool you can add to your home washing routine is a foam gun. It elevates your process from a simple wash to a professional-style detail. The magic is in the touchless pre-wash, which safely removes the bulk of abrasive dirt before your mitt ever touches the paint.
The Foam Gun: Your Secret Weapon
A foam gun like the SwiftJet is a game-changer. It simply clips onto your garden hose and mixes your car shampoo with water and air, blanketing your car in a thick, clinging foam.
This foam doesn't just look cool; it has a job to do. It dwells on the surface, softening and encapsulating dirt and grit, allowing you to blast most of it away with just the rinse. This pre-wash stage is what separates a decent wash from a truly great, safe one.
Of course, not all foam guns are created equal. If you need help navigating the options, our ultimate guide to choosing an auto foam gun breaks everything down. By investing in this kind of curated toolkit, you're setting yourself up for a safer, more efficient, and deeply satisfying wash every single time.
Mastering the Pre-Wash to Prevent Scratches
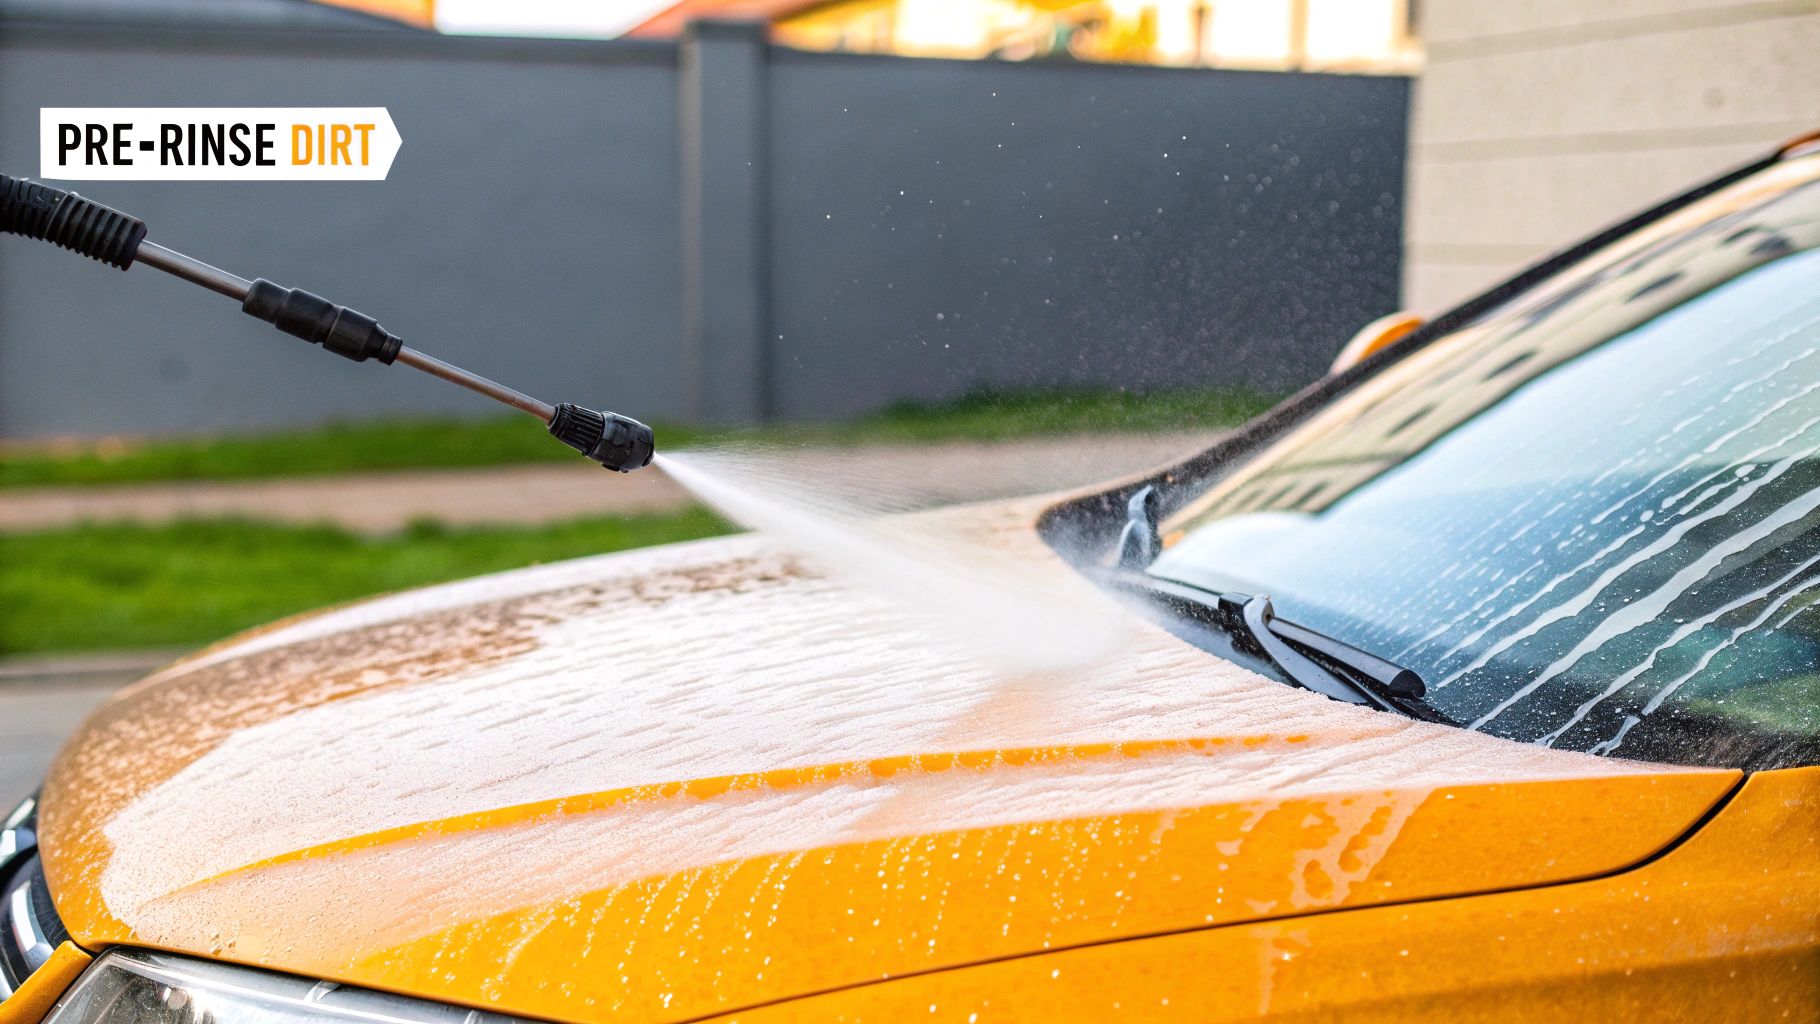
If there's one single step that separates a quick driveway rinse from a true professional detail, this is it. The pre-wash is your best line of defense against those annoying swirl marks and fine scratches that slowly but surely dull your car's finish. Think about it: most paint damage happens the moment you put a mitt to a dirty car, essentially grinding all that loose grit and road grime right into your clear coat.
A proper pre-wash changes the game entirely. It’s the secret to washing your car at home like the pros because it gets rid of the most abrasive, harmful dirt before you ever make physical contact.
The Power of Snow Foam
Your goal here is simple: blanket the entire vehicle in a thick layer of snow foam. For this, you'll want a quality foam gun or cannon. A tool like the SwiftJet is ideal because it hooks up to a standard garden hose and whips up a rich, clinging foam that goes on thick.
But this isn't just about cool-looking photos. That foam is doing some serious work.
- It Dwells: Good, thick foam clings to the car's vertical surfaces. This gives the soap's cleaning agents the time they need to break down the grime.
- It Loosens: The active ingredients get to work softening up stubborn stuff like caked-on dust, road film, and bug splatters.
- It Encapsulates: As the foam drips, it surrounds the larger, gritty particles of dirt and sand, lifting them away from the paint's surface.
Let the foam sit for a few minutes—don't let it dry out!—and then just rinse it all off. You'll literally see sheets of dirt and grime just slide off the car. What's left is a much cleaner, much safer surface for your main hand wash.
The pre-wash stage is non-negotiable if you care about long-term paint perfection. By removing up to 80% of loose dirt before a wash mitt ever touches the paint, you slash the risk of creating new swirl marks.
Adopting this professional mindset is a smart move. After the 2008 recession, as disposable income recovered, new car sales climbed. More owners started looking for ways to protect their investment, and that often meant turning to professional-grade techniques. You can replicate those same high standards at home, and the pre-wash is where it all starts.
Pre-Wash Best Practices
To get the best results, always try to work in the shade or on an overcast day. You never want to apply foam to a hot, sun-baked panel, as it will dry way too fast and can leave behind a stubborn residue.
Give the foam about two to five minutes to do its job. The perfect timing is when you see it start to slowly run down the sides, pulling all that loosened dirt with it.
Once it's dwelled, grab your hose or pressure washer and rinse everything off thoroughly, always starting from the top and working your way down. This lets gravity help you, ensuring all that grime flows down and off the car instead of getting splashed back onto a panel you just rinsed.
Rinsing properly is also a big deal, especially if you have hard water. To learn more, check out our guide on how to avoid water spots when washing your car. After this rinse, your car is prepped and ready for a much safer contact wash.
Alright, the heavy lifting of the pre-wash is done. You've blasted away the thickest layers of road grime, which means it’s time for the main event: the contact wash. This is where the magic really happens, and the secret to a flawless finish is the two-bucket method.
If there's one non-negotiable technique in car detailing, this is it. Skipping this step is the fastest way I’ve seen people accidentally scratch their own paint, creating those ugly swirl marks you’re working so hard to avoid.
Setting Up for a Swirl-Free Wash
The beauty of the two-bucket method is its simplicity. You just need two buckets. To really do it right, though, you’ll want to stick a Grit Guard in the bottom of each one. It's a simple plastic grate that sits at the bottom, but its job is critical: it traps all the dirt you rinse off your wash mitt, keeping it from getting stirred back up and dragged across your paint.
Here's how you set it up:
- Bucket #1 (The "Wash" Bucket): Fill this with your favorite pH-neutral car soap, following the dilution ratio on the bottle. This is your clean, soapy water.
- Bucket #2 (The "Rinse" Bucket): This one just gets plain, clean water. Its only job is to clean your mitt.
Once you’re set, you’ll always start washing from the top of the car and work your way down. Gravity is your friend here. The roof, windows, and hood are usually the cleanest parts. Washing them first lets the soapy water cascade down, helping to loosen the tougher grime on the lower panels before your mitt even gets there.
The Wash-and-Rinse Cycle
The rhythm of a two-bucket wash is what protects your paint. It’s a simple, repeatable cycle that you’ll get into quickly.
The golden rule is this: dip your wash mitt into the soap, wash a single small section of your car, and then plunge that dirty mitt into your rinse bucket. Only after you’ve scrubbed it clean and wrung it out do you go back to the soap bucket. This is what keeps your wash water from turning into liquid sandpaper.
When you’re actually washing, always use straight, overlapping motions. Forget what you’ve seen in movies—scrubbing in circles is a major cause of swirl marks. I find it easiest to mentally divide the car into small, manageable sections: the roof is one section, the hood is another, each door is its own, and so on.
This is the basic flow for prepping your soap or foam solution before you start.
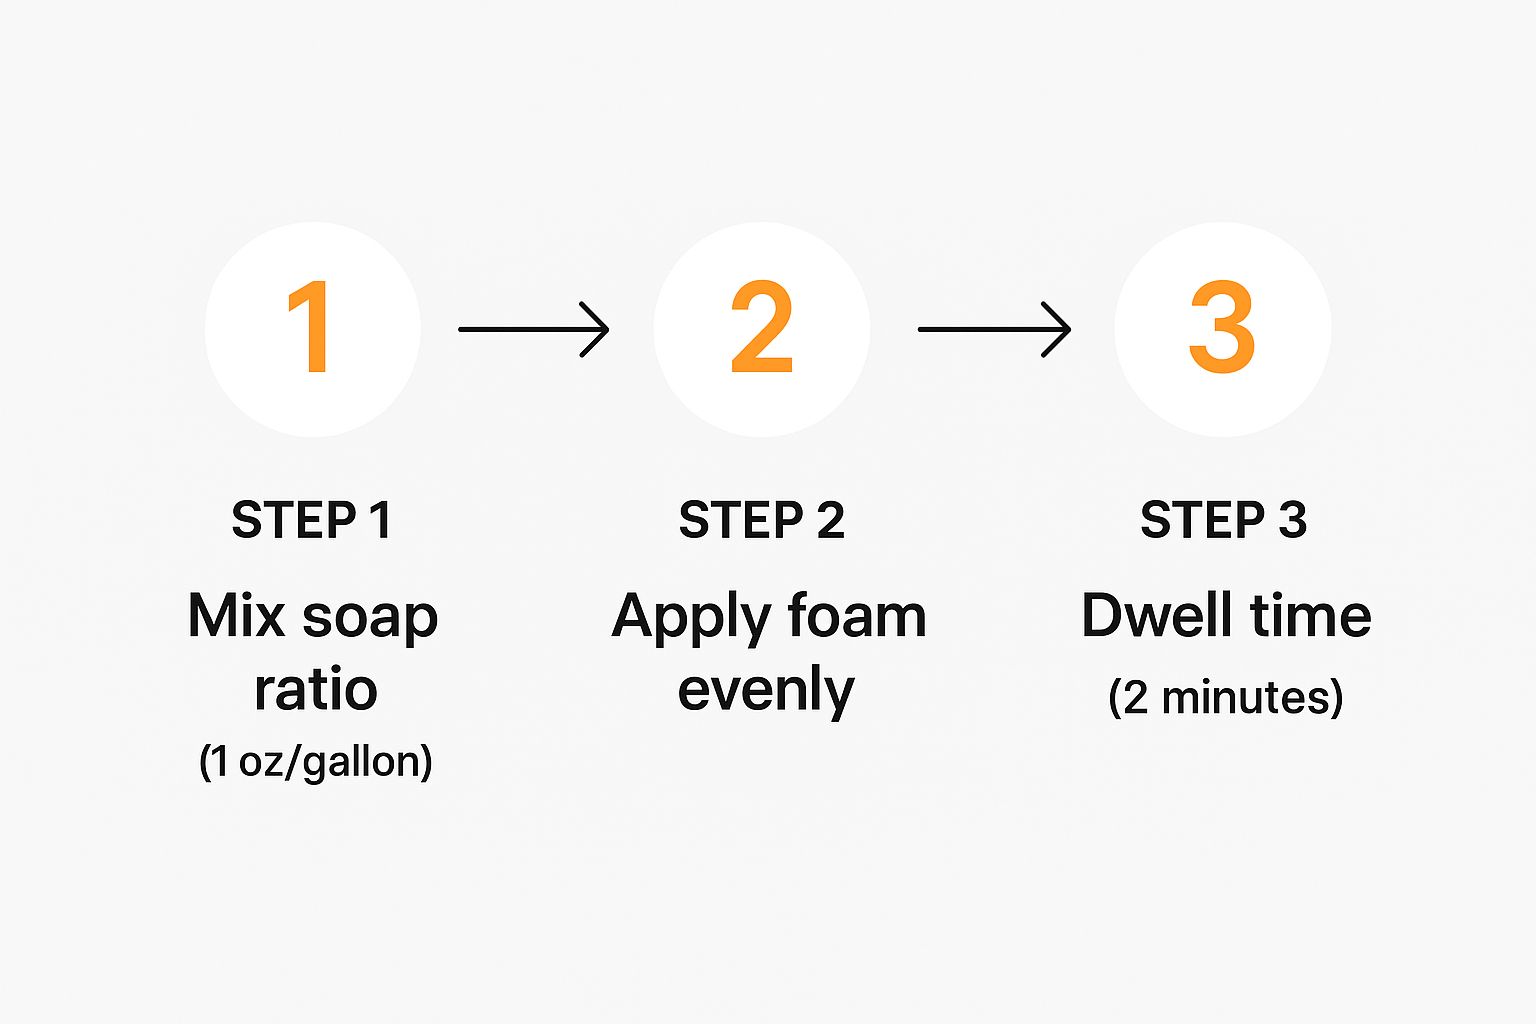
As the visual shows, getting your measurements right and letting the product do its job is key to an effective and safe wash.
After washing one panel, dunk that mitt into the rinse bucket and give it a good scrub against the Grit Guard. You’ll see the dirt fall to the bottom. The first time you do this, you'll be shocked at how much filth ends up in what started as a bucket of clean water.
So, the process looks like this:
- Load Up: Dunk your clean mitt in the soap bucket.
- Wash: Gently clean one panel using straight-line passes.
- Rinse Clean: Submerge the dirty mitt in the rinse bucket and scrub it against the Grit Guard.
- Repeat: Wring out the clean mitt and go back to the soap bucket for the next panel.
This is the system that separates an amateur job from a professional-quality wash at home. You’re ensuring that only a clean, well-lubricated mitt ever touches your car’s delicate clear coat. Always, and I mean always, save the dirtiest parts—like the rocker panels behind the wheels and the lower bumpers—for the absolute very end.
Drying Your Car Without Causing Swirl Marks
You've done the hard work—the foam, the two-bucket wash, the final rinse. Your car is sparkling clean, but don't drop the towel just yet. This next step, drying, is precisely where many people accidentally ruin that perfect finish.
Letting your car air-dry, especially out in the sun, is one of the biggest mistakes you can make. As water beads evaporate, they leave behind all the minerals they contain, etching stubborn water spots onto your paint. And please, don’t even think about grabbing an old bath towel. That’s a one-way ticket to a finish covered in fine scratches and swirls.
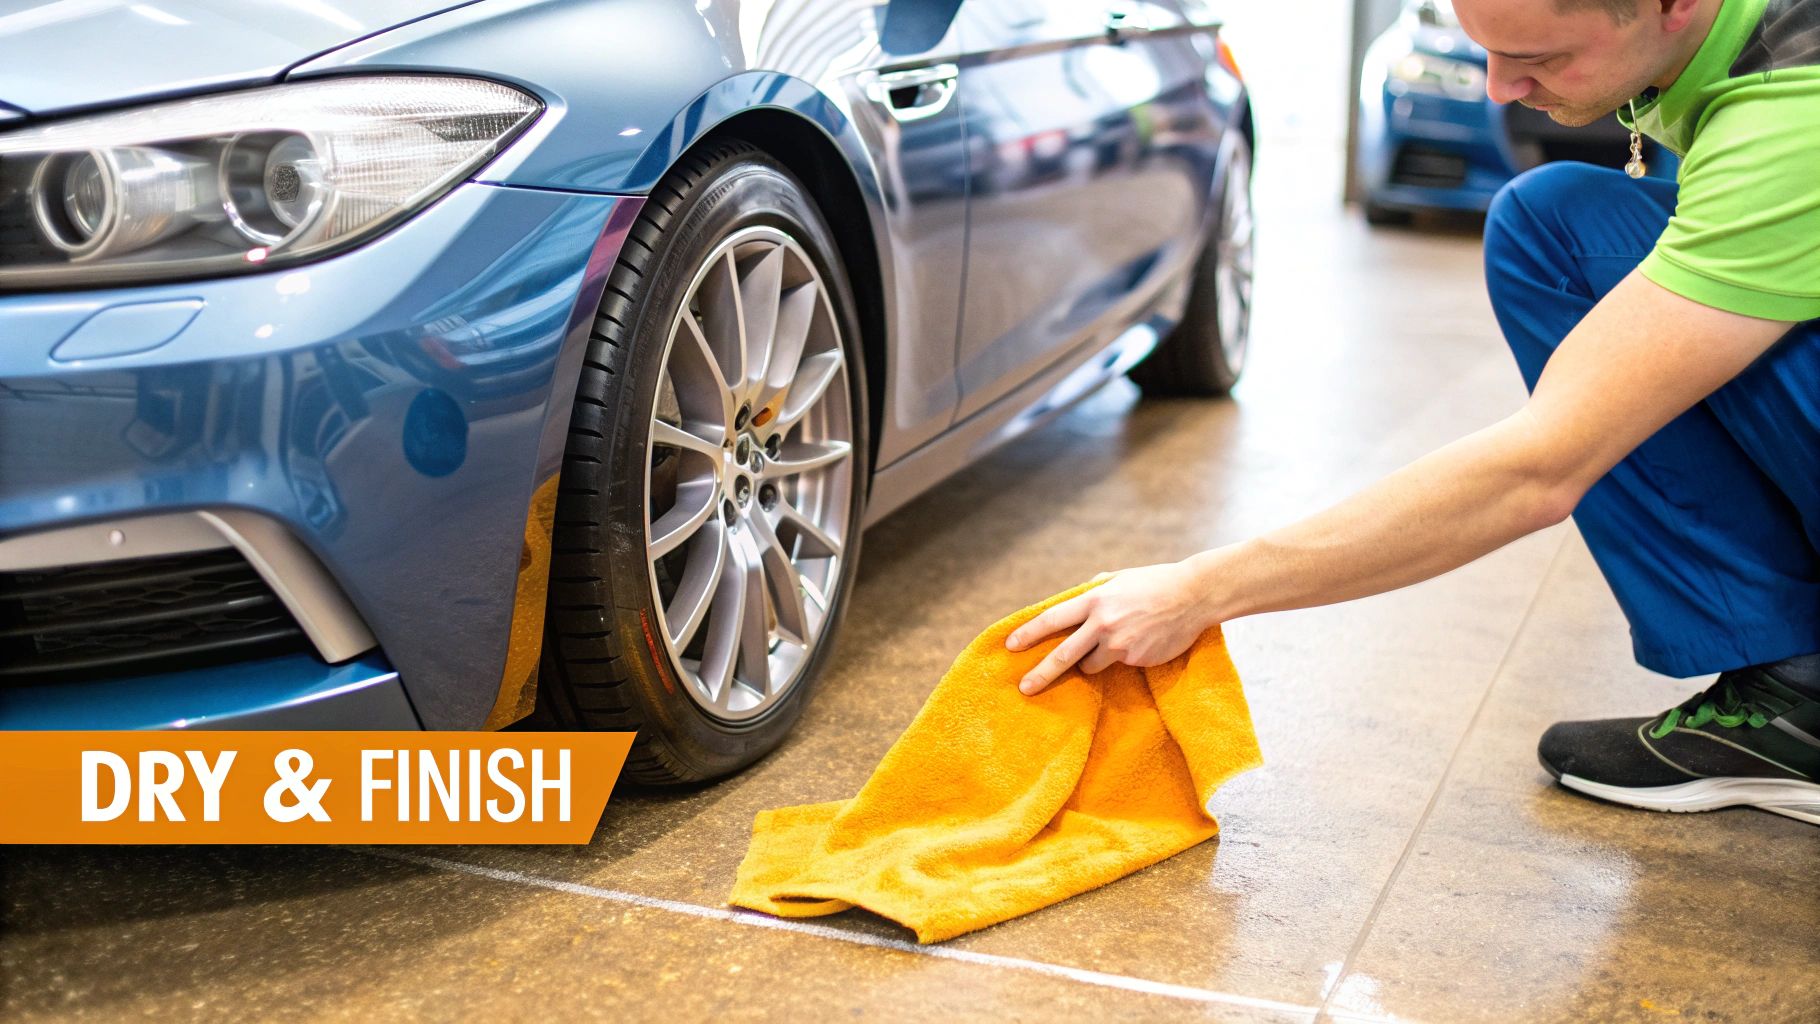
The Right Tools for a Perfect Dry
The goal here is simple: touch the paint as little, and as gently, as possible. That's why a high-quality, plush microfiber drying towel is non-negotiable. Forget old-school chamois; a modern, large, waffle-weave or high-pile microfiber towel is what you need. These things are incredibly absorbent and can often dry an entire panel in one go.
The technique you use is just as crucial as the tool. No aggressive rubbing! There are two safe and effective ways to do this:
- The Blotting Method: Simply lay the towel flat across a panel, like the hood or roof. Pat it down gently, then lift it. You'll be amazed at how much water it soaks up with zero dragging.
- The Gentle Drag: This is my go-to. Hold two corners of the towel and let it glide across the surface using only its own weight. Just pull it in one smooth, straight line.
This level of care is what sets a great home wash apart. And you're not just saving your paint; you're also saving water. Think about it: while a typical professional wash can use around 38 gallons of water per car, careful at-home methods are far more efficient. With around 66% of US car owners washing their cars monthly, that small effort adds up.
Pro Tip: For a truly flawless finish, bring out the leaf blower! An electric one works perfectly. It's the best way to blast water out of all the tight crevices where your towel can't reach.
Target Those Annoying Drip Spots
You know what I'm talking about—those spots that hold onto water, only to let it drip out ten minutes later and leave a long, ugly streak down your clean door. A leaf blower is your secret weapon against these.
Focus on these common culprits:
- Wing mirrors
- Around door handles
- The front grille and emblems
- Inside the lug nut holes on your wheels
- All the panel gaps and trim pieces
Hit these areas first, before you even touch the car with a towel. This ensures no surprise drips will sabotage your work.
Combining a gentle towel dry with a final pass from a leaf blower is the best way to wash your car at home for a streak-free, scratch-free shine. For more expert advice, check out our guide on top tips for a spotless finish.
Your Home Car Wash Questions Answered
Even after you’ve got your tools and technique down, questions are bound to pop up. Getting that flawless, professional-looking finish at home often means figuring out the little things—the small details that can make or break the final result.
Let's dive into some of the most common questions I hear from people learning how to wash their car the right way. I'll give you the straightforward answers you need to solve those pesky problems and refine your process.
How Often Should I Wash My Car?
This is the big one, and the honest answer is: it depends. A solid rule of thumb for most people is every two to four weeks. This is a great rhythm for keeping your car looking sharp without making washing it a total chore.
But your car's situation might demand a different schedule:
- Your Daily Driver: If you’re on the road every day, especially through areas with lots of dust, pollen, or road grime, you’ll want to stick closer to the two-week mark. This stops all that gunk from really baking onto your paint.
- Tough Weather: Winter road salt is a car's worst nightmare; wash it off as soon as you can. In the summer, bug splatter and bird droppings can etch into your clear coat in just a day or two under the hot sun, so get them off quickly.
- Where It Sleeps: A garage-kept car is shielded from the elements and can comfortably go longer between washes. If your car lives on the street, it's constantly exposed and will need more frequent cleaning.
Think of it as preventative care for your car's finish. A consistent wash schedule is all about removing harmful stuff before it has a chance to cause lasting damage. It’s the key to keeping that deep shine for years.
What’s the Best Soap to Use?
This is non-negotiable. The single most important thing to look for is a pH-neutral car shampoo. Period.
Never, ever use dish soap. It’s designed to be aggressive and cut through caked-on grease on your pots and pans. That same power will strip off any wax or sealant you have on your car, leaving your paint completely exposed and unprotected.
A proper, pH-balanced car soap is formulated to be gentle. It lifts dirt and grime away from the surface without harming the protective layers. For the safest wash possible, I always recommend using it with a foam gun. A tool like the SwiftJet whips that soap into a thick, lubricating foam. That foam is crucial—it helps your wash mitt glide across the paint, drastically reducing the risk of creating swirl marks.
How Do I Deal with Stubborn Contaminants?
We’ve all been there. You finish washing, and there’s still baked-on bug splatter, a bit of road tar, or some sticky tree sap that just won’t budge. Whatever you do, don't just scrub harder! That’s a fast track to scratching your paint.
Instead, you need to work smarter, not harder.
- For Bugs & Tar: Grab a dedicated bug and tar remover. These products are formulated to dissolve these specific messes. Just spray it on the spot, let it sit for a minute to do its thing, and then gently wipe it away with a clean microfiber towel.
- For Rough, Gritty Paint: If you wash your car and the paint still feels rough to the touch, you’re dealing with bonded contaminants. This is where a clay bar comes in. After washing, you glide a lubricated clay bar over the paint, and it will safely pull out all that embedded grit. The result is a surface that’s as smooth as glass. This is a bit more involved, so you’ll probably only need to do it once or twice a year.
By tackling these common issues, you can take your home car wash from good to great, leaving your car with a finish that truly looks professional.
We've covered a lot of ground, but sometimes you just need a quick reference. Here’s a table summarizing the key answers to help you on your next wash day.
Quick Answers to Your Car Wash Questions
| Question | Short Answer | Key Takeaway |
|---|---|---|
| How often should I wash my car? | Every 2-4 weeks is a good starting point. | Adjust frequency based on your driving habits, local weather, and whether the car is garaged. |
| What's the best soap to use? | A pH-neutral car shampoo is essential. | Avoid dish soap at all costs, as it strips wax and sealant, leaving your paint unprotected. |
| How do I remove stubborn spots? | Use a targeted product like a bug/tar remover or a clay bar. | Never use aggressive scrubbing; let the right product do the work to avoid scratching the paint. |
Hopefully, this cheat sheet gives you the confidence to handle whatever your car throws at you.
Ready to transform your home car wash and see what a real foamy pre-wash can do? The SwiftJet Car Wash Foam Gun makes it dead simple to get professional results with the garden hose you already own.
Discover the SwiftJet and get a free wash mitt with your order today!